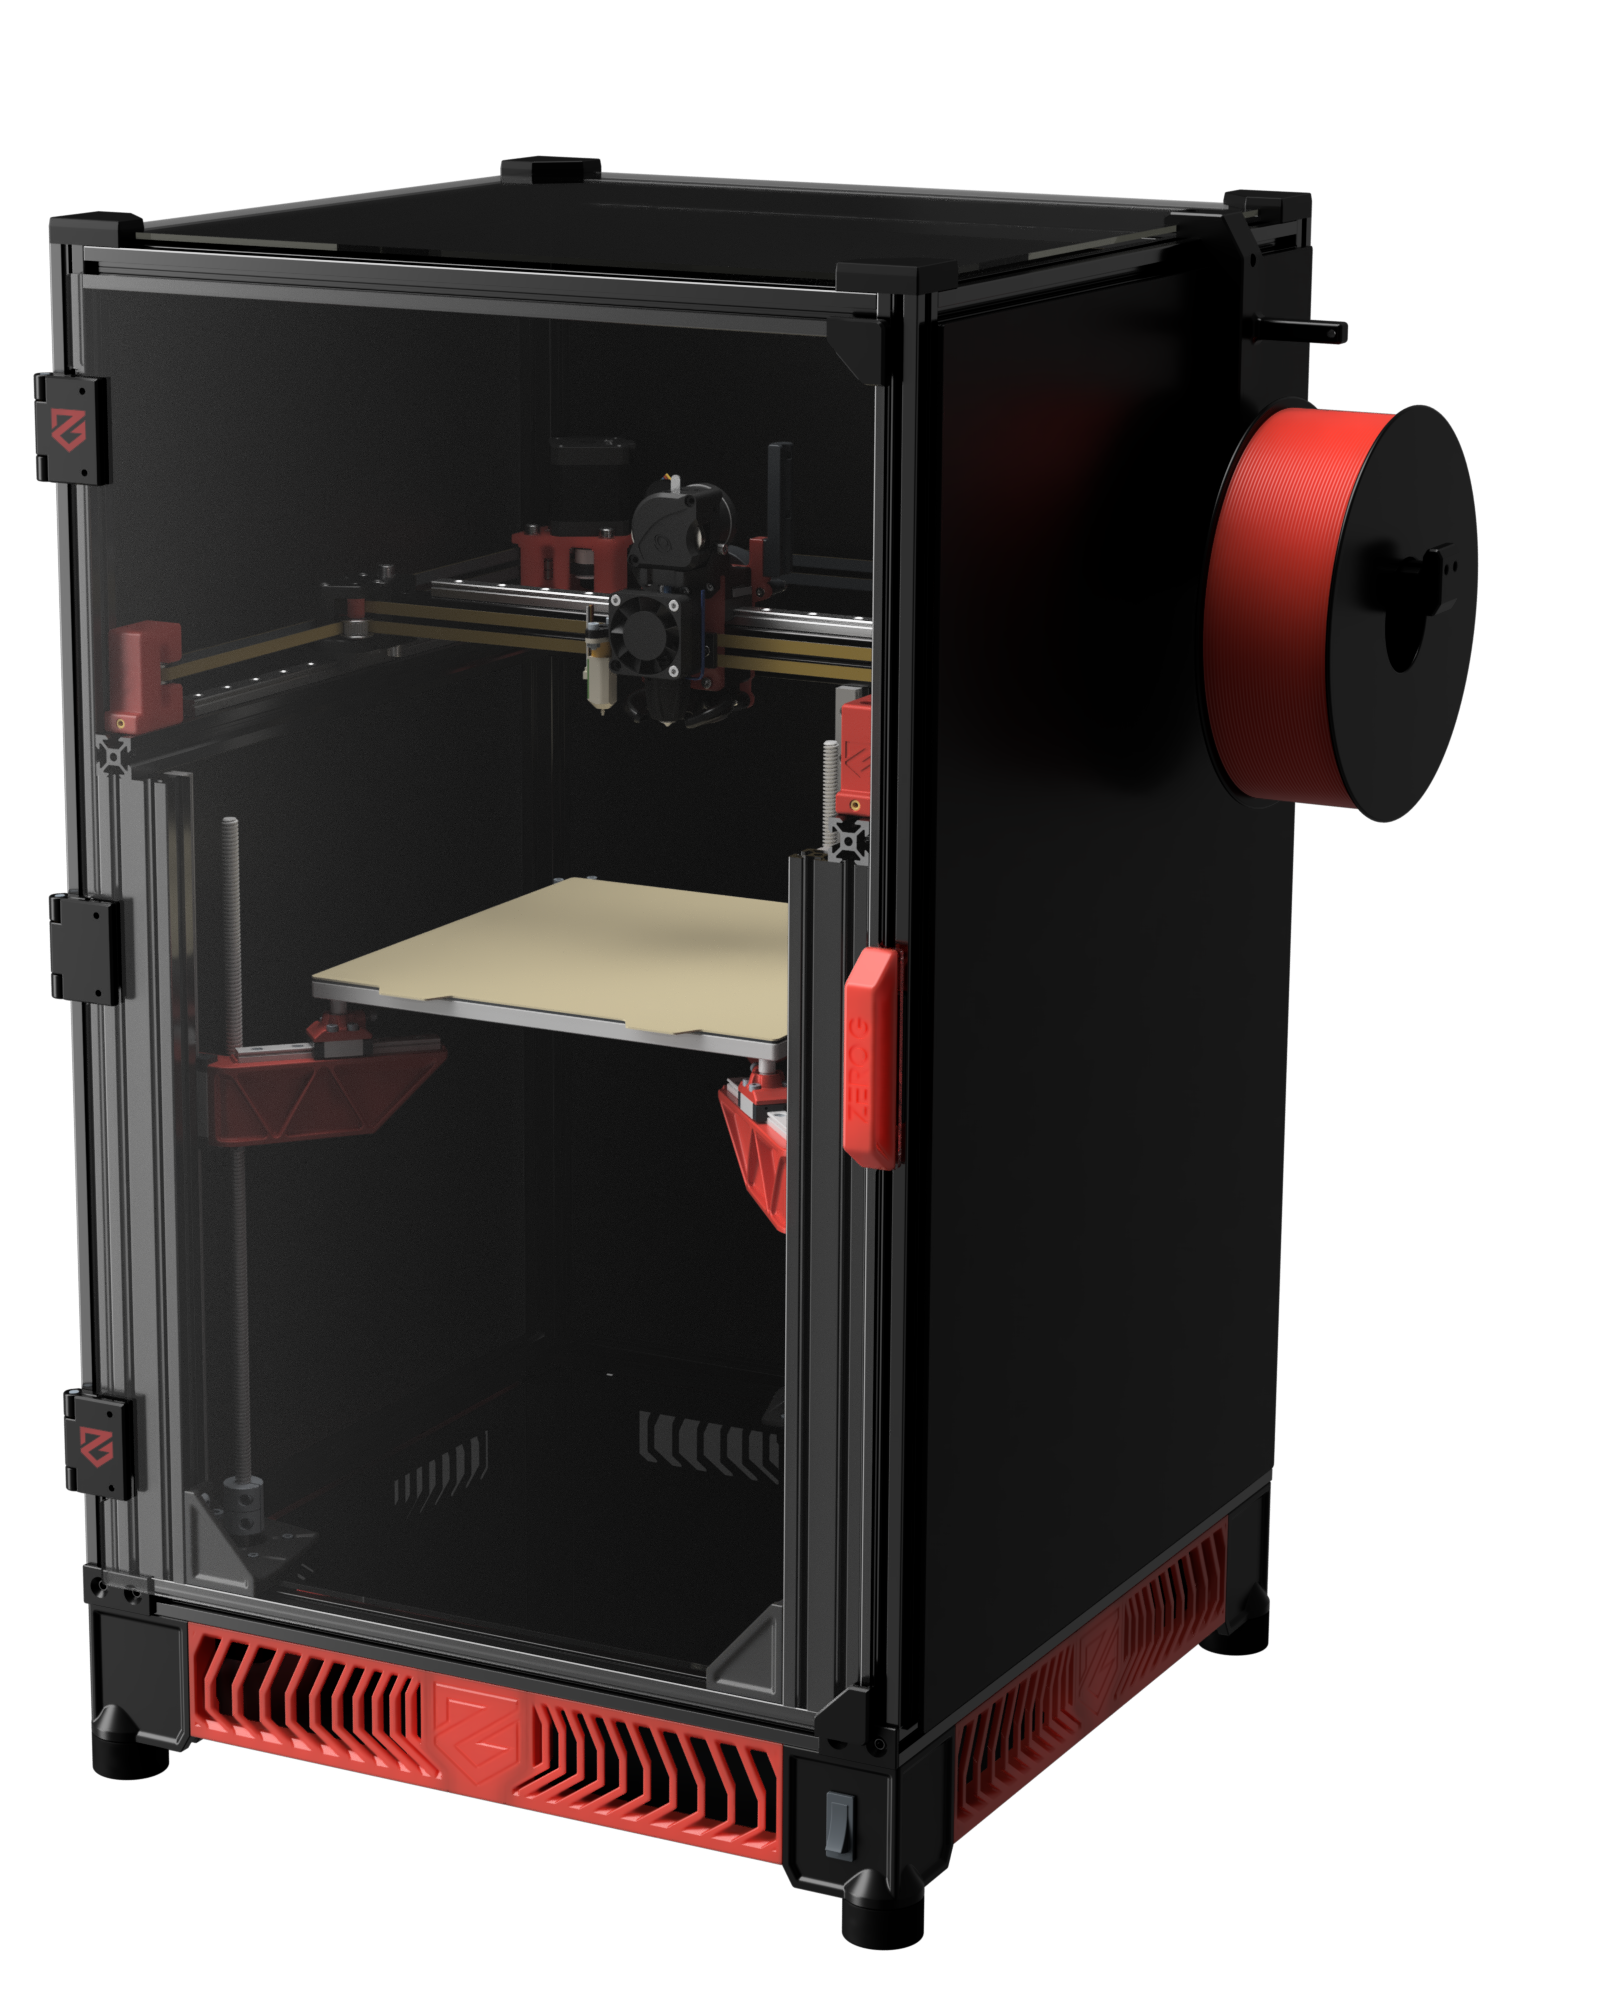
# Welcome to ZeroG

## Welcome to ZeroG

The Zero G documentation will give you a start building your project, learning all about 3D printing and more!

## Getting Started

On this website you’ll find all sorts of information, [ABS Printing Tips](/guides/printing/printing-tips), [Print Settings](/guides/printing/print-settings), [Design Guidelines](/guides/design), [Mainsail Theme](/faq/mainsail/mainsail-theme-setup), [Manuals](https://tempdocs.zerog.one/projects/) and more!

Currently we’re working on instructions for three of our projects. Our projects are **Mercury One.1, Hydra** and **Nebula.**

<table data-card-size="large" data-view="cards"><thead><tr><th></th><th data-type="content-ref"></th><th data-hidden data-card-cover data-type="image">Cover image</th></tr></thead><tbody><tr><td>Projects Introduction</td><td></td><td><a href="https://3028713203-files.gitbook.io/~/files/v0/b/gitbook-x-prod.appspot.com/o/spaces%2Fc7rngz4fr0ULXRXV6Dnh%2Fuploads%2Feq8uqHWQvECIOMameP8T%2FHeader.png?alt=media&amp;token=22413cd8-7728-4c44-a91c-b486a67a13a8">Header.png</a></td></tr></tbody></table>

## Discord

We’re a big [Discord](https://discord.gg/zerog) advocate! We love using it and building a community. Missing something in the documentation, need assistance, share your adventure, or enjoy a nice community? Join our [Discord](https://discord.gg/zerog) today!

## Step Files!

The step files for Hydra and Mercury One.1 are now available.

Find them in the menu: Manual → [Mercury One.1](broken://pages/sWNkR9VQqMAFBfUZpTvi) **OR** [Hydra](broken://pages/bQPYDiHZxeeusvubw7BX) → Files. There is a section called “Step files”.

## License

We’re not using a GPL3 license like most other open source projects. Our work is licensed under a [Creative Commons Attribution-NonCommercial-ShareAlike 4.0 International License](http://creativecommons.org/licenses/by-nc-sa/4.0/)

**What does this mean and why did you choose for this instead of GPL3?**

1. What does this mean?
   1. Read more about the license here [**here**](http://creativecommons.org/licenses/by-nc-sa/4.0/).
2. Why did you choose this license?
   1. I want to protect our project from others taking advantage of our files and community members.
   2. The license still allows you to do the following:
      1. **Share** — copy and redistribute the material in any medium or format
      2. **Adapt** — remix, transform, and build upon the material
   3. Yes, **Share and Adapt** come with **terms** and you can read those [**here**](http://creativecommons.org/licenses/by-nc-sa/4.0/).


# Printing


# Printing tips

## <mark style="color:red;">What material should I use?</mark> <a href="#what-material-should-i-use" id="what-material-should-i-use"></a>

ZeroG printers are designed to be printed using ABS or ASA. This means we’ve included tolerances for material shrinkage in our models.

It’s recommended to print your ABS or ASA parts inside of an enclosure, this will greatly increase layer strength, and helps combat warping.

{% hint style="warning" %}
The ABS+ we tested showed **weaker layer adhesion** than standard ABS or ASA. Although easier to print, it was also **easier to break**.

Not every ABS+ blend is the same, but many variants include **other** additives that can reduce structural strength and make parts unsuitable for load-bearing use.
{% endhint %}

## <mark style="color:red;">Calibration print</mark> <a href="#calibration-print" id="calibration-print"></a>

Check it out now! You can find it [here](https://www.printables.com/model/369447-zerog-abs-callibration-print). This test print will assist you in determining the proper fitment of dowel pins, heatsets, and bolts, as well as testing the bridging and overhangs. The printable pages description will provide you with the necessary settings to use.

## <mark style="color:red;">Analyzing a break</mark> <a href="#analyzing-a-break" id="analyzing-a-break"></a>

Great! Let's use this moment to check your layer adhesion. We mostly use our Steppers mounts or X Joints to check the adhesion.\
Below you’ll find a picture of a collection of breaks, on how it **should** look.

<figure><img src="https://docs2.zerog.one/images/universal_tips_advise/examples/break_samples.png" alt=""><figcaption></figcaption></figure>

### <mark style="color:red;">**Example 1 -**</mark> <mark style="color:red;">X Joint</mark>

Shows a break going across multiple layers. A break on multiple layers indicates good layer adhesion.

### <mark style="color:red;">**Example 2**</mark> <mark style="color:red;">- Stepper mount break</mark>

White stress marks showing on the break but nothing on multiple layers. White stress mark on plastic indicates force was needed to seperate the layers.

### <mark style="color:red;">**Example 3**</mark> <mark style="color:red;">- x joint</mark>

The part has been printed with a .6 nozzle showing a gap between the outer perimeter and the inner perimeters. It’s still a strong part, the break goes across multiple layers.

## <mark style="color:red;">Filament choices</mark> <a href="#filament-choices" id="filament-choices"></a>

### <mark style="color:red;">Materials we recommend</mark> <a href="#materials-we-recommend" id="materials-we-recommend"></a>

We've got a few materials that we do recommend, we've also listed some alternatives without a rating (1-5).

<table data-card-size="large" data-view="cards"><thead><tr><th>Material</th><th>Recommended</th><th>Note/Info</th></tr></thead><tbody><tr><td>ASA</td><td>⭐⭐⭐⭐</td><td>-</td></tr><tr><td>ASA-CF</td><td>⭐⭐⭐⭐</td><td>Carbon Filled ASA also helps prevent warping while printing</td></tr><tr><td>ABS</td><td>⭐⭐⭐</td><td>-</td></tr><tr><td>ABS-CF</td><td>⭐⭐⭐</td><td>Carbon Filled ABS also helps prevent warping while printing</td></tr></tbody></table>

### <mark style="color:red;">Filament brands that we recommend</mark> <a href="#filament-brands-that-we-recommend" id="filament-brands-that-we-recommend"></a>

* [Polymaker](https://us.polymaker.com/?aff=282)
* Bambulab
* LDO ABS
* 3DO

### <mark style="color:red;">Filament colors that we DO NOT recommend</mark> <a href="#filament-colors-that-we-do-not-recommend" id="filament-colors-that-we-do-not-recommend"></a>

**White** - You can, but we don’t recommend it. The pigment shows a ton of flaws and causes weak layer adhesion.**White** filament is not recommended. The titanium dioxide used for the white pigment weakens layer adhesion, causing print layer separation.


# Print settings

We’ve designed our parts to work with the settings displayed below. Make sure to respect these settings, otherwise parts might turn out weak or look weird.

If you’re not happy with the print quality, join our [Discord](https://discord.gg/zerog) and ask for some help.

### <mark style="color:red;">Recommended print settings</mark> <a href="#recommended-print-settings" id="recommended-print-settings"></a>

* First layer height: 0.25mm (This is required. Our parts have been designed for this.)
* Layer height: 0.2mm
* Extrusion width: 0.4mm, forced
* Infill percentage: 40%
* Infill type: Adaptive Cubic, grid, gyroid, honeycomb, triangle, or cubic
* Wall count: 4
* Solid top/bottom layers: 5
* Seam placement: **REAR**
  * This is important as we have seam relieve features that line up with the seam placement.
* Supports: NONE

### <mark style="color:red;">Importing ZeroG files</mark> <a href="#importing-zerog-files" id="importing-zerog-files"></a>

Please be aware that the files you receive from us are already optimized for printing; we’ve exported everything as they should be printed. When importing them into your preferred slicer, they should display in the correct orientation. We advise against using the ‘auto rotate’ function in your slicer, as it can negatively impact seam placement and other print details. Improper rotation might also affect how materials shrink, leading to off-centered features and other discrepancies

> Credits for most of the recommended print settings [Voron](https://vorondesign.com/)


# Design

Clearances you need when printing with ABS/ASA

## <mark style="color:red;">Guidelines</mark>

This page includes the clearances you need when printing with ABS, they have been tested for shrinkage and turn out to be the best “general” settings for everyone to print without any clearance issues.

## <mark style="color:red;">M3 Hardware</mark>

<table data-full-width="false"><thead><tr><th>Type</th><th>Fit</th><th>Hole</th><th>Counterbore</th><th>Depth</th></tr></thead><tbody><tr><td>DIN918</td><td>Loose</td><td>3.3mm</td><td>6mm</td><td>N/A</td></tr><tr><td>DIN918</td><td>Tight</td><td>3.2mm</td><td>5.8mm</td><td>N/A</td></tr><tr><td>DIN934 (nut)</td><td>Loose</td><td>5.8mm</td><td>N/A</td><td>2.6mm</td></tr><tr><td>DIN934 (nut)</td><td>Tight</td><td>5.7mm</td><td>N/A</td><td>2.6mm</td></tr></tbody></table>

## <mark style="color:red;">M5 Hardware</mark>

| Type         | Fit   | Hole  | Counterbore | Depth |
| ------------ | ----- | ----- | ----------- | ----- |
| DIN918       | Loose | 5.3mm | 9mm         | N/A   |
| DIN918       | Tight | 5.2mm | 8.8mm       | N/A   |
| DIN934 (nut) | Loose | 8.3mm | N/A         | 4.2mm |
| DIN934 (nut) | Tight | 8.2mm | N/A         | 4.2mm |

## <mark style="color:red;">Heatset Inserts</mark>

| Type                      | Size             | Hole  | Counterbore | Depth |
| ------------------------- | ---------------- | ----- | ----------- | ----- |
| Heat set threaded inserts | M3 X D5.0 X L4.0 | 4.7mm | N/A         | 4.1mm |


# Sourcing Guide

A page that includes a bunch of sources

{% hint style="info" %}
***Quick note** This page doesn't contain a '**single bill of materials'**. Instead, it has links to sources we found or recommend. Each project will have its own bill of materials linked to sections on this page. This setup makes it easier for us to update. Found any broken URLs or links to the wrong content? Please do let is know!*
{% endhint %}

## DIN 912 / ISO 4762

### **M3 x 8mm SHCS**

<table data-view="cards"><thead><tr><th>Store Name</th><th>Ships To</th><th>Ships From</th><th>Note</th><th data-hidden data-card-cover data-type="files"></th></tr></thead><tbody><tr><td><a href="https://s.click.aliexpress.com/e/_9yeIIO">AliExpress - Nindejin</a></td><td>International</td><td>International</td><td>Select correct size</td><td></td></tr></tbody></table>

### **M3 x 10mm SHCS**

<table data-view="cards"><thead><tr><th>Store Name</th><th>Ships To</th><th>Ships From</th><th>Note</th></tr></thead><tbody><tr><td><a href="https://www.boltdepot.com/Product-Details.aspx?product=6380">Boltdepot</a></td><td>US</td><td>US</td><td>N/A</td></tr><tr><td><a href="https://s.click.aliexpress.com/e/_9yeIIO">AliExpress - Nindejin</a></td><td>International</td><td>International</td><td>Select correct size</td></tr></tbody></table>

### **M3 x 12mm SHCS**

<table data-view="cards"><thead><tr><th>Store Name</th><th>Ships To</th><th>Ships From</th><th>Note</th></tr></thead><tbody><tr><td><a href="https://boltdepot.com/Product-Details?product=6381">Boltdepot</a></td><td>US</td><td>US</td><td>N/A</td></tr><tr><td><a href="https://s.click.aliexpress.com/e/_9yeIIO">AliExpress - Nindejin</a></td><td>International</td><td>International</td><td>Select correct size</td></tr></tbody></table>

### **M3 x 16mm SHCS**

<table data-view="cards"><thead><tr><th>Store Name</th><th>Ships To</th><th>Ships From</th><th>Note</th></tr></thead><tbody><tr><td><a href="https://www.boltdepot.com/Product-Details.aspx?product=6382">Boltdepot</a></td><td>US</td><td>US</td><td>N/A</td></tr><tr><td><a href="https://s.click.aliexpress.com/e/_9yeIIO">AliExpress - Nindejin</a></td><td>International</td><td>International</td><td>Select correct size</td></tr></tbody></table>

### **M3 x 20mm SHCS**

<table data-view="cards"><thead><tr><th>Store Name</th><th>Ships To</th><th>Ships From</th><th>Note</th></tr></thead><tbody><tr><td><a href="https://www.boltdepot.com/Product-Details.aspx?product=6383">Boltdepot</a></td><td>US</td><td>US</td><td>N/A</td></tr><tr><td><a href="https://s.click.aliexpress.com/e/_9yeIIO">AliExpress - Nindejin</a></td><td>International</td><td>International</td><td>Select correct size</td></tr></tbody></table>

### **M3 x 25mm SHCS**

<table data-view="cards"><thead><tr><th>Store Name</th><th>Ships To</th><th>Ships From</th><th>Note</th></tr></thead><tbody><tr><td><a href="https://www.boltdepot.com/Product-Details.aspx?product=6384">Boltdepot</a></td><td>US</td><td>US</td><td>N/A</td></tr><tr><td><a href="https://s.click.aliexpress.com/e/_9yeIIO">AliExpress - Nindejin</a></td><td>International</td><td>International</td><td>Select correct size</td></tr></tbody></table>

### **M3 x 30mm SHCS**

<table data-view="cards"><thead><tr><th>Store Name</th><th>Ships To</th><th>Ships From</th><th>Note</th></tr></thead><tbody><tr><td><a href="https://www.boltdepot.com/Product-Details.aspx?product=6385">Boltdepot</a></td><td>US</td><td>US</td><td>N/A</td></tr><tr><td><a href="https://s.click.aliexpress.com/e/_9yeIIO">AliExpress - Nindejin</a></td><td>International</td><td>International</td><td>Select correct size</td></tr></tbody></table>

### **M3 x 35mm SHCS**

<table data-view="cards"><thead><tr><th>Store Name</th><th>Ships To</th><th>Ships From</th><th>Note</th></tr></thead><tbody><tr><td><a href="https://www.boltdepot.com/Product-Details.aspx?product=6386">Boltdepot</a></td><td>US</td><td>US</td><td>N/A</td></tr><tr><td><a href="https://s.click.aliexpress.com/e/_9yeIIO">AliExpress - Nindejin</a></td><td>International</td><td>International</td><td>Select correct size</td></tr></tbody></table>

### **M4 x 16mm SHCS**

<table data-view="cards"><thead><tr><th>Store Name</th><th>Ships To</th><th>Ships From</th><th>Note</th></tr></thead><tbody><tr><td><a href="https://www.boltdepot.com/Product-Details.aspx?product=6396">Boltdepot</a></td><td>US</td><td>US</td><td>N/A</td></tr><tr><td><a href="https://s.click.aliexpress.com/e/_9yeIIO">AliExpress - Nindejin</a></td><td>International</td><td>International</td><td>Select correct size</td></tr></tbody></table>

### **M4 x 35mm SHCS**

<table data-view="cards"><thead><tr><th>Store Name</th><th>Ships To</th><th>Ships From</th><th>Note</th></tr></thead><tbody><tr><td><a href="https://www.boltdepot.com/Product-Details.aspx?product=6398">Boltdepot</a></td><td>US</td><td>US</td><td>N/A</td></tr><tr><td><a href="https://s.click.aliexpress.com/e/_9yeIIO">AliExpress - Nindejin</a></td><td>International</td><td>International</td><td>Select correct size</td></tr></tbody></table>

### **M5 x 8mm SHCS**

<table data-view="cards"><thead><tr><th>Store Name</th><th>Ships To</th><th>Ships From</th><th>Note</th></tr></thead><tbody><tr><td><a href="https://www.boltdepot.com/Product-Details.aspx?product=6406">Boltdepot</a></td><td>US</td><td>US</td><td>N/A</td></tr><tr><td><a href="https://s.click.aliexpress.com/e/_9yeIIO">AliExpress - Nindejin</a></td><td>International</td><td>International</td><td>Select correct size</td></tr></tbody></table>

### **M5 x 12mm SHCS**

<table data-view="cards"><thead><tr><th>Store Name</th><th>Ships To</th><th>Ships From</th><th>Note</th></tr></thead><tbody><tr><td><a href="https://www.boltdepot.com/Product-Details.aspx?product=6408">Boltdepot</a></td><td>US</td><td>US</td><td>N/A</td></tr><tr><td><a href="https://s.click.aliexpress.com/e/_9yeIIO">AliExpress - Nindejin</a></td><td>International</td><td>International</td><td>Select correct size</td></tr></tbody></table>

### **M5 x 20mm SHCS**

<table data-view="cards"><thead><tr><th>Store Name</th><th>Ships To</th><th>Ships From</th><th>Note</th></tr></thead><tbody><tr><td><a href="https://www.boltdepot.com/Product-Details.aspx?product=6410">Boltdepot</a></td><td>US</td><td>US</td><td>N/A</td></tr><tr><td><a href="https://s.click.aliexpress.com/e/_9yeIIO">AliExpress - Nindejin</a></td><td>International</td><td>International</td><td>Select correct size</td></tr></tbody></table>

### **M5 x 50mm SHCS**

<table data-view="cards"><thead><tr><th>Store Name</th><th>Ships To</th><th>Ships From</th><th>Note</th></tr></thead><tbody><tr><td><a href="https://www.boltdepot.com/Product-Details.aspx?product=6453">Boltdepot</a></td><td>US</td><td>US</td><td>N/A</td></tr><tr><td><a href="https://s.click.aliexpress.com/e/_9yeIIO">AliExpress - Nindejin</a></td><td>International</td><td>International</td><td>Select correct size</td></tr></tbody></table>

***

## DIN 7380 / ISO 7380

### **M5 x 8mm BHCS**

<table data-view="cards"><thead><tr><th>Store Name</th><th>Ships To</th><th>Ships From</th><th>Note</th></tr></thead><tbody><tr><td><a href="https://www.boltdepot.com/Product-Details.aspx?product=6631">Boltdepot</a></td><td>US</td><td>US</td><td>N/A</td></tr><tr><td><a href="https://s.click.aliexpress.com/e/_A19eD7">AliExpress - Nindejin</a></td><td>International</td><td>International</td><td>Select correct size</td></tr></tbody></table>

***

## DIN 7991 / ISO 10642

### **M3 x 6mm SFH**

<table data-view="cards"><thead><tr><th>Store Name</th><th>Ships To</th><th>Ships From</th><th>Note</th></tr></thead><tbody><tr><td><a href="https://www.boltdepot.com/Product-Details.aspx?product=7212">Boltdepot</a></td><td>US</td><td>US</td><td>N/A</td></tr><tr><td><a href="https://s.click.aliexpress.com/e/_AEXIMh">AliExpress - Nindejin</a></td><td>International</td><td>International</td><td>Select correct size</td></tr></tbody></table>

***

## Precision Dowel Pin

### M5 **x** 30mm - Dowel Pin

<table data-view="cards"><thead><tr><th>Store Name</th><th>Ships To</th><th>Ships From</th><th>Note</th></tr></thead><tbody><tr><td><a href="https://s.click.aliexpress.com/e/_ATn62e">AliExpress - Nindejin</a></td><td>International</td><td>International</td><td>Select correct size</td></tr><tr><td><a href="https://collabs.shop/gux2gc">West3D</a></td><td>International</td><td>NA</td><td>Select correct size</td></tr><tr><td><a href="https://kb-3d.com/store/hardware/141-30-5mm-bearing-steel-shafts-various-lengths-1642282491009.html#/18-5mmshafts-30mm">KB3D</a></td><td>International</td><td>NA</td><td>Good tolerance</td></tr></tbody></table>

***

## T-Nut Roll-In Spring

### M3 - **6mm Slot**

<table data-view="cards"><thead><tr><th>Store Name</th><th>Ships To</th><th>Ships From</th><th>Note</th><th data-hidden data-card-target data-type="content-ref"></th></tr></thead><tbody><tr><td><a href="https://www.printyplease.uk/M3TNUT">PrintyPlease</a></td><td>UK</td><td>UK</td><td>N/A</td><td></td></tr><tr><td><a href="https://dfh.fm/products/roll-in-spring-nuts?variant=39612700393641">dfh.fm</a></td><td>International</td><td>US</td><td>N/A</td><td></td></tr><tr><td><a href="https://kb-3d.com/store/extrusion-framing/251-t-nut-drop-inroll-in-20-series-6mm-slot-width-m3-threads-1657989324345.html">KB3D</a></td><td>International</td><td>US</td><td>N/A</td><td></td></tr><tr><td><a href="https://sparta3d.ca/products/3d-sidekick-roll-in-t-nuts-tnuts-tnuts-t-nuts?_pos=3&#x26;_sid=916827c77&#x26;_ss=r">Sparta3D</a></td><td>International</td><td>CA</td><td>N/A</td><td><a href="broken://pages/DSQqnsAqJPnIRyPgQJ1S">Broken link</a></td></tr><tr><td><a href="https://spool3d.ca/m3-roll-in-spring-t-nut-2020/">Spool3D</a></td><td>CA</td><td>CA</td><td>N/A</td><td></td></tr><tr><td><a href="https://s.click.aliexpress.com/e/_9JpX52">Aliexpress - Link CNC</a></td><td>International</td><td>International</td><td>Select correct size</td><td></td></tr></tbody></table>

### M5 - **6mm Slot**

<table data-view="cards"><thead><tr><th>Store Name</th><th>Ships To</th><th>Ships From</th><th>Note</th><th data-hidden data-card-cover data-type="files"></th></tr></thead><tbody><tr><td><a href="https://www.printyplease.uk/M5Tnut">PrintyPlease</a></td><td>UK</td><td>UK</td><td>N/A</td><td></td></tr><tr><td><a href="https://dfh.fm/products/roll-in-spring-nuts?variant=39612700426409">dfh.fm</a></td><td>International</td><td>US</td><td>N/A</td><td></td></tr><tr><td><a href="https://kb-3d.com/store/extrusion-framing/252-t-nut-drop-inroll-in-20-series-6mm-slot-width-m5-threads-1657989339400.html">KB3D</a></td><td>International</td><td>US</td><td>N/A</td><td></td></tr><tr><td><a href="https://spool3d.ca/m5-roll-in-spring-t-nut-2020">Spool3D</a></td><td> CA</td><td>CA</td><td>N/A</td><td></td></tr><tr><td><a href="https://s.click.aliexpress.com/e/_9JpX52">Aliexpress - Link CNC</a></td><td>International</td><td>International</td><td>Select correct size</td><td></td></tr></tbody></table>

***

### Extrusions

#### 20x20 Aluminum Extrusion

<table data-view="cards"><thead><tr><th>Store Name</th><th>Ships To</th><th>Ships From</th><th>Note</th></tr></thead><tbody><tr><td><a href="https://www.aluxprofiel.nl/aluminium-constructieprofiel-2020-zwart/a3957?c=3470">Aluxprofile</a></td><td>NL</td><td>NL</td><td>N/A</td></tr><tr><td><a href="https://us.misumi-ec.com/vona2/detail/110302683830/?Inch=0">Misumi</a></td><td>US</td><td>US</td><td>N/A</td></tr></tbody></table>

***

## Linear Rails

### MGN12H - 300MM

<table data-view="cards"><thead><tr><th>Store Name</th><th>Ships To</th><th>Ships From</th><th>Note</th></tr></thead><tbody><tr><td><a href="https://www.fabreeko.com/products/honeybadger-mgn12c-stainless-steel-rails?variant=42106258161919">Fabreeko</a></td><td>US</td><td>US</td><td>N/A</td></tr><tr><td><a href="https://kb-3d.com/store/motion/377-5160-kb3d-mgn12h-linear-rail-guide-with-carriage-multiple-lengths-1646161437836.html#/140-raillength-300mm">KB3D</a></td><td>US</td><td>US</td><td>N/A</td></tr><tr><td><a href="https://collabs.shop/7bf179">West3D</a></td><td>US</td><td>US</td><td>Select correct size</td></tr><tr><td><a href="https://alchemy3d.de/products/berserker-viking-skis-by-west3d-linear-rail-mgn12h?variant=44957602283786">Alchemy3D</a></td><td>EU</td><td>DE</td><td>N/A</td></tr></tbody></table>

### MGN12H - 330MM

<table data-view="cards"><thead><tr><th>Store Name</th><th>Ships To</th><th>Ships From</th><th>Note</th></tr></thead><tbody><tr><td><a href="https://www.fabreeko.com/products/honeybadger-mgn12c-stainless-steel-rails?variant=42780752609535">Fabreeko</a></td><td>US</td><td>US</td><td>N/A</td></tr><tr><td><a href="https://alchemy3d.de/products/berserker-viking-skis-by-west3d-linear-rail-mgn12h?variant=44957681484042">Alchemy3D</a></td><td>EU</td><td>DE</td><td>N/A</td></tr></tbody></table>

### MGN12H - 450MM

<table data-view="cards"><thead><tr><th>Store Name</th><th>Ships To</th><th>Ships From</th><th>Note</th></tr></thead><tbody><tr><td><a href="https://kb-3d.com/store/motion/377-8203-kb3d-mgn12h-linear-rail-guide-with-carriage-multiple-lengths-1646161437836.html#/1010-raillength-450mm">KB3D</a></td><td>US</td><td>US</td><td>N/A</td></tr><tr><td><a href="https://www.fabreeko.com/products/honeybadger-mgn12c-stainless-steel-rails?variant=42626697887999">Fabreeko</a></td><td>US</td><td>US</td><td>N/A</td></tr><tr><td><a href="https://collabs.shop/7bf179">West3D</a></td><td>US</td><td>US</td><td>Select correct size</td></tr></tbody></table>

***

## Custom Gantry Parts

### Mercury One.1 Extrusion

<table data-view="cards"><thead><tr><th>Store Name</th><th>Ships To</th><th>Ships From</th><th>Note</th></tr></thead><tbody><tr><td><a href="https://s.click.aliexpress.com/e/_DlBXW33">AliExpress - Fysetc</a></td><td>International</td><td>International</td><td><a data-footnote-ref href="#user-content-fn-1">370mm <strong>ONLY</strong></a></td></tr><tr><td><a href="https://s.click.aliexpress.com/e/_DFRXIMt">AliExpress - Fysetc</a></td><td>International</td><td>International</td><td><a data-footnote-ref href="#user-content-fn-2">500mm <strong>ONLY</strong></a></td></tr></tbody></table>

### Mercury One.1 Toolhead

<table data-view="cards"><thead><tr><th>Store Name</th><th>Ships To</th><th>Ships From</th><th>Note</th></tr></thead><tbody><tr><td><a href="https://s.click.aliexpress.com/e/_DEX9eTP">AliExpress - Mellow</a></td><td>International</td><td>International</td><td><a data-footnote-ref href="#user-content-fn-3"><strong>VZBOT COLAB CNC TOOLHEAD</strong></a></td></tr></tbody></table>

***

## Printer kits

### Mercury One.1

<table data-view="cards"><thead><tr><th>Store Name</th><th>Ships To</th><th>Ships From</th><th>Note</th></tr></thead><tbody><tr><td><a href="https://www.fabreeko.com/collections/zero-g/products/mercury-one-kit?variant=42031744614655">Fabreeko</a></td><td>International</td><td>US</td><td>Check what's included!</td></tr><tr><td><a href="https://3do.eu/frame-kits/1754-1713-zero-g-mercury-one-kit.html">3DO</a></td><td>EU</td><td>DK / EU</td><td>Check what's included!</td></tr><tr><td><a href="https://collabs.shop/1omfod">West3D</a></td><td>International</td><td>US</td><td>Check what's included!</td></tr><tr><td><a href="https://s.click.aliexpress.com/e/_DD1GWMD">AliExpress - POWGE</a></td><td>International</td><td>International</td><td>Check what's included!</td></tr></tbody></table>

### Hydra

<table data-view="cards"><thead><tr><th>Store Name</th><th>Ships To</th><th>Ships From</th><th>Note</th></tr></thead><tbody><tr><td><a href="https://www.fabreeko.com/products/zero-g-hydra-3-point-conversion-for-ender-5-pro-plus">Fabreeko</a></td><td>International</td><td>US</td><td><mark style="color:yellow;">Check what's included!</mark></td></tr><tr><td><a href="https://3do.eu/frame-kits/1754-1713-zero-g-mercury-one-kit.html">3DO</a></td><td>EU</td><td>DK / EU</td><td><mark style="color:yellow;">Check what's included!</mark></td></tr><tr><td><a href="https://collabs.shop/bhids5">West3D</a></td><td>International</td><td>US</td><td><mark style="color:yellow;">Check what's included!</mark></td></tr></tbody></table>

***

## Heaters

### Hydra bed heater

<table data-view="cards"><thead><tr><th>Store Name</th><th>Ships To</th><th>Ships From</th><th>Note</th></tr></thead><tbody><tr><td><a href="https://kb-3d.com/store/electronics/1148-keenovo-silicone-heater-for-zerog-hydra-pro-600w-120v-1634255181217.html">KB3D</a></td><td><a data-footnote-ref href="#user-content-fn-4">NA (110/120v)</a></td><td>US</td><td>Size 255 is recommended for the pro</td></tr><tr><td><a href="https://kb-3d.com/store/electronics/1149-keenovo-silicone-heater-for-zerog-hydra-plus-1000w-120v-1634255185551.html">KB3D</a></td><td><a data-footnote-ref href="#user-content-fn-4">NA (110/120v)</a></td><td>US</td><td>Size 377</td></tr><tr><td><a href="https://www.fabreeko.com/products/fabreeko-edge-to-edge-heaters-for-zero-g?_pos=3&#x26;_sid=0187843b2&#x26;_ss=r&#x26;variant=42649578012927">Fabreeko</a></td><td>International</td><td>US</td><td>Size 275</td></tr><tr><td><a href="https://www.fabreeko.com/products/fabreeko-edge-to-edge-heaters-for-zero-g?_pos=3&#x26;_sid=0187843b2&#x26;_ss=r&#x26;variant=42649589022975">Fabreeko</a></td><td>International</td><td>US</td><td>Size 377</td></tr><tr><td><a href="https://s.click.aliexpress.com/e/_DnKgYY3">Fysetc</a></td><td>International</td><td>China</td><td>Heater, 255x255x8mm bed, surface, magnet</td></tr><tr><td><a href="https://s.click.aliexpress.com/e/_Deflc7X">Fysetc</a></td><td>International</td><td>China</td><td>Heater, 377x370x8mm bed, surface, magnet</td></tr></tbody></table>

## Stepper Motors

{% hint style="info" %}
Stepper motors vary in power and step angles. Need some help in selecting the right motor for your project? Join our [Discord server](https://discord.gg/zerog), we're more than happy to help you out!
{% endhint %}

### Nema 17

| Store Name                                                                                                                         | Ships To      | Ships From    | Note |
| ---------------------------------------------------------------------------------------------------------------------------------- | ------------- | ------------- | ---- |
| [Fabreeko](https://www.fabreeko.com/products/zero-g-ab-motors-by-honeybadger?_pos=2&_sid=b7db3078d&_ss=r\&variant=43510563176703)  | International | US            | N/A  |
| [3DO](https://3do.dk/en/motors/1170-nema17-42sth48-2504ac.html)                                                                    | EU            | DK / EU       | N/A  |
| [West3D](https://collabs.shop/p8eh44)                                                                                              | International | US            | N/A  |
| [KB3D](https://kb-3d.com/store/stepper-motors-servos/371-ldo-stepper-motor-nema-17-42sth48-2504ac-speedy-power-1651971790651.html) | International | US            | N/A  |
| [AliExpress - Stepper Online](https://s.click.aliexpress.com/e/_Aq98MK)                                                            | International | International | N/A  |

## Controller Boards

{% hint style="info" %}
Carefully pick the board for your project, there is a lot of variation between them. Doing research is highly recommended.
{% endhint %}

### Spider V3.0

| Store Name                                                                                                                   | Ships To      | Ships From    | Note |
| ---------------------------------------------------------------------------------------------------------------------------- | ------------- | ------------- | ---- |
| [Fabreeko](https://www.fabreeko.com/products/fystec-spider-voron-design?_pos=1&_sid=3ff0ff26b&_ss=r\&variant=44184259395839) | International | US            | N/A  |
| [AliExpress - Fysetc](https://s.click.aliexpress.com/e/_DBTmPNP)                                                             | International | International | N/A  |

### LDO Leviathan

| Store Name                                                                                                                                      | Ships To      | Ships From | Note |
| ----------------------------------------------------------------------------------------------------------------------------------------------- | ------------- | ---------- | ---- |
| [3DO](https://3do.dk/en/boards/1527-ldo-voron-leviathan.html)                                                                                   | EU            | DK / EU    | N/A  |
| [Fabreeko](https://www.fabreeko.com/products/leviathan-v1-2-controller-board-by-ldo-voron)                                                      | International | US         | N/A  |
| [KB3D](https://kb-3d.com/store/controllers-displays-drivers/1027-ldo-leviathan-3d-printer-controller-main-board-for-klipper-1700224010852.html) | International | US         | N/A  |
| [West3D](https://collabs.shop/xzuh4l)                                                                                                           | International | US         | N/A  |

### BigTreeTech Kraken

| Store Name                                                                                                                                        | Ships To      | Ships From | Note |
| ------------------------------------------------------------------------------------------------------------------------------------------------- | ------------- | ---------- | ---- |
| [3DO](https://3do.dk/en/boards/2208-bigtreetech-kraken-v10.html)                                                                                  | EU            | DK / EU    | N/A  |
| [Fabreeko](https://www.fabreeko.com/products/btt-kraken-high-performance-high-current-8-driver-board)                                             | International | US         | N/A  |
| [KB3D](https://kb-3d.com/store/controllers-displays-drivers/1094-bigtreetech-kraken-main-controller-board-high-current-8-axis-1709418555988.html) | International | US         | N/A  |
| [West3D](https://collabs.shop/endcgh)                                                                                                             | International | US         | N/A  |

### BigTreeTech OctoPus Pro

| Store Name                                                                                                                                 | Ships To      | Ships From | Note |
| ------------------------------------------------------------------------------------------------------------------------------------------ | ------------- | ---------- | ---- |
| [3DO](https://3do.dk/en/boards/357-bigtreetech-octopus-pro-v10-f446.html)                                                                  | EU            | DK / EU    | N/A  |
| [Fabreeko](https://www.fabreeko.com/products/btt-octopus-pro-8-driver-mainboard-pre-order)                                                 | International | US         | N/A  |
| [KB3D](https://kb-3d.com/store/controllers-displays-drivers/784-bigtreetech-octopus-pro-controller-main-board-v10-f446-1674341175885.html) | International | US         | N/A  |
| [West3D](https://collabs.shop/int0y8)                                                                                                      | International | US         | N/A  |

[^1]: This lightweight gantry is 370mm, make sure you're going after the correct size for your machine.

[^2]: This lightweight gantry is 500mm, make sure you're going after the correct size for your machine.

[^3]: Official colab with VZBot and ZeroG. The toolhead is customized to fit MGN12H.

[^4]: Your voltage should meet the voltage you use in your country.


# Motherboards

An informative list to help you choose the mainboard for your project.

{% hint style="warning" %}
This is **NOT** an exhaustive list, please refer to the relevant documentation and manuals for the mainboard of your choice.  This page serves merely as a pointer to picking out your hardware.
{% endhint %}

***

### <mark style="color:red;">LDO Leviathan</mark>

7 Individual motor ports | Easy Pi mounting | 48v Capable XY

{% hint style="info" %}
This board uses 2209 and 5160 integrated drivers.
{% endhint %}

<details>

<summary>More Info</summary>

<table><thead><tr><th width="157"></th><th></th><th data-hidden></th></tr></thead><tbody><tr><td>Chip:</td><td>STM32H743</td><td></td></tr><tr><td>Host Type:</td><td>Raspberry Pi</td><td></td></tr><tr><td>Stepper Ports:</td><td>5 Low Voltage (24v) + 2 High Voltage (24-48v)</td><td></td></tr><tr><td>Fan Ports:</td><td>4x 3-Pin</td><td></td></tr><tr><td>Thermistor Ports:</td><td>4x Thermistor Ports</td><td></td></tr><tr><td>Heater Ports:</td><td>1x Heated Bed (10.0A)<br>1x Hotend (7.5A)</td><td></td></tr><tr><td>Endstop Ports:</td><td>3x</td><td></td></tr><tr><td>Extra:</td><td>1x CAN port<br>1x Probe Port<br>1x Filament Runout Port</td><td></td></tr></tbody></table>

</details>

***

### <mark style="color:red;">BTT Kraken</mark>

8 Individual motor ports | High stepper current limits | 60V Capable XY

{% hint style="info" %}
This board uses integrated 2160 drivers.
{% endhint %}

<details>

<summary>More Info</summary>

<table><thead><tr><th>Type</th><th>Info</th><th data-hidden></th></tr></thead><tbody><tr><td>Chip:</td><td>STM32H723</td><td></td></tr><tr><td>Host Type:</td><td>Raspberry Pi</td><td></td></tr><tr><td>Stepper Ports:</td><td>4 High Current (4.7A) + 4 Low Current (3.0A) </td><td></td></tr><tr><td>Fan Ports:</td><td>6x 2-pin<br>2x 4 pin<br>5x Always-On fans</td><td></td></tr><tr><td>Thermistor ports:</td><td>5x Thermistor Ports<br>2x MAX31865</td><td></td></tr><tr><td>Heater Ports:</td><td>1x Heated Bed (10A)<br>4x Hotend (6A each)</td><td></td></tr><tr><td>Endstop Ports:</td><td>8x</td><td></td></tr><tr><td>Extra:</td><td>2x CAN Ports<br>1x Probe Port<br>1x Filament Runout Port<br>1x Proximity Switch Port<br>1x Servo Port</td><td></td></tr><tr><td></td><td></td><td></td></tr></tbody></table>

</details>

***

### <mark style="color:red;">BTT Octopus Pro 1.1</mark>

8 Individual motor ports | Community favorite | Versatile

{% hint style="info" %}
Widely used and supported in the community.
{% endhint %}

<details>

<summary>More Info</summary>

<table><thead><tr><th width="157">Type</th><th>Info</th><th data-hidden></th></tr></thead><tbody><tr><td>Chip:</td><td>STM32H723</td><td></td></tr><tr><td>Host Type:</td><td>Raspberry Pi</td><td></td></tr><tr><td>Stepper Ports:</td><td>9 Ports, 8 Drivers (1 Shared)</td><td></td></tr><tr><td>Fan Ports:</td><td>6x 2-Pin<br>2x Always on</td><td></td></tr><tr><td>Thermistor Ports:</td><td>5x Thermistor Ports<br>1x PT100/PT1000</td><td></td></tr><tr><td>Heater Ports:</td><td>1x Heated Bed (10.0A)<br>4x Hotend (6.0A each)</td><td></td></tr><tr><td>Endstop Ports:</td><td>6x Endstop Ports</td><td></td></tr><tr><td>Extra:</td><td>1x CAN Port<br>1x Probe Port<br>2x Filament Runout Port<br>1x Proximity Switch Port</td><td></td></tr></tbody></table>

</details>

***

### <mark style="color:red;">BTT Manta M8P</mark>

8 Individual motor ports | Uses Pi Compute Module | 48v Capable

{% hint style="info" %}
Use a CM4/5, CB1 is underpowered.
{% endhint %}

<details>

<summary>More Info</summary>

<table><thead><tr><th width="157">Type</th><th>Info</th><th data-hidden></th></tr></thead><tbody><tr><td>Chip:</td><td>STM32H723</td><td></td></tr><tr><td>Host Type:</td><td>Pi Compute Module</td><td></td></tr><tr><td>Stepper Ports:</td><td>9 Ports, 8 Drivers (1 Shared)</td><td></td></tr><tr><td>Fan Ports:</td><td>5x 2-Pin<br>2x 4-Pin<br>1x Always-On<br>1x Pi Fan</td><td></td></tr><tr><td>Thermistor Ports:</td><td>5x Thermistor Ports</td><td></td></tr><tr><td>Heater  Ports:</td><td>1x Heated Bed (10.0A)<br>4x Hotend (5.5A each)</td><td></td></tr><tr><td>Endstop Ports:</td><td>4x Endstop Ports</td><td></td></tr><tr><td>Extra:</td><td>1x CAN port<br>1x Probe Port<br>1x Filament Runout Port<br>1x Proximity Switch Port<br>1x Servo Port</td><td></td></tr></tbody></table>

</details>


# TMC Drivers

An informative list to help you choose the drivers for your project.

{% hint style="warning" %}
This is **NOT** an exhaustive list, please refer to the relevant documentation and manuals for the drivers of your choice.  This page serves merely as a pointer to picking out your hardware.
{% endhint %}

***

### <mark style="color:red;">BTT 5160T Plus test</mark>

10.6A RMS | 60V | SPI

{% hint style="danger" %}
Note: To get the full performance out of these drivers, you need to swap the **physical** sense resistor on the board, this is not an operation for beginners.
{% endhint %}

<details>

<summary>More Info</summary>

<table><thead><tr><th width="180">Type</th><th>Info</th><th data-hidden></th></tr></thead><tbody><tr><td>Driver Chip</td><td>TMC5160-TA</td><td></td></tr><tr><td>Driver Voltage</td><td>8-60v</td><td></td></tr><tr><td>Max RMS</td><td>10.6A </td><td></td></tr><tr><td>Operating Mode</td><td>SPI</td><td></td></tr><tr><td>Sense Resistor</td><td>0.022</td><td></td></tr></tbody></table>

</details>

***

### <mark style="color:red;">BTT 5160T & Pro</mark>

3A | 36V 5160T | 56V 5160Pro | SPI

{% hint style="info" %}
Good for chasing performance, high voltage and current limits
{% endhint %}

<details>

<summary>More Info</summary>

<table><thead><tr><th width="180.5">Type</th><th>Info</th><th data-hidden></th></tr></thead><tbody><tr><td>Driver Chip</td><td>TMC5160-TA</td><td></td></tr><tr><td>Driver Voltage</td><td>8-36v (5160T) | 8-56v (5160 Pro)</td><td></td></tr><tr><td>Max RMS</td><td>3.0A</td><td></td></tr><tr><td>Operating Mode</td><td>SPI</td><td></td></tr><tr><td>Sense Resistor</td><td>0.075</td><td></td></tr></tbody></table>

</details>

***

### <mark style="color:red;">BTT 2240</mark>

2.1A | 36v | SPI

{% hint style="info" %}
The 2240's have an integrated thermistor that can be displayed.
{% endhint %}

<details>

<summary>More Info</summary>

<table><thead><tr><th width="179">Type</th><th>Info</th><th data-hidden></th></tr></thead><tbody><tr><td>Driver Chip</td><td>TMC2240-ATJ</td><td></td></tr><tr><td>Driver Voltage</td><td>4.5-36v</td><td></td></tr><tr><td>Max RMS</td><td>2.1A</td><td></td></tr><tr><td>Operating Mode</td><td>SPI</td><td></td></tr><tr><td>RREF</td><td>12000</td><td></td></tr></tbody></table>

</details>

***

### <mark style="color:red;">BTT 2209</mark>

2.0A | 28V | SPI / UART

{% hint style="info" %}
Good for beginners, easy to set up.
{% endhint %}

<details>

<summary>More Info</summary>

<table><thead><tr><th>Type</th><th>Info</th><th data-hidden></th></tr></thead><tbody><tr><td>Driver Chip</td><td>TMC2209-LA</td><td></td></tr><tr><td>Driver Voltage</td><td>5.5-28v</td><td></td></tr><tr><td>Max RMS</td><td>2.0A</td><td></td></tr><tr><td>Operating Mode</td><td>SPI | UART</td><td></td></tr><tr><td>Sense Resistor</td><td>0.110</td><td></td></tr></tbody></table>

</details>


# Stepper Motors

An informative list to help you choose the motors for your project.

{% hint style="warning" %}
This is **NOT** an exhaustive list, please refer to the relevant documentation and manuals for the motors of your choice.  This page serves merely as a pointer to picking out your hardware.
{% endhint %}

***

### <mark style="color:red;">42STH60-3004AH (Classifieds)</mark>

2.85A RMS | 12.4 Oz-in | XY | Integrated thermistor

{% hint style="info" %}
Very torque heavy but with a slightly lower top speed than 2504's.
{% endhint %}

<details>

<summary>More Info</summary>

<table><thead><tr><th>Type</th><th>Info</th><th data-hidden></th></tr></thead><tbody><tr><td>Phase Resistance</td><td>1.1x(1±20%)Ω</td><td></td></tr><tr><td>Phase Inductance</td><td>2.3x(1±20%)mH</td><td></td></tr><tr><td>Holding Torque</td><td> 12.4 Oz-in | 88 N-cm </td><td></td></tr><tr><td>Rated Current</td><td>2.85A RMS</td><td></td></tr><tr><td>Coil Temp Limit</td><td>180c</td><td></td></tr></tbody></table>

</details>

***

### <mark style="color:red;">42STH48-2804AH</mark>

2.8a RMS | 5.9 Oz-in | XY

{% hint style="info" %}
We have observed heavy VFA when running these motors at 48v.
{% endhint %}

<details>

<summary>More Info</summary>

<table><thead><tr><th>Type</th><th>Info</th><th data-hidden></th></tr></thead><tbody><tr><td>Phase Resistance</td><td>0.7x(1±20%)Ω</td><td></td></tr><tr><td>Phase Inductance</td><td>0.6x(1±20%)mH</td><td></td></tr><tr><td>Holding Torque</td><td>5.9 Oz-in | 42 N-cm</td><td></td></tr><tr><td>Rated Current</td><td>2.8A RMS </td><td></td></tr><tr><td>Coil Temp Limit</td><td>180c (AH) | 130c (AC)</td><td></td></tr></tbody></table>

</details>

***

### <mark style="color:red;">42STH48-2504AH</mark>

2.5A RMS | 7.6 Oz-in | Comes in AH(High temp) and AC configurations

{% hint style="info" %}
Regarded as the best overall steppers for speed and quality.
{% endhint %}

<details>

<summary>More Info</summary>

<table><thead><tr><th>Type</th><th>Info</th><th data-hidden></th></tr></thead><tbody><tr><td>Phase Resistance</td><td>1.2x(1±20%)Ω</td><td></td></tr><tr><td>Phase Inductance</td><td>1.5x(1±20%)mH</td><td></td></tr><tr><td>Holding Torque</td><td>7.6 Oz-in | 55 N-cm</td><td></td></tr><tr><td>Rated Current</td><td>2.5A RMS</td><td></td></tr><tr><td>Coil Temp Limit</td><td>180c (AH) | 130c (AC)</td><td></td></tr></tbody></table>

</details>

***

### <mark style="color:red;">42STH48-2004AH</mark>

2.0A RMS | 5.6 Oz-in | Comes in MAH/AH variants&#x20;

{% hint style="info" %}
Slightly underpowered for CoreXY, best used in Z.
{% endhint %}

<details>

<summary>More Info</summary>

<table><thead><tr><th>Type</th><th>Info</th><th data-hidden></th></tr></thead><tbody><tr><td>Phase Resistance</td><td>1.6x(1±20%)Ω</td><td></td></tr><tr><td>Phase Inductance</td><td>3.0x(1±20%)mH</td><td></td></tr><tr><td>Holding Torque</td><td>5.6 Oz-in | 59 N-cm</td><td></td></tr><tr><td>Rated Current</td><td>2.0A RMS</td><td></td></tr><tr><td>Coil Temp limit</td><td>130c (AC/MAC)</td><td></td></tr></tbody></table>

</details>

***

### <mark style="color:red;">42STH48-1684AC</mark>

1.68A RMS | 6.08 Oz-in | Comes in MAC/AC variants.

{% hint style="info" %}
Underpowered for CoreXY, best used in Z.
{% endhint %}

<details>

<summary>More Info</summary>

<table><thead><tr><th>Type</th><th>Info</th><th data-hidden></th></tr></thead><tbody><tr><td>Phase Resistance</td><td>1.65x(1±20%)Ω</td><td></td></tr><tr><td>Phase Inductance</td><td>2.8x(1±20%)mH</td><td></td></tr><tr><td>Holding Torque</td><td>6.08 Oz-in | 43 N-cm</td><td></td></tr><tr><td>Rated Current</td><td>1.68</td><td></td></tr><tr><td>Coil Temp Limit</td><td>130c (AC/MAC)</td><td></td></tr></tbody></table>

</details>


# Mainsail


# Mainsail Theme Setup

Steps for setting up the mainsail theme for your user interface. Complete the installation with the provided instructions and enjoy the improved visual experience.

## Connect to SSH

{% stepper %}
{% step %}

### Launch your SSH client.

First, launch your SSH client, in my case it's [Putty](https://www.putty.org/).

<img src="https://docs2.zerog.one/images/other/mainsail/theme/step1.png" alt="" data-size="original">

{% endstep %}

{% step %}

### Sign in

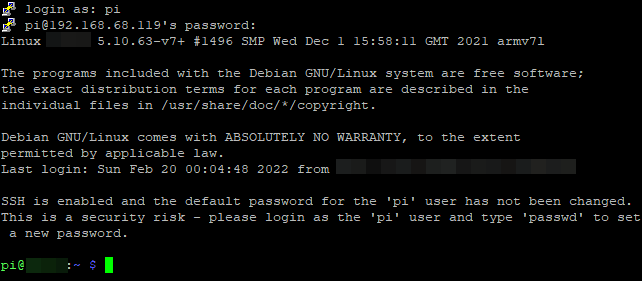
Then enter your Raspberry’s local IP address in the “Host” or “Server” field.

Follow the prompts to connect to your Raspberry. Note that your local IP address may differ from the one used in the example.
{% endstep %}

{% step %}

### Check your SSH Console

Your console should look similar to this.

<img src="https://docs.zerog.one/assets/images/howto/theme/step2.png" alt="" data-size="original">

{% endstep %}
{% endstepper %}

### SSH Console & Commands

{% stepper %}
{% step %}

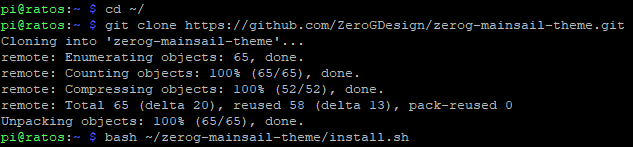
### Execute the following Commands

```bash
cd ~/
git clone https://github.com/ZeroGDesign/zerog-mainsail-theme.git
bash ~/zerog-mainsail-theme/install.sh
```

{% endstep %}

{% step %}

### Double check

If done correctly out would look somewhat like this

<img src="https://docs.zerog.one/assets/images/howto/theme/step3.png" alt="" data-size="original">

{% hint style="warning" %}
The input field still shows a command we have to run, press **ENTER** on your keyboard to run the command.
{% endhint %}
{% endstep %}

{% step %}

### Ran the Code

Once executed, your console should display the message ‘*Theme has been installed, have fun!*’ indicating that this step is now complete.

<img src="https://docs2.zerog.one/images/other/mainsail/theme/step4.png" alt="" data-size="original">
{% endstep %}
{% endstepper %}

## Dashboard

{% stepper %}
{% step %}

### Locate your Config Files

Locate the file ‘*moonraker.conf*’ and click on it.

<img src="https://docs2.zerog.one/images/other/mainsail/theme/step6.png" alt="" data-size="original">
{% endstep %}

{% step %}

### Adding Them Update Script

Scroll down until you find the text *\[update\_manager]*.

*If you see an additional line that reads “enable\_auto\_refresh: True”, do not remove it. Simply proceed to the next line. Note that this line may not be present for all users.*

<img src="https://docs2.zerog.one/images/other/mainsail/theme/step7.png" alt="" data-size="original">
{% endstep %}

{% step %}

### Insert Code

```yaml
[update_manager client ZeroGTheme]
type: git_repo
path: ~/zerog-mainsail-theme
origin: https://github.com/ZeroGDesign/zerog-mainsail-theme.git
install_script: install.sh
is_system_service: False
```

{% endstep %}

{% step %}

### Confirm Changes

Confirm your code looks somewhat similar to this.

<img src="https://docs2.zerog.one/images/other/mainsail/theme/step8.png" alt="" data-size="original">
{% endstep %}
{% endstepper %}

## Final Steps

{% stepper %}
{% step %}

### Press Save & Restart

<img src="https://docs2.zerog.one/images/other/mainsail/theme/step9.png" alt="" data-size="original">
{% endstep %}

{% step %}

### Restart Moonraker

If a notification appears asking you to **try again**, click on it to proceed.

<img src="https://docs2.zerog.one/images/other/mainsail/theme/step10.png" alt="" data-size="original">
{% endstep %}

{% step %}

### Refresh your Browser

Refresh your browser to check if the ZeroG theme is now visible.

<img src="https://docs2.zerog.one/images/other/mainsail/theme/step11.png" alt="" data-size="original">

###

{% endstep %}
{% endstepper %}

### Update Manager

On the right-hand side, you will see the **Update Manager**. You should now notice that **ZeroGTheme** has been added. This will enable you to easily obtain the latest updates as they become available for the ZeroG Mainsail Theme.

![](https://docs2.zerog.one/images/other/mainsail/theme/step12.png)

### That's it, Enjoy!

![](https://docs2.zerog.one/images/other/mainsail/theme/step13.png)


# Frame


# Blind joints, how do they work?

Learn how to assemble your frame using Blind Joints

{% hint style="info" %}
The page will be updated with detailed information in the future. We have included the basic details for now to make sure we have some information on the website.
{% endhint %}

## What is a Blind Joint?

A blind joint on an extrusion involves a through hole on the side of the extrusion. This hole will be used to tighten a bolt that will screw together with another piece of extrusion. This other piece most likely has a threaded hole on the end.

This setup secures two extrusions at a right angle without exposing any parts externally, providing a clean look and robust connection.

## Enlarging images

Click the image to enlarge them, giving you a more detailed view.

## How do they work

{% stepper %}
{% step %}

### Take a threaded extrusion

Insert a bolt (depending on the frame size) into the threaded part of the extrusion.

<img src="https://3028713203-files.gitbook.io/~/files/v0/b/gitbook-x-prod.appspot.com/o/spaces%2Fc7rngz4fr0ULXRXV6Dnh%2Fuploads%2FtIwl1xviGOa0mDqpgELX%2Ffaq_blind_joint_step_1.png?alt=media&amp;token=317a1032-31ac-49f7-9e0f-186d5565b9ae" alt="" data-size="original">
{% endstep %}

{% step %}

### Screw bolt in

Leave 2.5 to 3mm of space between the bolt head and the extrusion end. This helps in sliding another extrusion on later.

<img src="https://3028713203-files.gitbook.io/~/files/v0/b/gitbook-x-prod.appspot.com/o/spaces%2Fc7rngz4fr0ULXRXV6Dnh%2Fuploads%2FBa6I1MToug2gRywbcBpD%2Ffaq_blind_joint_step_2.png?alt=media&amp;token=c9fbadba-6b98-4416-bcf7-2229360c8197" alt="" data-size="original">
{% endstep %}

{% step %}

### Slide in extrusion

Slide another piece of extrusion over the bolt we just added.

<img src="https://3028713203-files.gitbook.io/~/files/v0/b/gitbook-x-prod.appspot.com/o/spaces%2Fc7rngz4fr0ULXRXV6Dnh%2Fuploads%2FVewjPloAwwmxSM8mIf6z%2Ffaq_blind_joint_step_3.png?alt=media&amp;token=aaa35cf2-cc48-4b79-b60d-80ea9791f3bb" alt="" data-size="original">

Here is another view of the extrusion sliding over the bolt.

<img src="https://3028713203-files.gitbook.io/~/files/v0/b/gitbook-x-prod.appspot.com/o/spaces%2Fc7rngz4fr0ULXRXV6Dnh%2Fuploads%2FabmnjpN9WlWhoq0lxM2L%2Ffaq_blind_joint_step_4.png?alt=media&amp;token=fbd0736a-aec6-4c0b-b474-8e9d66704bbf" alt="" data-size="original">

{% endstep %}

{% step %}

### Making sure the surface is Flush

Ensure the surfaces are perfectly aligned. This is crucial, especially when we're trying to get a square frame.

See the red arrows: one shows a cut surface, the other the extrusion's side. Place this on a flat surface and find the edge on the mating surfaces with your fingers to align them. Keep them aligned for the next step.

<img src="https://3028713203-files.gitbook.io/~/files/v0/b/gitbook-x-prod.appspot.com/o/spaces%2Fc7rngz4fr0ULXRXV6Dnh%2Fuploads%2Flsor72AwoX5BfT8rMdOs%2Ffile.excalidraw.svg?alt=media&amp;token=a871a314-2174-4f47-8d28-641114f29d5c" alt="" data-size="original">

{% endstep %}

{% step %}

### Tightening the bolt

Ensure the surfaces remain flush and tighten the bolt further. This will strengthen the 'blind joint' connection.

<img src="https://3028713203-files.gitbook.io/~/files/v0/b/gitbook-x-prod.appspot.com/o/spaces%2Fc7rngz4fr0ULXRXV6Dnh%2Fuploads%2Fg8cdKPOtIqhdnnxOLXxv%2Ffaq_blind_joint_step_6.png?alt=media&amp;token=2c190741-9c1c-49fb-b736-1757d5ba7cf2" alt="" data-size="original">

Great job! You've successfully created a blind joint. Congratulations!

<img src="https://3028713203-files.gitbook.io/~/files/v0/b/gitbook-x-prod.appspot.com/o/spaces%2Fc7rngz4fr0ULXRXV6Dnh%2Fuploads%2FNIfGxoiP01I5qdGP2eiG%2Ffaq_blind_joint_step_7.png?alt=media&amp;token=393f82c8-0bbc-4513-9a0e-493674fc09f7" alt="" data-size="original">

{% endstep %}
{% endstepper %}


# Electronics


# Motherboards


# Spider V3.0

Information on the Spider v3.0 can be found on this page.

## GitHub

{% @github-files/github-code-block url="<https://github.com/FYSETC/FYSETC-SPIDER/tree/main/hardware/V3.0>" %}

<figure><img src="https://3028713203-files.gitbook.io/~/files/v0/b/gitbook-x-prod.appspot.com/o/spaces%2Fc7rngz4fr0ULXRXV6Dnh%2Fuploads%2FGu7Kh73KpfRYuptqv8jK%2Fspider_v3_0.png?alt=media&amp;token=0e64490a-622f-4fbc-9dd8-bf2de5d3f398" alt=""><figcaption></figcaption></figure>

## Pros

* CAN support
* Selectable fan voltage
* Driver pin configuration
* 48v support
* Dimensions: 135x200mm
* Common STM32F446 MCU

## Cons

* Lack of documentation

## &#x20;Ports

* 8 stepper driver
* 3x extruder heater
* Bed in/out
* 6x fan
* 6x endstop
* 6x thermistor
* Can port
* EXP1+EXP2
* 48v port
* Rpi communication pins
* BL Touch
* LEDs
* External 5V
* SPI ports

## Stores

We've added some of the stores to the Sourcing Guide [here](https://tempdocs.zerog.one/faq/electronics/motherboards/pages/Q0RxUEio22ZqY8XylQah#spider-v3.0).


# LDO Voron Leviathan

Information on the LDO Voron Leviathan can be found on this page.

## GitHub

{% @github-files/github-code-block url="<https://github.com/MotorDynamicsLab/Leviathan>" %}

## Guide

{% embed url="<https://ldomotion.com/#/guide/VORON-Leviathan-V12>" %}

<figure><img src="https://3028713203-files.gitbook.io/~/files/v0/b/gitbook-x-prod.appspot.com/o/spaces%2Fc7rngz4fr0ULXRXV6Dnh%2Fuploads%2F7Cx4QyYXz3X6Xi7Elhz7%2Fldo_leviathan.png?alt=media&amp;token=e3cd2f52-7b2c-43b8-8008-f34eb5807d04" alt=""><figcaption></figcaption></figure>

## Pros

* Fully open source
* TMC5160/TMC2209
* 48v support
* Common STM32F446 MCU
* Dedicated mounting space for a Raspberry Pi 3,4,5 or Zero 2W
* Dedicated power supply and uart port for Raspberry Pi
* Reverse polarity protection for main power supply and HV Stepper supply input
* Dimensions: 170x100mm
* Superior stepper driver cooling (passive)
* Great documentation

## Cons

* Onboard Stepper drivers
* Limited ports

## Ports

* 5x Integrated TMC2209 stepper drivers
* 2x Integrated 48V rated TMC5160 stepper drivers
* 7x motor ports
* 4x Fan ports with flyback protection, 5V/24V selectable voltage, and tachometer inputs
* 4x Thermistor ports with 2k2 ohm pullup resistors
* 1x Dedicated LED strip with flicker free dimming down to 1%
* 1x Neopixel port
* 1x Hotend power output up to 180W
* 1x Hotbed power output up to 240W
* 1x Dedicated Z probe port with selectable voltage and integrated diode
* 3x Endstop ports and a filament sensor port
* Canbus port
* EXP1+EXP2

## Stores

We've added some of the stores to the Sourcing Guide [here](/resources/sourcing-guide#ldo-leviathan).


# BigTreeTech Kraken

Information on the BigTreeTech (BTT) Kraken can be found on this page.

## GitHub

{% @github-files/github-code-block url="<https://github.com/bigtreetech/BIGTREETECH-Kraken>" %}

<figure><img src="https://3028713203-files.gitbook.io/~/files/v0/b/gitbook-x-prod.appspot.com/o/spaces%2Fc7rngz4fr0ULXRXV6Dnh%2Fuploads%2FNW6pCMsjM8G8KMp2IHaM%2Fbtt_kraken.png?alt=media&amp;token=ce9adb1e-46c3-46c8-95c2-bffcbd09f48f" alt=""><figcaption></figcaption></figure>

## Pros

* STM32H723
* 60v support
* Dimensions: 200x113mm
* 8A motor ports
* Dual CAN support
* 5v dedicated RPI psu
* Comes with limited edition BTT Black ducky
* Good documentation  &#x20;

## Cons

* Integrated Stepper Drivers
* Very large

## Ports

* Onboard TMC2160, support 24-60V, Max 8A driving current for M1-M4, Max 3A for M5-M8
* 8x motor ports
* 5x motor fan ports
* Bed ports
* Motor port
* Power port
* 4x hotend ports
* 6x DC fan ports
* 2x 4 pin fan ports
* 8x endstops
* Probe(Servos, Probe)
* Servo
* Filament Sensor
* PS-ON
* I2C
* 2x RGB
* SPI
* UART interface
* EXP1+EXP2
* 2x CAN,
* 2x PT100/PT1000
* USB-A 5V Power

## Stores

We've added some of the stores to the Sourcing Guide [here](/resources/sourcing-guide#bigtreetech-kraken).


# BigTreeTech Octopus Pro

Information on the BigTreeTech ( BTT) Octopus Pro can be found on this page.

## GitHub

{% embed url="<https://www.google.com/url?q=https://github.com/bigtreetech/BIGTREETECH-OCTOPUS-Pro&sa=D&source=editors&usg=AOvVaw1bxYmVUzkKQjW9Yfxd0jIh&ust=1733293259471245>" %}

<figure><img src="https://3028713203-files.gitbook.io/~/files/v0/b/gitbook-x-prod.appspot.com/o/spaces%2Fc7rngz4fr0ULXRXV6Dnh%2Fuploads%2FWdIiEYduNYrYtaBdMcj9%2Fbtt_octopus_pro.png?alt=media&amp;token=29bab10c-e478-4088-9ccf-4956c385fb29" alt=""><figcaption></figcaption></figure>

## Pros

* Great community support
* Good docs
* Dimensions: 160x100mm
* Common STM32F446 MCU option
* High speed STM32H723 MCU option
* CAN support
* 48v support

## Cons

* TBD

## Ports

* 8x stepper drivers
* 1x z sync port on driver 3
* IIC
* Motor power
* Power
* Bed Port
* PT100/PT1000
* 4x Hotend ports
* SPI3
* 8x Fan ports
* BL Touch
* LED
* Probe Port
* 8x endstop ports
* 5x thermistor ports
* CAN interface
* Power detection port
* PS On
* EXP1+EXP2
* BootO
* UART2

## Stores

We've added some of the stores to the Sourcing Guide [here](/resources/sourcing-guide#bigtreetech-octopus-pro).


# Project Introduction

This page serves to introduce you to the differences, terminology used, and the projects available to build.

## <mark style="color:red;">WIP</mark>

### <mark style="color:red;">Step Files</mark>

You can now download the step files for our Mercury One.1! Select the appropriate size for your 3D printer:

* [Ender 5 (pro) Size - Hydra\_5pro.zip](https://docs.zerog.one/assets/stl/hydra/Hydra_5pro.zip)
* [Ender 5 Plus Size - Hydra\_5Plus.zip](https://docs.zerog.one/assets/stl/hydra/Hydra_5Plus.zip)

Simply click on the desired link and start creating your masterpiece with ease.

## <mark style="color:red;">Our Projects</mark>

<table data-card-size="large" data-view="cards"><thead><tr><th></th><th data-type="content-ref"></th><th></th><th data-hidden data-card-cover data-type="image">Cover image</th></tr></thead><tbody><tr><td>Mercury One.1</td><td><a href="/projects/mercury-one.1/introduction">Introduction</a></td><td>Merc stuff</td><td><a href="https://content.gitbook.com/content/XgzDoYdwl0Vuu3qB4KOp/blobs/BuxthVOYJ4Vub7usuK2W/Header.png">Header.png</a></td></tr><tr><td>Hydra</td><td><a href="/projects/hydra/introduction">Introduction</a></td><td>Hydra stuff</td><td><a href="https://content.gitbook.com/content/XgzDoYdwl0Vuu3qB4KOp/blobs/qRWhecdxUxxufGNxIAS2/hydra_bare.png">hydra_bare.png</a></td></tr></tbody></table>

<table data-card-size="large" data-view="cards"><thead><tr><th></th><th data-type="content-ref"></th><th></th><th data-hidden data-card-cover data-type="image">Cover image</th></tr></thead><tbody><tr><td>Nebula</td><td><a href="/projects/nebula/introduction">Introduction</a></td><td>Nebula stuff</td><td><a href="https://content.gitbook.com/content/XgzDoYdwl0Vuu3qB4KOp/blobs/ymPfKH6VSF5qigSFUJfQ/full_frame_render.png">full_frame_render.png</a></td></tr><tr><td>Electronics</td><td></td><td>Electronics stuff</td><td><a href="https://834763357-files.gitbook.io/~/files/v0/b/gitbook-x-prod.appspot.com/o/spaces%2FXgzDoYdwl0Vuu3qB4KOp%2Fuploads%2FeaauY2cbqcI8FvzefHHI%2Fbtt_octopus_pro.png?alt=media&amp;token=e58f5074-c5bb-4fc0-9b25-84417a37b64b">btt_octopus_pro.png</a></td></tr></tbody></table>


# Introduction

## <mark style="color:red;">MERCURY ONE.1</mark> <a href="#mercury-one1" id="mercury-one1"></a>

<table data-card-size="large" data-view="cards" data-full-width="false"><thead><tr><th>Difficulty</th><th>Language</th></tr></thead><tbody><tr><td>Moderate to experienced</td><td>English</td></tr></tbody></table>

## <mark style="color:red;">What's this project about?</mark>

The Mercury One.1 upgrade transforms your current Ender 5(Pro/Plus) into a CoreXY system. This provides an improvement over the Cartesian system, which relies on V-rollers that may lack precision and demand considerable maintenance. Additionally, the CoreXY system is optimized for higher speeds, enhancing your 3D printing experience and quality.

### <mark style="color:red;">Who's this project for?</mark> <a href="#whos-this-project-for" id="whos-this-project-for"></a>

If you’re an Ender 5, Ender 5 Pro, or Ender 5 Plus owner who is dissatisfied with print quality, speed, or encountering other issues, consider this upgrade. Whether you’re interested in learning how to modify printers or simply seeking an enjoyable new project, this is the perfect opportunity for you!

## <mark style="color:red;">What machines does this run on?</mark>

We support the Ender 5, Ender 5 Pro, and Ender 5 Plus frames when upgrading to Mercury One.1. To install this upgrade, you will need to remove the X and Y motion system from the existing frame.\ <mark style="color:red;">**Please note**</mark>**&#x20;that some&#x20;**<mark style="color:red;">**soldering or wire extension may be necessary**</mark> during this process.

### <mark style="color:red;">Difficulty</mark> <a href="#difficulty" id="difficulty"></a>

We consider this build to be easy to moderate in difficulty. However, the more challenging aspects might be the firmware and wiring. As of now, we haven’t written any configuration for Klipper, and some wires may need to be remade or extended.


# Bill of material

In the `Stores` column of the tables, you'll find stores with approved and tested hardware from our sourcing guide. Simply right-click on the desired store and select 'Open link in new tab' to make your life easier.

{% hint style="info" %}
The Bill of Materials for the Mercury One.1 is not yet complete, but it does include the hardware for the EVA Toolhead. For further information, please refer to the Changelog [here](https://docs.zerog.one/changelog/mercury#th-december-2022).
{% endhint %}

## <mark style="color:red;">Self sourcing</mark> <a href="#self-sourcing" id="self-sourcing"></a>

### <mark style="color:red;">Bolts</mark> <a href="#bolts" id="bolts"></a>

*Note: The amount of bolts includes spares.*

| Size  | Type               | Amount                                        | Stores                                                   |
| ----- | ------------------ | --------------------------------------------- | -------------------------------------------------------- |
| M3x8  | ISO 4762 / DIN 912 | 65                                            | [Click here](/resources/sourcing-guide#m3-x-8mm-shcs)    |
| M3x12 | ISO 4762 / DIN 912 | 8                                             | [Click here](/resources/sourcing-guide#m3-x-12mm-shcs)   |
| M3x16 | ISO 4762 / DIN 912 | 8                                             | [Click here](/resources/sourcing-guide#m3-x-16mm-shcs)   |
| M3x20 | ISO 4762 / DIN 912 | 14                                            | [Click here](/resources/sourcing-guide#m3-x-20mm-shcs)   |
| M3x25 | ISO 4762 / DIN 912 | 5                                             | [Click here](/resources/sourcing-guide#m3-x-25mm-shcs)   |
| M3x30 | ISO 4762 / DIN 912 | 8                                             | [Click here](/resources/sourcing-guide#m3-x-30mm-shcs)   |
| M3x35 | ISO 4762 / DIN 912 | 12                                            | [Click here](/resources/sourcing-guide#m3-x-35mm-shcs)   |
| M4x20 | ISO 4762 / DIN 912 | 8 (<mark style="color:red;">PLUS ONLY</mark>) | Click here                                               |
| M5x8  | ISO 4762 / DIN 912 | 6                                             | [Click here](/resources/sourcing-guide#m5-x-8mm-shcs)    |
| M5x12 | ISO 4762 / DIN 912 | 6                                             | [Click here](/resources/sourcing-guide#m5-x-12mm-shcs)   |
| M5x20 | ISO 4762 / DIN 912 | 4                                             | [Click here](/resources/sourcing-guide#m5-x-20mm-shcs)   |
| M5x50 | ISO 4762 / DIN 912 | 6                                             | [Click here](/resources/sourcing-guide#m5-x-50mm-shcs)   |

### <mark style="color:red;">T-Nuts</mark> <a href="#t-nuts" id="t-nuts"></a>

| Size | Type                  | Amount | Stores                                              |
| ---- | --------------------- | ------ | --------------------------------------------------- |
| M3   | Roll in spring loaded | 35     | [Click here](/resources/sourcing-guide#m3-6mm-slot) |
| M5   | Roll in spring loaded | 20     | [Click here](/resources/sourcing-guide#m5-6mm-slot) |

### <mark style="color:red;">Extrusions</mark> <a href="#extrusions" id="extrusions"></a>

{% hint style="info" %}
*Note: Ender 5 (Pro) and Ender 5 Plus have different sizes for parts.*

The Lightweight Gantry is not mandatory but an optional upgrade!
{% endhint %}

{% tabs %}
{% tab title="ENDER 5 (PRO)" %}

<table data-card-size="large" data-view="cards"><thead><tr><th>Printer</th><th>Size</th><th>Type</th><th>Amount</th><th>Stores</th></tr></thead><tbody><tr><td>Ender 5 (Pro)</td><td>370mm</td><td>2020 Extrusion</td><td>1</td><td><a href="/resources/sourcing-guide#id-20x20-aluminum-extrusion">Click here</a>   </td></tr><tr><td><mark style="color:orange;">LIGHTWEIGHT GANTRY*</mark></td><td>370mm</td><td><a data-footnote-ref href="#user-content-fn-1"><mark style="color:red;"><strong>CLICK HERE (NOTE)</strong></mark></a></td><td>1</td><td><a href="/spaces/c7rngz4fr0ULXRXV6Dnh/pages/Q0RxUEio22ZqY8XylQah#mercury-one.1-extrusion">Click here</a>   </td></tr></tbody></table>

<mark style="color:orange;">\* Lightweight Gantry Is</mark> <mark style="color:orange;"></mark><mark style="color:orange;">**optional**</mark>
{% endtab %}

{% tab title="ENDER 5 PLUS" %}

<table data-card-size="large" data-view="cards"><thead><tr><th>Printer</th><th>Size</th><th>Type</th><th>Amount</th><th>Stores</th></tr></thead><tbody><tr><td>Ender 5 Plus</td><td>500mm</td><td>2020 Extrusion</td><td>1</td><td><a href="/resources/sourcing-guide#id-20x20-aluminum-extrusion">Click here</a>   </td></tr><tr><td><mark style="color:orange;">LIGHTWEIGHT GANTRY*</mark></td><td>500mm</td><td><a data-footnote-ref href="#user-content-fn-2"><mark style="color:red;"><strong>CLICK HERE (NOTE)</strong></mark></a></td><td>1</td><td><a href="/spaces/c7rngz4fr0ULXRXV6Dnh/pages/Q0RxUEio22ZqY8XylQah#mercury-one.1-extrusion">Click here</a>   </td></tr></tbody></table>

<mark style="color:orange;">\* Lightweight Gantry Is</mark> <mark style="color:orange;"></mark><mark style="color:orange;">**optional**</mark>
{% endtab %}
{% endtabs %}

### <mark style="color:red;">Linear rails</mark> <a href="#linear-rails" id="linear-rails"></a>

{% hint style="info" %}
*Note: Ender 5 (Pro) and Ender 5 Plus have different sizes for parts.*
{% endhint %}

<table data-card-size="large" data-view="cards"><thead><tr><th>Printer</th><th>Size</th><th>Type</th><th>Amount</th><th>Stores</th></tr></thead><tbody><tr><td>Ender 5 (Pro)</td><td>330mm</td><td>MGN12H</td><td>3</td><td><a href="/resources/sourcing-guide#mgn12h-330mm">Click here</a>   </td></tr><tr><td>Ender 5 Plus</td><td>450mm</td><td>MGN12H</td><td>3</td><td><a href="/resources/sourcing-guide#mgn12h-450mm">Click here</a></td></tr></tbody></table>

### <mark style="color:red;">Electronics</mark> <a href="#electronics" id="electronics"></a>

*Note: You can self source the following parts. The parts below are recommended by us.*

| Type                 | Amount | Stores                                                      |
| -------------------- | ------ | ----------------------------------------------------------- |
| Nema17 Stepper motor | 2      | [Click here](/resources/sourcing-guide#nema-17)             |
| Controller board     | 1      | [Click here](/resources/sourcing-guide#controller-boards)   |
| Hotend - Rapido HF   | 1      | Click here                                                  |

| Type             | Size       | Amount | Stores       |
| ---------------- | ---------- | ------ | ------------ |
| Brushless DC fan | 40x40x10mm | 1      | Click here   |

### <mark style="color:red;">Misc</mark> <a href="#misc" id="misc"></a>

**Motion system**

| Size                | Type                | Amount      | Stores                                                        |
| ------------------- | ------------------- | ----------- | ------------------------------------------------------------- |
| M5X30mm             | Precision dowel pin | 10          | [Click here](/resources/sourcing-guide#m5-x-30mm-dowel-pin)   |
| 5\*13\*4 mm         | F695-2RS            | 20          | Click here                                                    |
| 6mm                 | 2GT 20T Idler       | 2           | Click here                                                    |
| 6mm                 | 2GT 20T Pulley      | 2           | Click here                                                    |
| Check note in store | GATES-LL-2GT        | READ NOTE → | Click here                                                    |

### <mark style="color:red;">**Other**</mark>

| Size             | Type                                        | Amount | Stores       |
| ---------------- | ------------------------------------------- | ------ | ------------ |
| M3 X D5.0 X L4.0 | Heatset insert                              | 50     | Click here   |
| M3               | Hex Nut                                     | 10     | Click here   |
| M3 Washer        | <p>Normal grade A M3<br>Stainless Steel</p> | 10     | Click here   |
| M5 Washer/Shim   | <p>Normal grade A M5<br>Stainless Steel</p> | 40     | Click here   |

[^1]: **Optional Upgrade**

    Compatible with (5/pro) - 370mm, only works with the rail on top. You need a 330mm MGN12H rail!

[^2]: **Optional Upgrade**

    Compatible with (5 plus) - 500mm, only works with the rail on top. You need a 450mm MGN12H rail!


# Files

### <mark style="color:red;">Print settings</mark> <a href="#print-settings" id="print-settings"></a>

For the recommended settings when printing our parts, please click [here](https://docs.zerog.one/standard/print/settings). Deviating from these settings may result in lower quality prints, loss of features, and improper alignment.

{% hint style="info" %}
File names starting with 'a' can be printed in an accent color.
{% endhint %}

### <mark style="color:red;">Stepper Towers</mark>

```
Estimated filament used: ~66g
```

<table><thead><tr><th width="99.5" data-type="image">Image</th><th width="299.5">File Name</th><th width="100">Qty.</th><th width="179.5">Plastic</th></tr></thead><tbody><tr><td></td><td><a href="https://github.com/ZeroGDesign/MercuryOne/blob/MercuryOne.1/STLs/Stepper_Towers/a_Stepper_Mount_Bottom_Left.stl">a_Stepper_Mount_Bottom_Left.stl</a></td><td>1x</td><td>ABS/ASA</td></tr><tr><td></td><td><a href="https://github.com/ZeroGDesign/MercuryOne/blob/MercuryOne.1/STLs/Stepper_Towers/a_Stepper_Mount_Bottom_Right.stl">a_Stepper_Mount_Bottom_Right.stl</a></td><td>1x</td><td>ABS/ASA</td></tr><tr><td></td><td><a href="https://github.com/ZeroGDesign/MercuryOne/blob/MercuryOne.1/STLs/Stepper_Towers/a_Stepper_Mount_Top_Left.stl">a_Stepper_Mount_Top_Left.stl</a></td><td>1x</td><td>ABS/ASA</td></tr><tr><td></td><td><a href="https://github.com/ZeroGDesign/MercuryOne/blob/MercuryOne.1/STLs/Stepper_Towers/a_Stepper_Mount_Top_Right.stl">a_Stepper_Mount_Top_Right.stl</a></td><td>1x</td><td>ABS/ASA</td></tr></tbody></table>

### <mark style="color:red;">XY Joints</mark>

{% tabs %}
{% tab title="Top Mount XY" %}

```
Estimated filament used: ~44g
```

<table><thead><tr><th width="100">Image</th><th width="300" valign="middle">File Name</th><th width="99.5">Qty.</th><th width="98.5">Plastic</th><th width="299">Notes</th></tr></thead><tbody><tr><td></td><td valign="middle"><a href="https://github.com/ZeroGDesign/MercuryOne/blob/MercuryOne.1/STLs/XY_Joints/XJoint_left_bottom.stl">XJoint_Bottom_Left.stl</a></td><td>1x</td><td>ABS/ASA</td><td></td></tr><tr><td></td><td valign="middle"><a href="https://github.com/ZeroGDesign/MercuryOne/blob/MercuryOne.1/STLs/XY_Joints/XJoint_right_bottom.stl">XJoint_Bottom_Right.stl</a></td><td>1x</td><td>ABS/ASA</td><td></td></tr><tr><td></td><td valign="middle"><a href="https://github.com/ZeroGDesign/MercuryOne/blob/MercuryOne.1/STLs/XY_Joints/XJoint_left_top.stl">XJoint_Top_Left.stl</a></td><td>1x</td><td>ABS/ASA</td><td></td></tr><tr><td></td><td valign="middle"><a href="https://github.com/ZeroGDesign/MercuryOne/blob/MercuryOne.1/STLs/XY_Joints/XJoint_right_top.stl">XJoint_Top_Right.stl</a></td><td>1x</td><td>ABS/ASA</td><td></td></tr><tr><td></td><td valign="middle"><a href="https://github.com/ZeroGDesign/MercuryOne/blob/MercuryOne.1/STLs/XY_Joints/a_Flange_Spacer_Pair.stl">a_Flange_Spacer_pair.stl</a></td><td>1x</td><td>ABS/ASA</td><td></td></tr><tr><td></td><td valign="middle"><a href="https://github.com/ZeroGDesign/MercuryOne/blob/MercuryOne.1/STLs/XY_Joints/a_Xjoint_10mm_Idler_Spacers.stl">a_XJoint_10mm_Idler_Spacers.stl</a></td><td>1x</td><td>ABS/ASA</td><td><a href="/projects/mercury-one.1/build-instruction/phase-1/printing#measuring-parts">Measure Parts</a></td></tr><tr><td></td><td valign="middle"><a href="https://github.com/ZeroGDesign/MercuryOne/blob/MercuryOne.1/STLs/XY_Joints/a_Xjoint_9mm_Idler_Spacers.stl">a_XJoint_9mm_Idler_Spacers.stl</a></td><td>1x</td><td>ABS/ASA</td><td><a href="/projects/mercury-one.1/build-instruction/phase-1/printing#measuring-parts">Measure Parts</a></td></tr><tr><td></td><td valign="middle"><a href="https://github.com/ZeroGDesign/MercuryOne/blob/MercuryOne.1/STLs/XY_Joints/a_Xjoint_8mm_Idler_Spacers.stl">a_XJoint_8mm_Idler_Spacers.stl</a></td><td>1x</td><td>ABS/ASA</td><td><a href="/projects/mercury-one.1/build-instruction/phase-1/printing#measuring-parts">Measure Parts</a></td></tr></tbody></table>

{% hint style="info" %}
Only print the **XJoint Idler Spacers** relevant for your setup.
{% endhint %}
{% endtab %}

{% tab title="Front Mount XY Joints" %}

```
Estimated filament used: ~44g
```

|               |   |   |
| ------------- | - | - |
|               |   |   |
|               |   |   |
|               |   |   |
| {% endtab %}  |   |   |
| {% endtabs %} |   |   |

### <mark style="color:red;">Front Towers</mark>

```
Estimated filament used: ~39g
```

<table><thead><tr><th width="99.5">Image</th><th width="299.5">File Name</th><th width="99.5">Qty.</th><th width="100">Plastic</th><th>Notes</th></tr></thead><tbody><tr><td></td><td><a href="https://github.com/ZeroGDesign/MercuryOne/blob/MercuryOne.1/STLs/Front_Towers/a_Front_Tower_Left.stl">a_Front_Tower_Left.stl</a></td><td>1x</td><td>ABS/ASA</td><td></td></tr><tr><td></td><td><a href="https://github.com/ZeroGDesign/MercuryOne/blob/MercuryOne.1/STLs/Front_Towers/a_Front_Tower_Right.stl">a_Front_Tower_Right.stl</a></td><td>1x</td><td>ABS/ASA</td><td></td></tr><tr><td></td><td><a href="https://github.com/ZeroGDesign/MercuryOne/blob/MercuryOne.1/STLs/Front_Towers/Front_Tension_Plate_T-Nut_x2.stl">Front_Tension_Plate_T-Nut_x2.stl</a><br></td><td>2x</td><td>ABS/ASA</td><td><a href="/projects/mercury-one.1/build-instruction/phase-1/printing#recommended-print-settings">More Info</a></td></tr><tr><td></td><td><a href="https://github.com/ZeroGDesign/MercuryOne/blob/MercuryOne.1/STLs/Front_Towers/Front_Tension_Plate_Tapped_x2.stl">Front_Tension_Plate_Tapped_x2.stl</a></td><td>2x</td><td>ABS/ASA</td><td><a href="/projects/mercury-one.1/build-instruction/phase-1/printing#recommended-print-settings">More Info</a></td></tr></tbody></table>

{% hint style="info" %}
Learn about Tapped vs T-Nut front tensioner plates [**here**](/projects/mercury-one.1/build-instruction/phase-1/printing#recommended-print-settings)
{% endhint %}

### <mark style="color:red;">Tools</mark>

```
Estimated filament used: ~11g
```

<table><thead><tr><th width="100">Image</th><th width="299.5">File Name</th><th width="100">Qty.</th><th width="180.5">Plastic</th></tr></thead><tbody><tr><td></td><td><a href="https://github.com/ZeroGDesign/MercuryOne/blob/MercuryOne.1/STLs/Tools/Tool_Front_Tower_.stl">Tool_Front_Tower.stl</a></td><td>1x</td><td>PLA/PETG/ABS/ASA</td></tr><tr><td></td><td><a href="https://github.com/ZeroGDesign/MercuryOne/blob/MercuryOne.1/STLs/Tools/Tool_Front_Tower__Brass.stl">Tool_Front_Tower_Brass.stl</a></td><td>1x</td><td>PLA/PETG/ABS/ASA</td></tr><tr><td></td><td><a href="https://github.com/ZeroGDesign/MercuryOne/blob/MercuryOne.1/STLs/Tools/Tool_Pulley_alignment_Left.stl">Tool_Pulley_Alignment_Left.stl</a></td><td>1x</td><td>PLA/PETG/ABS/ASA</td></tr><tr><td></td><td><a href="https://github.com/ZeroGDesign/MercuryOne/blob/MercuryOne.1/STLs/Tools/Tool_Pulley_Alignment_Right.stl">Tool_Pulley_Alignment_Right.stl</a></td><td>1x</td><td>PLA/PETG/ABS/ASA</td></tr><tr><td></td><td><a href="https://github.com/ZeroGDesign/MercuryOne/blob/MercuryOne.1/STLs/Tools/Tool_Rail_Alignment_.stl">Tool_Rail_Alignment.stl</a></td><td>x2</td><td>PLA/PETG/ABS/ASA</td></tr></tbody></table>

### <mark style="color:red;">Misc</mark>

```
Estimated filament used: ~38g
```

<table><thead><tr><th width="100">Image</th><th width="299.5">File Name</th><th width="100.5">Qty.</th><th width="100">Plastic</th><th>Notes</th></tr></thead><tbody><tr><td></td><td><a href="https://github.com/ZeroGDesign/MercuryOne/blob/MercuryOne.1/STLs/Misc/Rear_Splitloom_Arm.stl">Rear_Splitloom_Arm.stl</a></td><td>1x</td><td>ABS/ASA</td><td></td></tr><tr><td></td><td><a href="https://github.com/ZeroGDesign/MercuryOne/blob/MercuryOne.1/STLs/Misc/Y_Endstop.stl">Y_Endstop.stl</a></td><td>1x</td><td>ABS/ASA</td><td></td></tr><tr><td></td><td><a href="https://github.com/ZeroGDesign/MercuryOne/blob/MercuryOne.1/STLs/Misc/5_Pro/Pro_Only_Z_Drop_Bracket_x2.stl">Pro_Only_Z_Drop_Bracket_x2.stl</a></td><td>2x</td><td>ABS/ASA</td><td><strong>ONLY</strong> used for the Pro</td></tr><tr><td></td><td><a href="https://github.com/ZeroGDesign/MercuryOne/blob/MercuryOne.1/STLs/Misc/5_Plus/Plus_Only_Bed_Raiser_x4.stl">Plus_Only_Bed_Raiser_x4.stl</a></td><td>4x</td><td>ABS/ASA</td><td><strong>ONLY</strong> Used for the Plus</td></tr></tbody></table>

### <mark style="color:red;">Optional: Lightweight Gantry Files</mark>

```
Estimated filament used: ~2g
```

<table><thead><tr><th width="99.5">Image</th><th width="300">File Name</th><th width="100">Qty.</th><th width="99.5">Plastic</th><th>Notes</th></tr></thead><tbody><tr><td></td><td><a href="https://github.com/ZeroGDesign/MercuryOne/blob/MercuryOne.1/STLs/Misc/Lightweight_Gantry/x_endstop_block.stl">x_endstop_block.stl</a></td><td>1x</td><td>ABS/ASA</td><td><strong>ONLY</strong> Used for the Pro</td></tr><tr><td></td><td><a href="https://github.com/ZeroGDesign/MercuryOne/blob/MercuryOne.1/STLs/Misc/Lightweight_Gantry/x_endstop_block_PLUS.stl">x_endstop_block_PLUS.stl</a></td><td>1x</td><td>ABS/ASA</td><td><strong>ONLY</strong> Used for the Plus</td></tr></tbody></table>

{% hint style="info" %}
These are only applicable if the Fysetc Lightweight Gantry Is used.
{% endhint %}

### <mark style="color:red;">Nebula Specific Parts</mark>

```
Estimated filament used: ~54g
```

<table><thead><tr><th width="99.5">Image</th><th width="300">File Name</th><th width="99.5">Qty.</th><th width="99.5">Plastic</th><th>Notes</th></tr></thead><tbody><tr><td></td><td><a href="https://github.com/ZeroGDesign/Nebula/blob/Nebula1/STLs/Misc/Nebula_Left_Stepper_Bottom.stl">Nebula_Left_Stepper_Bottom.stl</a></td><td>1x</td><td>ABS/ASA</td><td></td></tr><tr><td></td><td><a href="https://github.com/ZeroGDesign/Nebula/blob/Nebula1/STLs/Misc/Nebula_Right_Stepper_Bottom.stl">Nebula_Right_Stepper_Bottom.stl</a></td><td>1x</td><td>ABS/ASA</td><td></td></tr><tr><td></td><td><a href="https://github.com/ZeroGDesign/Nebula/blob/Nebula1/STLs/Misc/Enclosure_Tension_Plate.stl">Enclosure_Tension_Plate.stl</a></td><td>2x</td><td>ABS/ASA</td><td></td></tr></tbody></table>

{% hint style="info" %}
Thees parts are only needed if you're doing a Mercury build using the Nebula Frame.
{% endhint %}


# Build Instruction

<table data-card-size="large" data-view="cards"><thead><tr><th>Phase</th><th>Link</th><th>About</th><th data-hidden data-card-cover data-type="files"></th></tr></thead><tbody><tr><td>1</td><td><a href="/projects/mercury-one.1/build-instruction/phase-1">Get Started -></a></td><td>Information about printing, concepts and hardware</td><td><a href="https://834763357-files.gitbook.io/~/files/v0/b/gitbook-x-prod.appspot.com/o/spaces%2FXgzDoYdwl0Vuu3qB4KOp%2Fuploads%2F5GaFkTagYS8qiOgLLiIJ%2Fheader_image_phase1.png?alt=media&amp;token=051c201a-6a8b-483b-afec-bd8f7795c8fb">header_image_phase1.png</a></td></tr><tr><td>2</td><td>Get Started -></td><td>Heat Set Inserts, Dowel Pins, Linear Rails, Z-Drop and Z-lift Brackets</td><td></td></tr><tr><td>3</td><td>Get Started -></td><td>Soon TM</td><td></td></tr><tr><td>4</td><td>Get Started -></td><td>Soon TM</td><td></td></tr></tbody></table>


# Mercury One.1

This pages will point you in the right direction.

We're still working on our new documentation website, for now we'll have the Mercury One.1 instructions available as a PDF.

## <mark style="color:red;">Build Instructions</mark> <a href="#build-instructions" id="build-instructions"></a>

It’s time to roll up our sleeves and get building with the release of our long-awaited PDF build instructions for the Mercury One.1.

We owe a huge debt of gratitude to our incredible community member,  *<mark style="color:red;">**Jonspaceharper**</mark>, for their dedication in bringing these instructions to life.*

But we couldn’t have done it without you, our community! Your continuous feedback and support have been instrumental in refining both the build instructions and the project itself.

## <mark style="color:red;">PDF</mark> <a href="#pdf" id="pdf"></a>

### <mark style="color:red;">Download Link</mark> <a href="#download-link" id="download-link"></a>

Click [here](https://docs.zerog.one/assets/mercury_one_1_instruction_18-02-2024.pdf) to download the latest Build Manual.

If the link doesn’t work, you can copy and paste this URL into your browser:

{% embed url="<https://docs.zerog.one/assets/mercury_one_1_instruction_18-02-2024.pdf>" %}

Please note that the download may take a while, as the file size is quite large.

### <mark style="color:red;">Version</mark> <a href="#version" id="version"></a>

The current version is dated 2024-02-18, which is also indicated in the PDF file’s bottom right corner.


# Phase 1

Pre-Flight Checks, general need to know information before getting started.


# Printing

Which parts do you NEED to print to get started?

## <mark style="color:red;">Measuring parts</mark>

We're going to measure some parts to make sure you've got the correct files to print. This is highly important to make sure pulleys and idlers move smoothly.

### <mark style="color:red;">Measure your toothed idler</mark>

We support several types of toothed idlers. To find the correct spacers, measure your idler’s height and check the next page for the corresponding spacers.

<figure><img src="https://834763357-files.gitbook.io/~/files/v0/b/gitbook-x-prod.appspot.com/o/spaces%2FXgzDoYdwl0Vuu3qB4KOp%2Fuploads%2FHGjDosoC7Lvlqwh4580C%2Ftoothed_idler_merc_measure.png?alt=media&amp;token=8f1180fe-e3e5-4567-86d1-bb5b42119fb3" alt=""><figcaption></figcaption></figure>

### <mark style="color:red;">Find your spacer</mark>

Print the matching spacer to your idler’s height. Each spacer has one (1) dot[^1] for 8.5mm, two (2) for 9mm, and three (3) for 10mm.

The Configurator should include the correct file for you, but we’ve also included direct links below.

{% hint style="info" %}
Once measured, the tabs below will tell you what the printed spacer should look like, if it's hard to see click the image to enlarge it.
{% endhint %}

<details>

<summary><strong>10mm</strong></summary>

**You measured 10mm**

[a\_Xjoint\_10mm\_Idler\_Spacers.stl](https://github.com/ZeroGDesign/docs/blob/gh-pages/docs/assets/stl/m1_1/a_Xjoint_10mm_Idler_Spacers.stl)

Here is an example of the printed spacer you need

<img src="https://834763357-files.gitbook.io/~/files/v0/b/gitbook-x-prod.appspot.com/o/spaces%2FXgzDoYdwl0Vuu3qB4KOp%2Fuploads%2F03l64RoFOvKVVfUSvRZW%2Fmerc_spacer_10mm.png?alt=media&amp;token=a58a1e39-8759-494e-aa64-dc1bfb9a5b5a" alt="" data-size="original">

</details>

<details>

<summary><strong>9mm</strong></summary>

**You measured 9mm**

[a\_Xjoint\_9mm\_Idler\_Spacers.stl](https://github.com/ZeroGDesign/docs/blob/gh-pages/docs/assets/stl/m1_1/a_Xjoint_9mm_Idler_Spacers.stl)\
Here is an example of the printed spacer you need

<img src="https://834763357-files.gitbook.io/~/files/v0/b/gitbook-x-prod.appspot.com/o/spaces%2FXgzDoYdwl0Vuu3qB4KOp%2Fuploads%2F5jGbfh1pxBTaLe3S9olv%2Fmerc_spacer_9mm.png?alt=media&amp;token=d51f4fb0-f7c0-417d-bfdb-edbf7fd1e8a0" alt="" data-size="original">

</details>

<details>

<summary><strong>8.5mm</strong></summary>

**You measured 8.5mm**

[a\_Xjoint\_8mm\_Idler\_Spacers.stl](https://github.com/ZeroGDesign/docs/blob/gh-pages/docs/assets/stl/m1_1/a_Xjoint_8mm_Idler_Spacers.stl)

Here is an example of the printed spacer you need

<img src="https://834763357-files.gitbook.io/~/files/v0/b/gitbook-x-prod.appspot.com/o/spaces%2FXgzDoYdwl0Vuu3qB4KOp%2Fuploads%2FVgjv74CbIgZCuo7iAjHR%2Fmerc_spacer_8mm.png?alt=media&amp;token=09bad966-37b7-46a1-bfbf-953ec0e95808" alt="" data-size="original">

</details>

***

## <mark style="color:red;">Tapped or T-Nut Tensioner plate?</mark> <a href="#recommended-print-settings" id="recommended-print-settings"></a>

#### <mark style="color:red;">Tapped front tension plate</mark>

The tapped version threads your extrusion directly. You'll use a tap to cut threads into the end of the aluminum extrusion, creating a threaded hole for the plate to screw into. We recommend using a spiral flute tap for clean, easy tapping.&#x20;

#### <mark style="color:red;">T-nut front tension plate</mark>

The T-nut version uses the front slot of your extrusion. You insert two T-nuts into the slot, then screw the plate into those T-nuts. This approach works well if you don't have tapping tools.

{% hint style="info" %}
**Nebula Frame**: If you're building the **Nebula Frame**, you must use the tapped front tension plate. The door clearance requires the smaller profile of the tapped version.
{% endhint %}

## <mark style="color:red;">Recommended print settings</mark> <a href="#recommended-print-settings" id="recommended-print-settings"></a>

* First layer height: 0.25mm (This is required. Our parts have been designed for this.)
* Layer height: 0.2mm
* Extrusion width: 0.4mm, forced
* Infill percentage: 40%
* Infill type: Adaptive Cubic, grid, gyroid, honeycomb, triangle, or cubic
* Wall count: 4
* Solid top/bottom layers: 5
* Seam placement: **REAR**
  * This is important as we have seam relieve features that line up with the seam placement.
* Supports: NONE

{% hint style="info" %}
Over-extrusion leads to top layers with an inconsistent finish and/or blobbing. Check the top surfaces on the stepper towers and X joints, as these are mating faces.

Light sanding with sandpaper can help remove rough surfaces and ensure a proper fit between parts.
{% endhint %}

[^1]: The printed spacers include a small dot in the bottom that'll tell you the size so you don't lose track.


# Concepts

This page outlines our concepts and naming conventions, which we'll reference in the build instructions later.

## <mark style="color:red;">Printed part codes</mark>

Our parts have printed codes to aid assembly.

1. A part code identifies
   1. If the part belongs on the **left (‘L’)** or **right (‘R’)** side of the printer.
   2. The **version** of the part.

<figure><img src="https://834763357-files.gitbook.io/~/files/v0/b/gitbook-x-prod.appspot.com/o/spaces%2FXgzDoYdwl0Vuu3qB4KOp%2Fuploads%2FjycCRH6nSra3Xk9eKGoS%2Fmerc_naming_concept_example.png?alt=media&amp;token=56a04860-1760-4959-abc3-cc8e662cde3a" alt=""><figcaption></figcaption></figure>

## <mark style="color:red;">Flange Stacks</mark>

Flange stacks (along with 5x30mm dowel pins) are used to create smooth idlers.

{% hint style="info" %}
Quality idlers, smooth and toothed, are key for your printer's performance. We use flange stacks throughout assembly.
{% endhint %}

Single flange stacks use

* [**three (3)** shims](#user-content-fn-1)[^1] and [**two (2)** bearings](#user-content-fn-2)[^2].

Double stacks uses

* [**five (5**) shims](#user-content-fn-1)[^1] and [**four (4)** bearings](#user-content-fn-2)[^2].

<figure><img src="https://834763357-files.gitbook.io/~/files/v0/b/gitbook-x-prod.appspot.com/o/spaces%2FXgzDoYdwl0Vuu3qB4KOp%2Fuploads%2FFRkuDgFyw2p2Cki2ZuDH%2Fflange_stack_example_concept.png?alt=media&amp;token=2067fa24-00d1-476b-9f19-036e56e7cc24" alt=""><figcaption></figcaption></figure>

## <mark style="color:red;">Types of Idlers</mark>

### <mark style="color:red;">Smooth Idlers</mark>

[Smooth idlers](#user-content-fn-3)[^3] are the most common idler that we will use; they turn the belt around its smooth side.

A **single flange stack** has **one (1)** smooth idler; a **double flange stack** has **two (2)**.

<figure><img src="https://834763357-files.gitbook.io/~/files/v0/b/gitbook-x-prod.appspot.com/o/spaces%2FXgzDoYdwl0Vuu3qB4KOp%2Fuploads%2FgCFXu2QSj9GiJdgt7m0a%2Fimage.png?alt=media&amp;token=e238a3f7-b56b-4cf0-9828-657c2b5a107c" alt=""><figcaption></figcaption></figure>

### <mark style="color:red;">Toothed Idlers</mark>

**Toothed idlers** are used on the **X joints only**. These are used when the belt turns towards its toothed side.

<figure><img src="https://834763357-files.gitbook.io/~/files/v0/b/gitbook-x-prod.appspot.com/o/spaces%2FXgzDoYdwl0Vuu3qB4KOp%2Fuploads%2FvPAZZqHbvFCi0swaQFlL%2Fimage.png?alt=media&amp;token=a04ba1b2-2082-482b-a9b3-8a3077ac0481" alt="" width="375"><figcaption></figcaption></figure>

[^1]: M5X1MM

[^2]: F695 BEARING

[^3]: Revering to one step up, this is our definition of Smooth Idlers.


# Introduction

<table data-card-size="large" data-view="cards" data-full-width="false"><thead><tr><th>Difficulty</th><th>Language</th></tr></thead><tbody><tr><td>Moderate to experienced</td><td>English</td></tr></tbody></table>

### Tools required <a href="#tools-required" id="tools-required"></a>

<table><thead><tr><th></th><th width="311.3333333333333"></th><th></th></tr></thead><tbody><tr><td>Tool<br>Description</td><td>Soldering iron<br>Used for heat set inserts</td><td><a href="https://docs.zerog.one/manual/build/hydra/introduction#lightbox__item_1"><img src="https://docs.zerog.one/assets/images/tools/soldering_iron.png" alt="soldering iron"></a></td></tr><tr><td>Tool<br>Description<br>Sizes</td><td>Hex Keys<br>Used to tighten and losen bolts<br>2mm, 2.5mm, 3mm, 4mm</td><td><a href="https://docs.zerog.one/manual/build/hydra/introduction#lightbox__item_2"><img src="https://docs.zerog.one/assets/images/tools/wera_hexkeys.png" alt="soldering iron"></a></td></tr></tbody></table>

### Do’s and don’ts <a href="#dos-and-donts" id="dos-and-donts"></a>

1. **Read and execute the instructions.**
2. **Got questions?**
   1. Join our [Discord server ](https://discord.gg/zerog).
3. **Don’t just look at images.**
   1. An image doesn’t explain the full story.
   2. There is text that will explain every step, read it carefully.
4. **Don’t skip instructions.**
   1. Unless we tell you to.
5. **Don’t use force, you shouldn’t have too.**
   1. Make sure to not use a unreasonable amount of force.
   2. Plastic does break and flange bearings crack, would be a waste wouldn’t it?


# Bill of Material

The tables contain a column named `Stores`. Click the [red text](https://docs.zerog.one/manual/build/hydra/bill_of_material#) underneath to reveal a pop-up with a list of stores. Stores that contain a checkmark  have been verified and tested by either an Engineer or a trusted community member.

### <mark style="color:red;">Kits</mark> <a href="#kits" id="kits"></a>

We **do not** own the kits. We’re **not responsible** for these kits. **Make sure to check the included hardware**. These kits might not contain all the hardware needed.

#### <mark style="color:red;">All kits</mark> <a href="#all-kits" id="all-kits"></a>

| Type      | Stores                                                                              |
| --------- | ----------------------------------------------------------------------------------- |
| Hydra kit | [Click here](https://docs.zerog.one/manual/build/hydra/bill_of_material#hydra_kits) |

## <mark style="color:red;">Self sourcing</mark> <a href="#self-sourcing" id="self-sourcing"></a>

### <mark style="color:red;">Bolts</mark> <a href="#bolts" id="bolts"></a>

| Size  | Type                 | Amount | Stores                                                                               |
| ----- | -------------------- | ------ | ------------------------------------------------------------------------------------ |
| M3X6  | ISO 10642 / DIN 7991 | 6      | [Click here](https://docs.zerog.one/manual/build/hydra/bill_of_material#m3x6_7991)   |
| M3X8  | ISO 4762 / DIN 912   | 85     | [Click here](broken://pages/Q0RxUEio22ZqY8XylQah#m3-x-8mm-shcs)                      |
| M3X10 | ISO 4762 / DIN 912   | 3      | [Click here](https://docs.zerog.one/manual/build/hydra/bill_of_material#m3x10_912)   |
| M4X16 | ISO 4762 / DIN 912   | 3      | [Click here](https://docs.zerog.one/manual/build/hydra/bill_of_material#m4x16_912)   |
| M5X8  | ISO 7380 / DIN 7380  | 4      | [Click here](https://docs.zerog.one/manual/build/hydra/bill_of_material#m5x8_7380)   |
| M5X10 | ISO 4762 / DIN 912   | 18     | [Click here](https://docs.zerog.one/manual/build/hydra/bill_of_material#m5x10_912)   |

### <mark style="color:red;">T-Nuts</mark> <a href="#t-nuts" id="t-nuts"></a>

| Size | Type                  | Amount | Stores                                                                                    |
| ---- | --------------------- | ------ | ----------------------------------------------------------------------------------------- |
| M3   | Roll in spring loaded | 24     | [Click here](https://docs.zerog.one/manual/build/hydra/bill_of_material#m3_rollin_tnut)   |
| M5   | Roll in spring loaded | 22     | [Click here](https://docs.zerog.one/manual/build/hydra/bill_of_material#m5_rollin_tnut)   |

### <mark style="color:red;">Extrusions</mark> <a href="#extrusions" id="extrusions"></a>

*Note: Ender 5 (Pro) and Ender 5 Plus have different sizes for parts.*

| Printer       | Size  | Type           | Amount | Stores                                                                                    |
| ------------- | ----- | -------------- | ------ | ----------------------------------------------------------------------------------------- |
| Ender 5 (Pro) | 400mm | 2020 Extrusion | 1      | [Click here](https://docs.zerog.one/manual/build/hydra/bill_of_material#extrusion_2020)   |
| Ender 5 Plus  | 510mm | 2020 Extrusion | 1      | [Click here](https://docs.zerog.one/manual/build/hydra/bill_of_material#extrusion_2020)   |

### <mark style="color:red;">Linear rails</mark> <a href="#linear-rails" id="linear-rails"></a>

*Note: Ender 5 (Pro) and Ender 5 Plus have different sizes for parts.*

| Printer       | Size  | Type             | Amount | Stores                                                                                 |
| ------------- | ----- | ---------------- | ------ | -------------------------------------------------------------------------------------- |
| X             | 100mm | MGN9C            | 3      | [Click here](https://docs.zerog.one/manual/build/hydra/bill_of_material#MGN9C_100mm)   |
| Ender 5 (Pro) | 400mm | MGN12C OR MGN12H | 3      | [Click here](https://docs.zerog.one/manual/build/hydra/bill_of_material#MGN12_400mm)   |
| Ender 5 Plus  | 500mm | MGN12C OR MGN12H | 3      | [Click here](https://docs.zerog.one/manual/build/hydra/bill_of_material#MGN12_500mm)   |

### <mark style="color:red;">Leadscrew</mark> <a href="#leadscrew" id="leadscrew"></a>

*Note: Ender 5 (Pro) and Ender 5 Plus have different sizes for parts. Leadscrews can vary in sizes.*

Make sure to look for Leadscrews that include a circular T8 Nut with 4 holes.

| Printer       | Size Range    | Type          | Amount | Stores                                                                                   |
| ------------- | ------------- | ------------- | ------ | ---------------------------------------------------------------------------------------- |
| Ender 5 (Pro) | 350mm / 370mm | TR8 Leadscrew | 3      | [Click here](https://docs.zerog.one/manual/build/hydra/bill_of_material#TR8_Leadscrew)   |
| Ender 5 Plus  | 450mm / 470mm | TR8 Leadscrew | 3      | [Click here](https://docs.zerog.one/manual/build/hydra/bill_of_material#TR8_Leadscrew)   |

### <mark style="color:red;">Magnets</mark> <a href="#magnet" id="magnet"></a>

| Size             | Type                                                 | Amount | Stores                                                                                    |
| ---------------- | ---------------------------------------------------- | ------ | ----------------------------------------------------------------------------------------- |
| 12x5mm or 12x4mm | <p>4mm hole Neodymium<br>Countersunk Ring Magnet</p> | 3      | [Click here](https://docs.zerog.one/manual/build/hydra/bill_of_material#12x5_cs_magnet)   |

### <mark style="color:red;">Bed</mark> <a href="#bed" id="bed"></a>

| Printer       | Size          | Type              | Amount | Stores                                                                                |
| ------------- | ------------- | ----------------- | ------ | ------------------------------------------------------------------------------------- |
| Ender 5 (Pro) | 255/275mm     | Bed heater        | 1      | [Click here](https://docs.zerog.one/manual/build/hydra/bill_of_material#bed_heater)   |
| Ender 5 Plus  | 377mm         | Bed heater        | 1      | [Click here](https://docs.zerog.one/manual/build/hydra/bill_of_material#bed_heater)   |
| Ender 5 (Pro) | 255/275mm     | Aluminum bed      | 1      | [Click here](https://docs.zerog.one/manual/build/hydra/bill_of_material#hydra_bed)    |
| Ender 5 Plus  | 377mm         | Aluminum bed      | 1      | [Click here](https://docs.zerog.one/manual/build/hydra/bill_of_material#hydra_bed)    |
| X             | Case specific | Solid State Relay | 1      | [Click here](https://docs.zerog.one/manual/build/hydra/bill_of_material#ssr)          |

### <mark style="color:red;">Misc</mark> <a href="#misc" id="misc"></a>

| Size              | Type                                        | Amount | Stores                                                                                         |
| ----------------- | ------------------------------------------- | ------ | ---------------------------------------------------------------------------------------------- |
| 2020              | 2020 Corner bracket                         | 2      | [Click here](https://docs.zerog.one/manual/build/hydra/bill_of_material#2020_corner_bracket)   |
| M3 X D5.0 X L4.0  | Heatset insert                              | 39     | [Click here](https://docs.zerog.one/manual/build/hydra/bill_of_material#heatset_insert)        |
| M3 Washer         | <p>Normal grade A M3<br>Stainless Steel</p> | 12     | [Click here](https://docs.zerog.one/manual/build/hydra/bill_of_material#plain_m3_washer)       |
| M4 X 8 X L8       | Spacer                                      | 3      | [Click here](https://docs.zerog.one/manual/build/hydra/bill_of_material#8mm_spacers)           |
| 10mm M4           | Kossel ball                                 | 3      | [Click here](https://docs.zerog.one/manual/build/hydra/bill_of_material#m4_kossel_balls)       |
| 10x11mm - 1 Meter | R18 Drag chain                              | 1      | [Click here](https://docs.zerog.one/manual/build/hydra/bill_of_material#10x11_drag_chain)      |
| Nema17            | Stepper motor                               | 3      | [Click here](https://docs.zerog.one/manual/build/hydra/bill_of_material#nema17_zaxis)          |
| 5mm-8mm           | Shaft Coupling                              | 3      | [Click here](https://docs.zerog.one/manual/build/hydra/bill_of_material#stepper_coupler)       |
| OPTIONAL          | Oldham Coupling                             | 3      | [Click here](https://docs.zerog.one/manual/build/hydra/bill_of_material#oldham_coupler)        |


# Files

### <mark style="color:red;">Print settings</mark> <a href="#print-settings" id="print-settings"></a>

For the recommended settings when printing our parts, please click [here](https://docs.zerog.one/standard/print/settings). Deviating from these settings may result in lower quality prints, loss of features, and improper alignment.

{% hint style="info" %}
File names starting with 'a' can be printed in an accent color.
{% endhint %}

### <mark style="color:red;">Z Stepper Mounts</mark> <a href="#downloading-stl-files" id="downloading-stl-files"></a>

```
Estimated filament used: ~95g
```

<table><thead><tr><th width="100">Image</th><th width="300">File Name</th><th width="80.5">Qty.</th><th width="100">Plastic</th><th>Notes</th></tr></thead><tbody><tr><td></td><td><a href="https://github.com/ZeroGDesign/Hydra/blob/Hydra1/STLs/Stepper_Mounts/Left_Stepper_Mount.stl">Left_Stepper_Mount.stl</a></td><td>1x</td><td>ABS/ASA</td><td></td></tr><tr><td></td><td><a href="https://github.com/ZeroGDesign/Hydra/blob/Hydra1/STLs/Stepper_Mounts/Rear_Stepper_Mount.stl">Rear_Stepper_Mount.stl</a></td><td>1x</td><td>ABS/ASA</td><td></td></tr><tr><td></td><td><a href="https://github.com/ZeroGDesign/Hydra/blob/Hydra1/STLs/Stepper_Mounts/Right_Stepper_Mount.stl">Right_Stepper_Mount.stl</a></td><td>1x</td><td>ABS/ASA</td><td></td></tr></tbody></table>

### <mark style="color:red;">Hydra Arms</mark>

```
Estimated filament used: ~125g
```

<table><thead><tr><th width="100">Image</th><th width="300">File Name</th><th width="80">Qty.</th><th width="100">Plastic</th><th>Notes</th></tr></thead><tbody><tr><td></td><td><a href="https://github.com/ZeroGDesign/Hydra/blob/Hydra1/STLs/Arms/Left_Arm.stl">Left_Arm.stl</a></td><td>1x</td><td>ABS/ASA</td><td></td></tr><tr><td></td><td><a href="https://github.com/ZeroGDesign/Hydra/blob/Hydra1/STLs/Arms/Rear_Arm.stl">Rear_Arm.stl</a></td><td>1x</td><td>ABS/ASA</td><td></td></tr><tr><td></td><td><a href="https://github.com/ZeroGDesign/Hydra/blob/Hydra1/STLs/Arms/Right_Arm.stl">Right_Arm.stl</a></td><td>1x</td><td>ABS/ASA</td><td></td></tr></tbody></table>

### <mark style="color:red;">Mini Tanks</mark>

```
Estimated filament used: ~7g
```

Measure your magnets to find the correct file.

{% hint style="info" %}
Minitanks have a lot of options. We've decided to split them up by magnet size.
{% endhint %}

{% tabs %}
{% tab title="12x5mm Magnet" %}

<table><thead><tr><th width="100">Image</th><th width="299.5">File Name</th><th width="79.5">Qty.</th><th width="100.5">Plastic</th><th width="140.5">Notes</th></tr></thead><tbody><tr><td></td><td><a href="https://github.com/ZeroGDesign/Hydra/blob/Hydra1/STLs/Mini_Tanks/Mini_Tank_12x5_9C.stl">Mini_Tank_12x5_9C.stl</a></td><td>3x</td><td>ABS/ASA</td><td>12x5mm Magnets </td></tr><tr><td></td><td><a href="https://github.com/ZeroGDesign/Hydra/blob/Hydra1/STLs/Mini_Tanks/Mini_Tank_11-7x5_9C.stl">Mini_Tank_11-7x5_9C.stl</a></td><td>3x</td><td>ABS/ASA</td><td>Read below</td></tr></tbody></table>

{% endtab %}

{% tab title="12x4mm Magnet" %}

<table><thead><tr><th width="100">Image</th><th width="299.5">File Name</th><th width="79.5">Qty.</th><th width="100.5">Plastic</th><th width="140.5">Notes</th></tr></thead><tbody><tr><td></td><td><a href="https://github.com/ZeroGDesign/Hydra/blob/Hydra1/STLs/Mini_Tanks/Mini_Tank_12x4_9C.stl">Mini_Tank_12x4_9C.stl</a></td><td>3x</td><td>ABS/ASA</td><td>12x4mm Magnets</td></tr><tr><td></td><td><a href="https://github.com/ZeroGDesign/Hydra/blob/Hydra1/STLs/Mini_Tanks/Mini_Tank_12x4-5_9C.stl">Mini_Tank_12x4-5_9C.stl</a></td><td>3x</td><td>ABS/ASA</td><td>12x4.5mm Magnets</td></tr><tr><td></td><td><a href="https://github.com/ZeroGDesign/Hydra/blob/Hydra1/STLs/Mini_Tanks/Mini_Tank_11-7x4_9C.stl">Mini_Tank_11-7x4_9C.stl</a></td><td>3x</td><td>ABS/ASA</td><td>Read below</td></tr><tr><td></td><td><a href="https://github.com/ZeroGDesign/Hydra/blob/Hydra1/STLs/Mini_Tanks/Mini_Tank_11-7x4-5_9C.stl">Mini_Tank_11-7x4-5_9C.stl</a></td><td>3x</td><td>ABS/ASA</td><td>Read below</td></tr></tbody></table>
{% endtab %}

{% tab title="12x3mm Magnet" %}

<table><thead><tr><th width="100">Image</th><th width="299.5">File Name</th><th width="79.5">Qty.</th><th width="100.5">Plastic</th><th width="140.5">Notes</th></tr></thead><tbody><tr><td></td><td><a href="https://github.com/ZeroGDesign/Hydra/blob/Hydra1/STLs/Mini_Tanks/Mini_Tank_12x3_9C.stl">Mini_Tank_12x3_9C.stl</a></td><td>3x</td><td>ABS/ASA</td><td>12x3mm Magnets</td></tr><tr><td></td><td><a href="https://github.com/ZeroGDesign/Hydra/blob/Hydra1/STLs/Mini_Tanks/Mini_Tank_12x3-5_9C.stl">Mini_Tank_12x3-5_9C.stl</a></td><td>3x</td><td>ABS/ASA</td><td>12x3.5mm Magnets</td></tr><tr><td></td><td><a href="https://github.com/ZeroGDesign/Hydra/blob/Hydra1/STLs/Mini_Tanks/Mini_Tank_11-7x3_9C.stl">Mini_Tank_11-7x3_9C.stl</a></td><td>3x</td><td>ABS/ASA</td><td>Read below</td></tr><tr><td></td><td><a href="https://github.com/ZeroGDesign/Hydra/blob/Hydra1/STLs/Mini_Tanks/Mini_Tank_11-7x3-5_9C.stl">Mini_Tank_11-7x3-5_9C.stl</a></td><td>3x</td><td>ABS/ASA</td><td>Read below</td></tr></tbody></table>
{% endtab %}
{% endtabs %}

{% hint style="warning" %}
We often see that magnets arrive slightly out of spec, we have included files to try account for this.
{% endhint %}

### <mark style="color:red;">Misc</mark>

```
Estimated filament used: ~21g
```

<table><thead><tr><th width="99.5">Image</th><th width="299.5">File Name</th><th width="79.5">Qty.</th><th width="99.5">Plastic</th><th width="142">Notes</th></tr></thead><tbody><tr><td></td><td><a href="https://github.com/ZeroGDesign/Hydra/blob/Hydra1/STLs/Misc/Chain_End.stl">Chain_End.stl</a></td><td>2x</td><td>ABS/ASA</td><td>End for Cable Chain</td></tr><tr><td></td><td><a href="https://github.com/ZeroGDesign/Hydra/blob/Hydra1/STLs/Misc/2020_Cable_Tie.stl">2020_Cable_Tie.stl</a></td><td>3x</td><td>ABS/ASA</td><td>Exact qty. varies</td></tr><tr><td></td><td><a href="https://github.com/ZeroGDesign/Hydra/blob/Hydra1/STLs/Misc/Wago_221_Triple.stl">Wago_221_Triple.stl</a></td><td>1x</td><td>ABS/ASA</td><td>3x 2 Port Wago</td></tr><tr><td></td><td><a href="https://github.com/ZeroGDesign/Hydra/blob/Hydra1/STLs/Misc/Wago_221_Fabreeko_Heater.stl">Wago_221_Fabreeko_Heater.stl</a></td><td>1x</td><td>ABS/ASA</td><td>2x 2 Port, 1x 3 Port Wago</td></tr></tbody></table>


# Build Instruction

<table data-card-size="large" data-view="cards"><thead><tr><th>Phase</th><th>Link</th><th>About</th></tr></thead><tbody><tr><td>1</td><td>Get Started -></td><td>Mostly information, introduction, BoM and other important information</td></tr><tr><td>2</td><td>Get Started -></td><td>Assembly of Hydra Arms</td></tr><tr><td>3</td><td>Get Started -></td><td>Assembly of Rails on Frame</td></tr><tr><td>4</td><td>Get Started -></td><td>Installation of motor mounts</td></tr></tbody></table>


# Phase 1


# 1. Assembling left arm

### <mark style="color:red;">Bed supporting arm</mark> <a href="#bed-supporting-arm" id="bed-supporting-arm"></a>

#### <mark style="color:red;">Left arm</mark> <a href="#left-arm" id="left-arm"></a>

[![Left arm](https://docs.zerog.one/assets/images/instructions/hydra/left_arm/left_arm_complete.png)](https://docs.zerog.one/manual/build/hydra/left_arm#lightbox__item_1)

![Left arm full overview](https://docs.zerog.one/assets/images/instructions/hydra/left_arm/left_arm_complete.png)

The hardware displayed below is for the left arm assembly.

#### <mark style="color:red;">**Hardware**</mark>

<table><thead><tr><th>Type</th><th>Amount</th><th>Image</th><th data-type="files"></th></tr></thead><tbody><tr><td>m3x8mm</td><td>9</td><td><img src="broken://files/xF9CnVNOileR6gZmx94Y" alt="" data-size="original"></td><td></td></tr><tr><td>m3x10mm</td><td>1</td><td><img src="broken://files/eLXWY6aon5uNa4tH2Ld2" alt=""></td><td><a href="broken://files/GE2ITU1qnQqzzD6vEu9N">Broken link</a></td></tr><tr><td>Heatset insert</td><td>10</td><td><img src="broken://files/BJ43ZZavWEPGDUjQduBi" alt=""></td><td></td></tr><tr><td>10mm Kossel ball</td><td>1</td><td></td><td></td></tr><tr><td>12x5x4 countersunk </td><td>1</td><td><img src="https://docs.zerog.one/assets/images/instructions/12x5x4mm_cs_magnet.png" alt="12x5x4 countersunk magnet" data-size="original"></td><td></td></tr><tr><td>MGN9C Rail</td><td>1</td><td><img src="https://docs.zerog.one/assets/images/instructions/mgn9c_100mm.png" alt="MGN9C rail"></td><td><a href="broken://files/0dV6DenQaRdZn7fET6aj">Broken link</a></td></tr></tbody></table>

#### <mark style="color:red;">**Printed part**</mark>

<table data-card-size="large" data-view="cards"><thead><tr><th>File Name</th><th>Description</th><th>Image</th><th>Download</th></tr></thead><tbody><tr><td>left_arm.stl</td><td>Front left support arm for print bed<br></td><td><a href="https://docs.zerog.one/manual/build/hydra/left_arm#lightbox__item_2"><img src="https://docs.zerog.one/assets/images/instructions/hydra/left_front_arm.png" alt="Left front arm"></a></td><td>Here</td></tr><tr><td>MGN9C_12x<em>#</em>Mag.stl</td><td><br>Connects the bed to the rail carriage</td><td><a href="https://docs.zerog.one/manual/build/hydra/left_arm#lightbox__item_3"><img src="https://docs.zerog.one/assets/images/instructions/hydra/mini_tank.png" alt="Smoll tank"></a></td><td>Here</td></tr></tbody></table>

![Left front arm](https://docs.zerog.one/assets/images/instructions/hydra/left_front_arm.png)![Left front arm](https://docs.zerog.one/assets/images/instructions/hydra/mini_tank.png)

We have very specific [settings](https://docs.zerog.one/standard/print/settings) you should print the parts with, they’ve been designed around these settings.

### <mark style="color:red;">Left arm assembly</mark> <a href="#left-arm-assembly" id="left-arm-assembly"></a>

#### <mark style="color:red;">**Inserting the heat inserts**</mark>

Printed part required:

| Filename : | left\_arm.stl | [![Left front arm](https://docs.zerog.one/assets/images/instructions/hydra/left_front_arm.png)](https://docs.zerog.one/manual/build/hydra/left_arm#lightbox__item_2) |
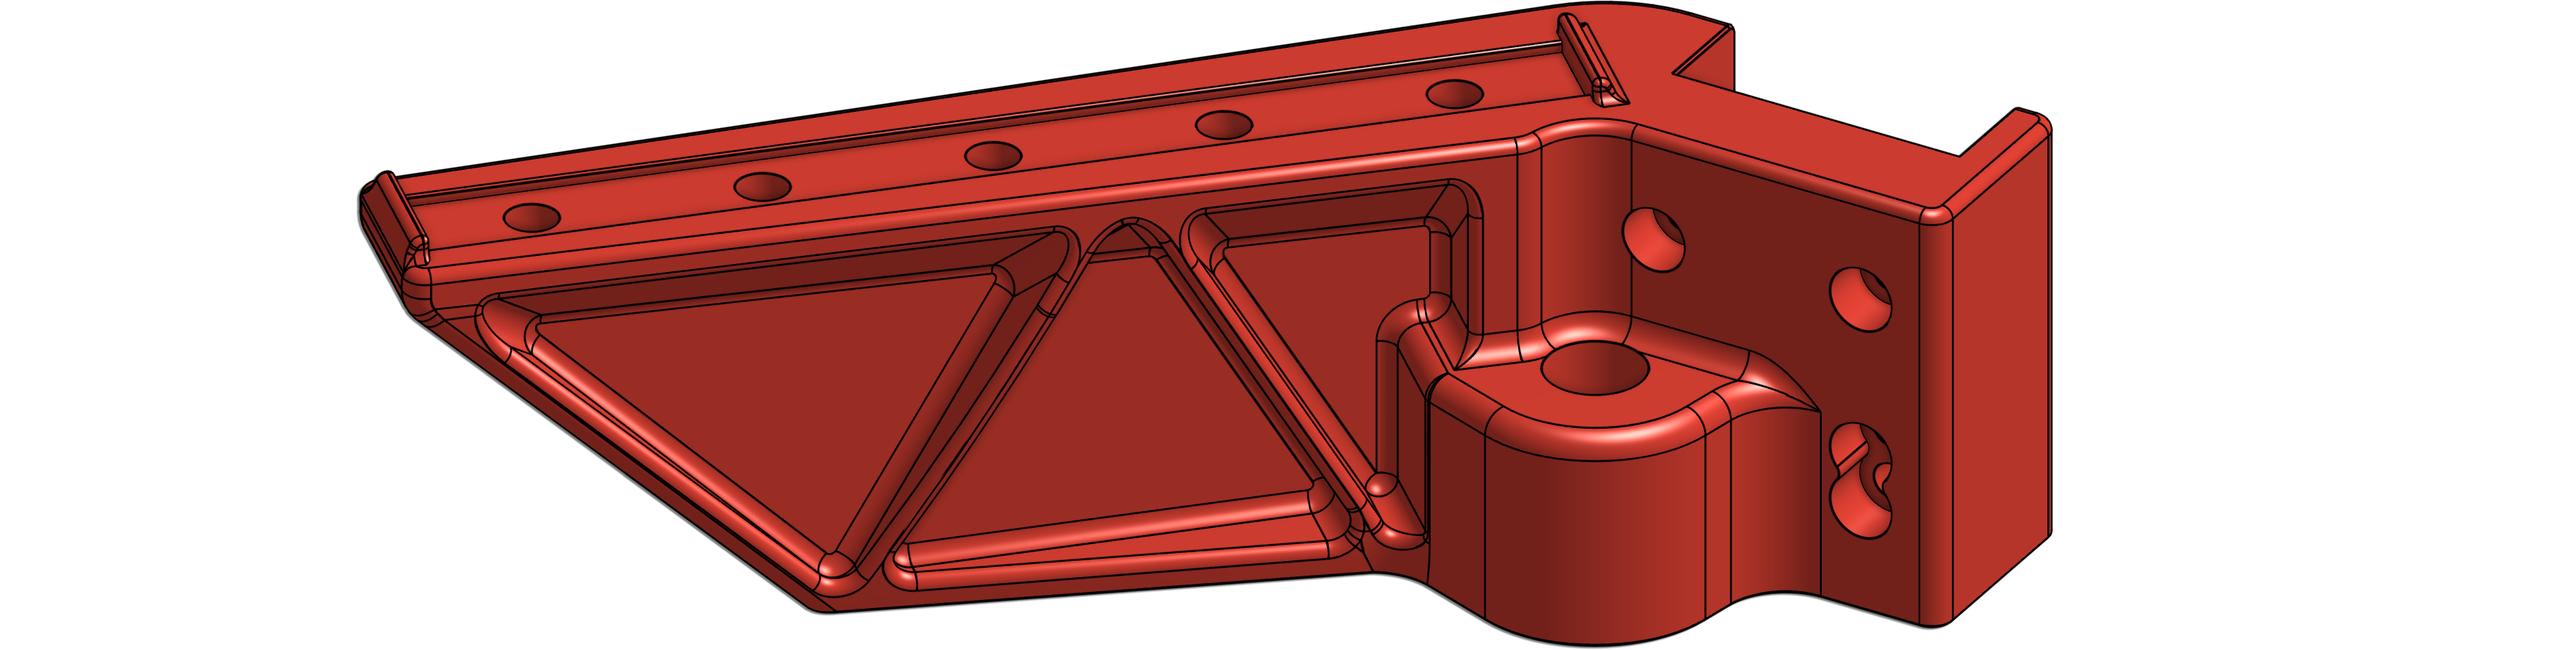
| ---------- | ------------- | -------------------------------------------------------------------------------------------------------------------------------------------------------------------- |

Hardware required:

| <p>Type:<br>Amount:</p> | <p>Heatset insert<br>9</p> | ![heatset insert](https://docs.zerog.one/assets/images/instructions/m3_heat_insert.png) |
| ----------------------- | -------------------------- | --------------------------------------------------------------------------------------- |

#### <mark style="color:red;">**Inserting heat inserts for bottom**</mark>

Stand your Left arm down on the top surface.

We’re starting our work with the bottom. If possible, clamp it between something, This way, it doesn’t move…

**Don’t burn yourself!** We’re going to work with a soldering iron, be careful. Heatsets inserts are still hot after melting them into the plastic, don’t touch them!

If you do not know how to insert heatset inserts into printed parts, please watch the video by [EDGE OF 3D](https://www.youtube.com/c/EDGEOF3D).

Place the small end of the heatset inserts into the hole. You can start with one heatset so they don’t fall out when you insert the other once. Heat up the soldering iron to about 250℃, you do not want to burn the plastic, you want to let the heatset melt into the plastic. These will be used to mount the leadscrew nut to the arm in a later step.

[![Insert heatset in bottom](https://docs.zerog.one/assets/images/instructions/hydra/left_arm/step1_inserts_bottom.png)](https://docs.zerog.one/manual/build/hydra/left_arm#lightbox__item_4)

> `Not sure if the heatset is in straight? Grab a longer M3 screw, and partially thread it in right after melting it in, this way you can turn it straight.`

![Insert heatset in bottom](https://docs.zerog.one/assets/images/instructions/hydra/left_arm/step1_inserts_bottom.png)

#### <mark style="color:red;">**Inserting heat inserts for top**</mark>

Stand your Left arm down the bottom surface.

Place the small end of the heatset inserts into the holes. And start melting them in as shown in the image below. These will be used to attach the MGN9C rail in a later step.

[![Insert heatset in bottom](https://docs.zerog.one/assets/images/instructions/hydra/left_arm/step2_inserts_top.png)](https://docs.zerog.one/manual/build/hydra/left_arm#lightbox__item_5)


![Insert heatset in top](https://docs.zerog.one/assets/images/instructions/hydra/left_arm/step2_inserts_top.png)

#### <mark style="color:red;">Installing MGN9 rail</mark> <a href="#installing-mgn9-rail" id="installing-mgn9-rail"></a>

Hardware required:

| <p>Type:<br>Amount:</p> | <p>MGN9C 100mm<br>1</p> | ![MGN9C](https://docs.zerog.one/assets/images/instructions/mgn9c_100mm.png) |
| ----------------------- | ----------------------- | --------------------------------------------------------------------------- |
| <p>Type:<br>Amount:</p> | <p>M3X8mm bolt<br>5</p> | ![m3x8mm](https://docs.zerog.one/assets/images/instructions/m3x8.png)       |

Grab the left arm and align the MGN9C rail into the top as shown in the image below.

[![Left arm align rail](https://docs.zerog.one/assets/images/instructions/hydra/left_arm/step3_place_rail.png)](https://docs.zerog.one/manual/build/hydra/left_arm#lightbox__item_6)


![Left arm align](https://docs.zerog.one/assets/images/instructions/hydra/left_arm/step3_place_rail.png)

Lower the rail into the slot, there are two tabs that’ll keep the MGN9C carriage from riding off the rail. The front tab is shown in the image below.

[![Left arm align rail](https://docs.zerog.one/assets/images/instructions/hydra/left_arm/step4_check_alignment.png)](https://docs.zerog.one/manual/build/hydra/left_arm#lightbox__item_7)


![Left arm align](https://docs.zerog.one/assets/images/instructions/hydra/left_arm/step4_check_alignment.png)

#### <mark style="color:red;">**Inserting screws into MGN9C rail**</mark>

Move the carriage to the back, and thread the first 3 M3x8mm screws into the heatset inserts using a 2.5mm hex driver.

[![Left arm align rail](https://docs.zerog.one/assets/images/instructions/hydra/left_arm/step5_insert_front3.png)](https://docs.zerog.one/manual/build/hydra/left_arm#lightbox__item_8)


![Left arm align](https://docs.zerog.one/assets/images/instructions/hydra/left_arm/step5_insert_front3.png)

Now move the carriage to the front and thread the last 2 M3X8mm screws into the heatset.

[![Left arm align rail](https://docs.zerog.one/assets/images/instructions/hydra/left_arm/step6_forward_lastbolts.png)](https://docs.zerog.one/manual/build/hydra/left_arm#lightbox__item_9)


![Left arm align](https://docs.zerog.one/assets/images/instructions/hydra/left_arm/step6_forward_lastbolts.png)

#### <mark style="color:red;">Mini tank!</mark> <a href="#mini-tank" id="mini-tank"></a>

Printed part required:

| Filename : | mini\_tank.stl | [![mink tank](https://docs.zerog.one/assets/images/instructions/hydra/mini_tank.png)](https://docs.zerog.one/manual/build/hydra/left_arm#lightbox__item_3) |

| ---------- | -------------- | ---------------------------------------------------------------------------------------------------------------------------------------------------------- |

Hardware required:

| <p>Type:<br>Amount:</p> | <p>Heatset insert<br>1</p> | ![heatset insert](https://docs.zerog.one/assets/images/instructions/m3_heat_insert.png) |
| ----------------------- | -------------------------- | --------------------------------------------------------------------------------------- |

#### <mark style="color:red;">**Inserting the heatset insert**</mark>

We start by melting the heatset insert in into the so called ‘barrel’, this is the hole in the front as shown in the image below.

[![Left arm](https://docs.zerog.one/assets/images/instructions/hydra/left_arm/step7_insert_minitank_rocket.png)](https://docs.zerog.one/manual/build/hydra/left_arm#lightbox__item_10)


![Left arm full overview](https://docs.zerog.one/assets/images/instructions/hydra/left_arm/step7_insert_minitank_rocket.png)

#### <mark style="color:red;">Installing Mini tank on carriage</mark> <a href="#installing-mini-tank-on-carriage" id="installing-mini-tank-on-carriage"></a>

Hardware required:

| <p>Type:<br>Amount:</p> | <p>m3x8mm<br>9</p>                    | ![m3x8](https://docs.zerog.one/assets/images/instructions/m3x8.png)                                    |
| ----------------------- | ------------------------------------- | ------------------------------------------------------------------------------------------------------ |
| <p>Type:<br>Amount:</p> | <p>Heatset insert<br>10</p>           | ![heatset insert](https://docs.zerog.one/assets/images/instructions/m3_heat_insert.png)                |
| <p>Type:<br>Amount:</p> | <p>10mm Kossel ball<br>1</p>          | ![10mm Kossel ball](https://docs.zerog.one/assets/images/instructions/10mm_kossel_ball.png)            |
| <p>Type:<br>Amount:</p> | <p>12x5x4 countersunk magnet<br>1</p> | ![12x5x4 countersunk magnet](https://docs.zerog.one/assets/images/instructions/12x5x4mm_cs_magnet.png) |

We’ve been working on the left arm and mini tank. It’s time to install the Mini tank onto the carriage. Grab the left arm and mini tank you’ve prepared in the steps above.

#### <mark style="color:red;">**Installing magnet assembly**</mark>

Grab the left arm and lower the magnet into the middle of the MGN9C carriage as shown below.

[![Left arm](https://docs.zerog.one/assets/images/instructions/hydra/left_arm/step8_lower_center_magnet.png)](https://docs.zerog.one/manual/build/hydra/left_arm#lightbox__item_11)
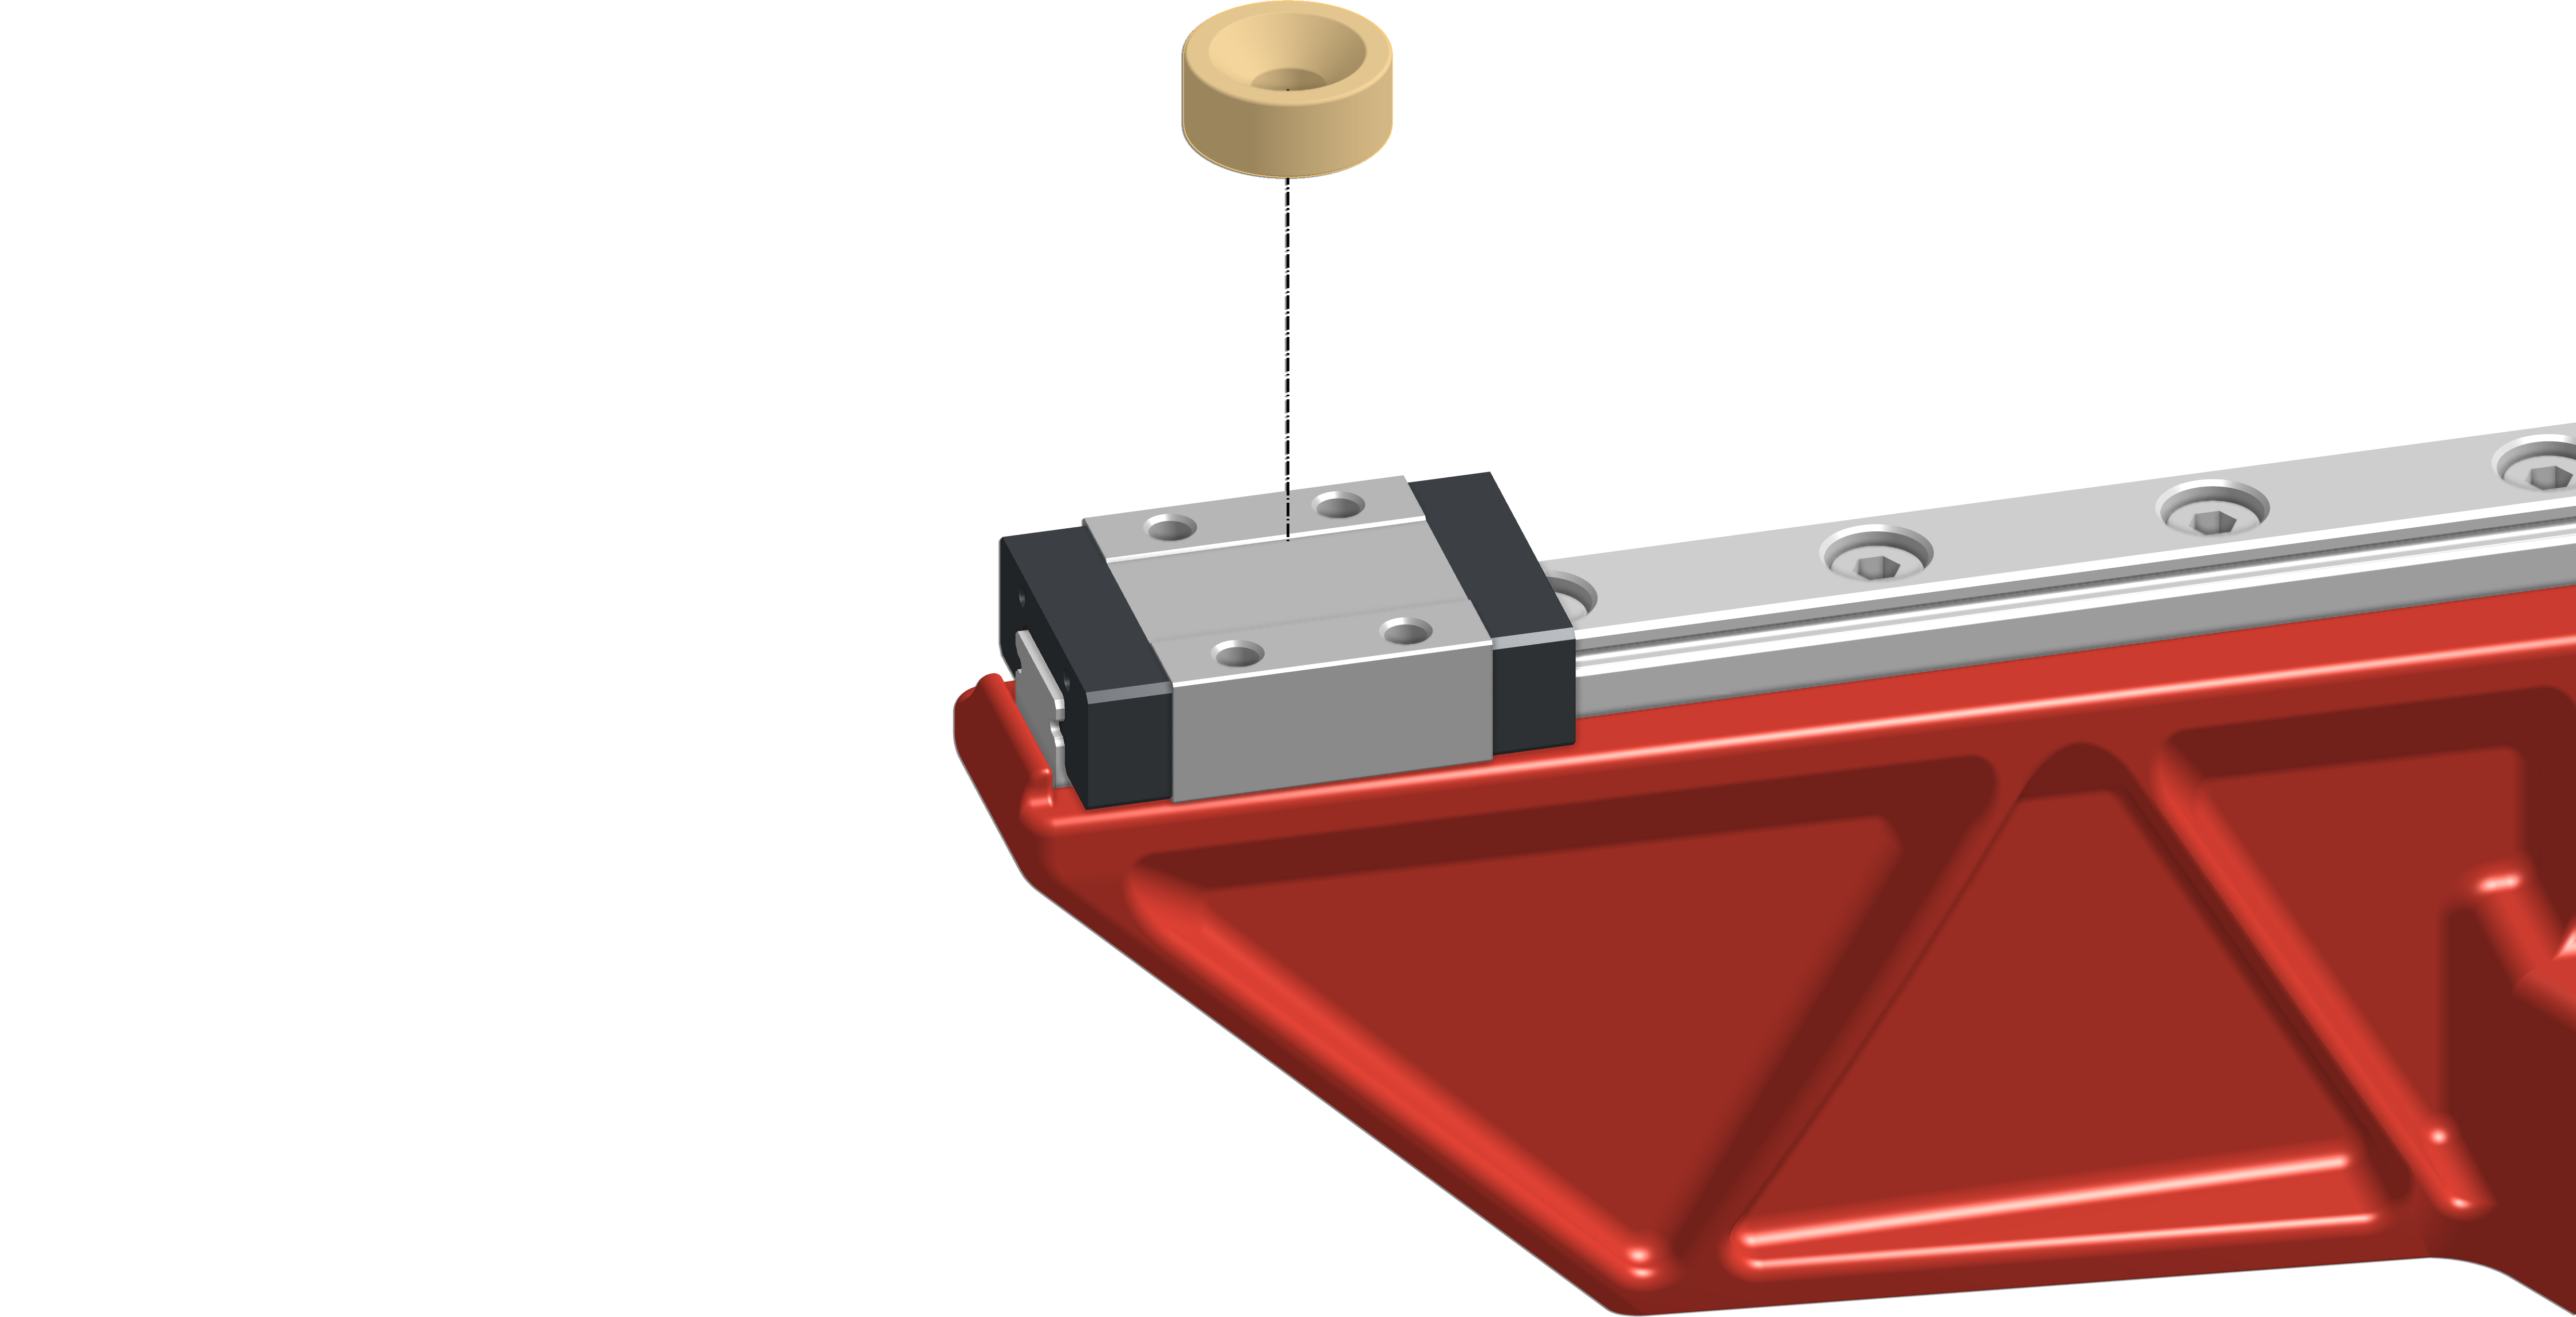

![Left arm full overview](https://docs.zerog.one/assets/images/instructions/hydra/left_arm/step8_lower_center_magnet.png)

Now take the 10mm Kossel ball and center it on the countersunk magnet, note that the threads + hole should face the top.

[![Left arm](https://docs.zerog.one/assets/images/instructions/hydra/left_arm/step9_lower_kossel_ball.png)](https://docs.zerog.one/manual/build/hydra/left_arm#lightbox__item_12)
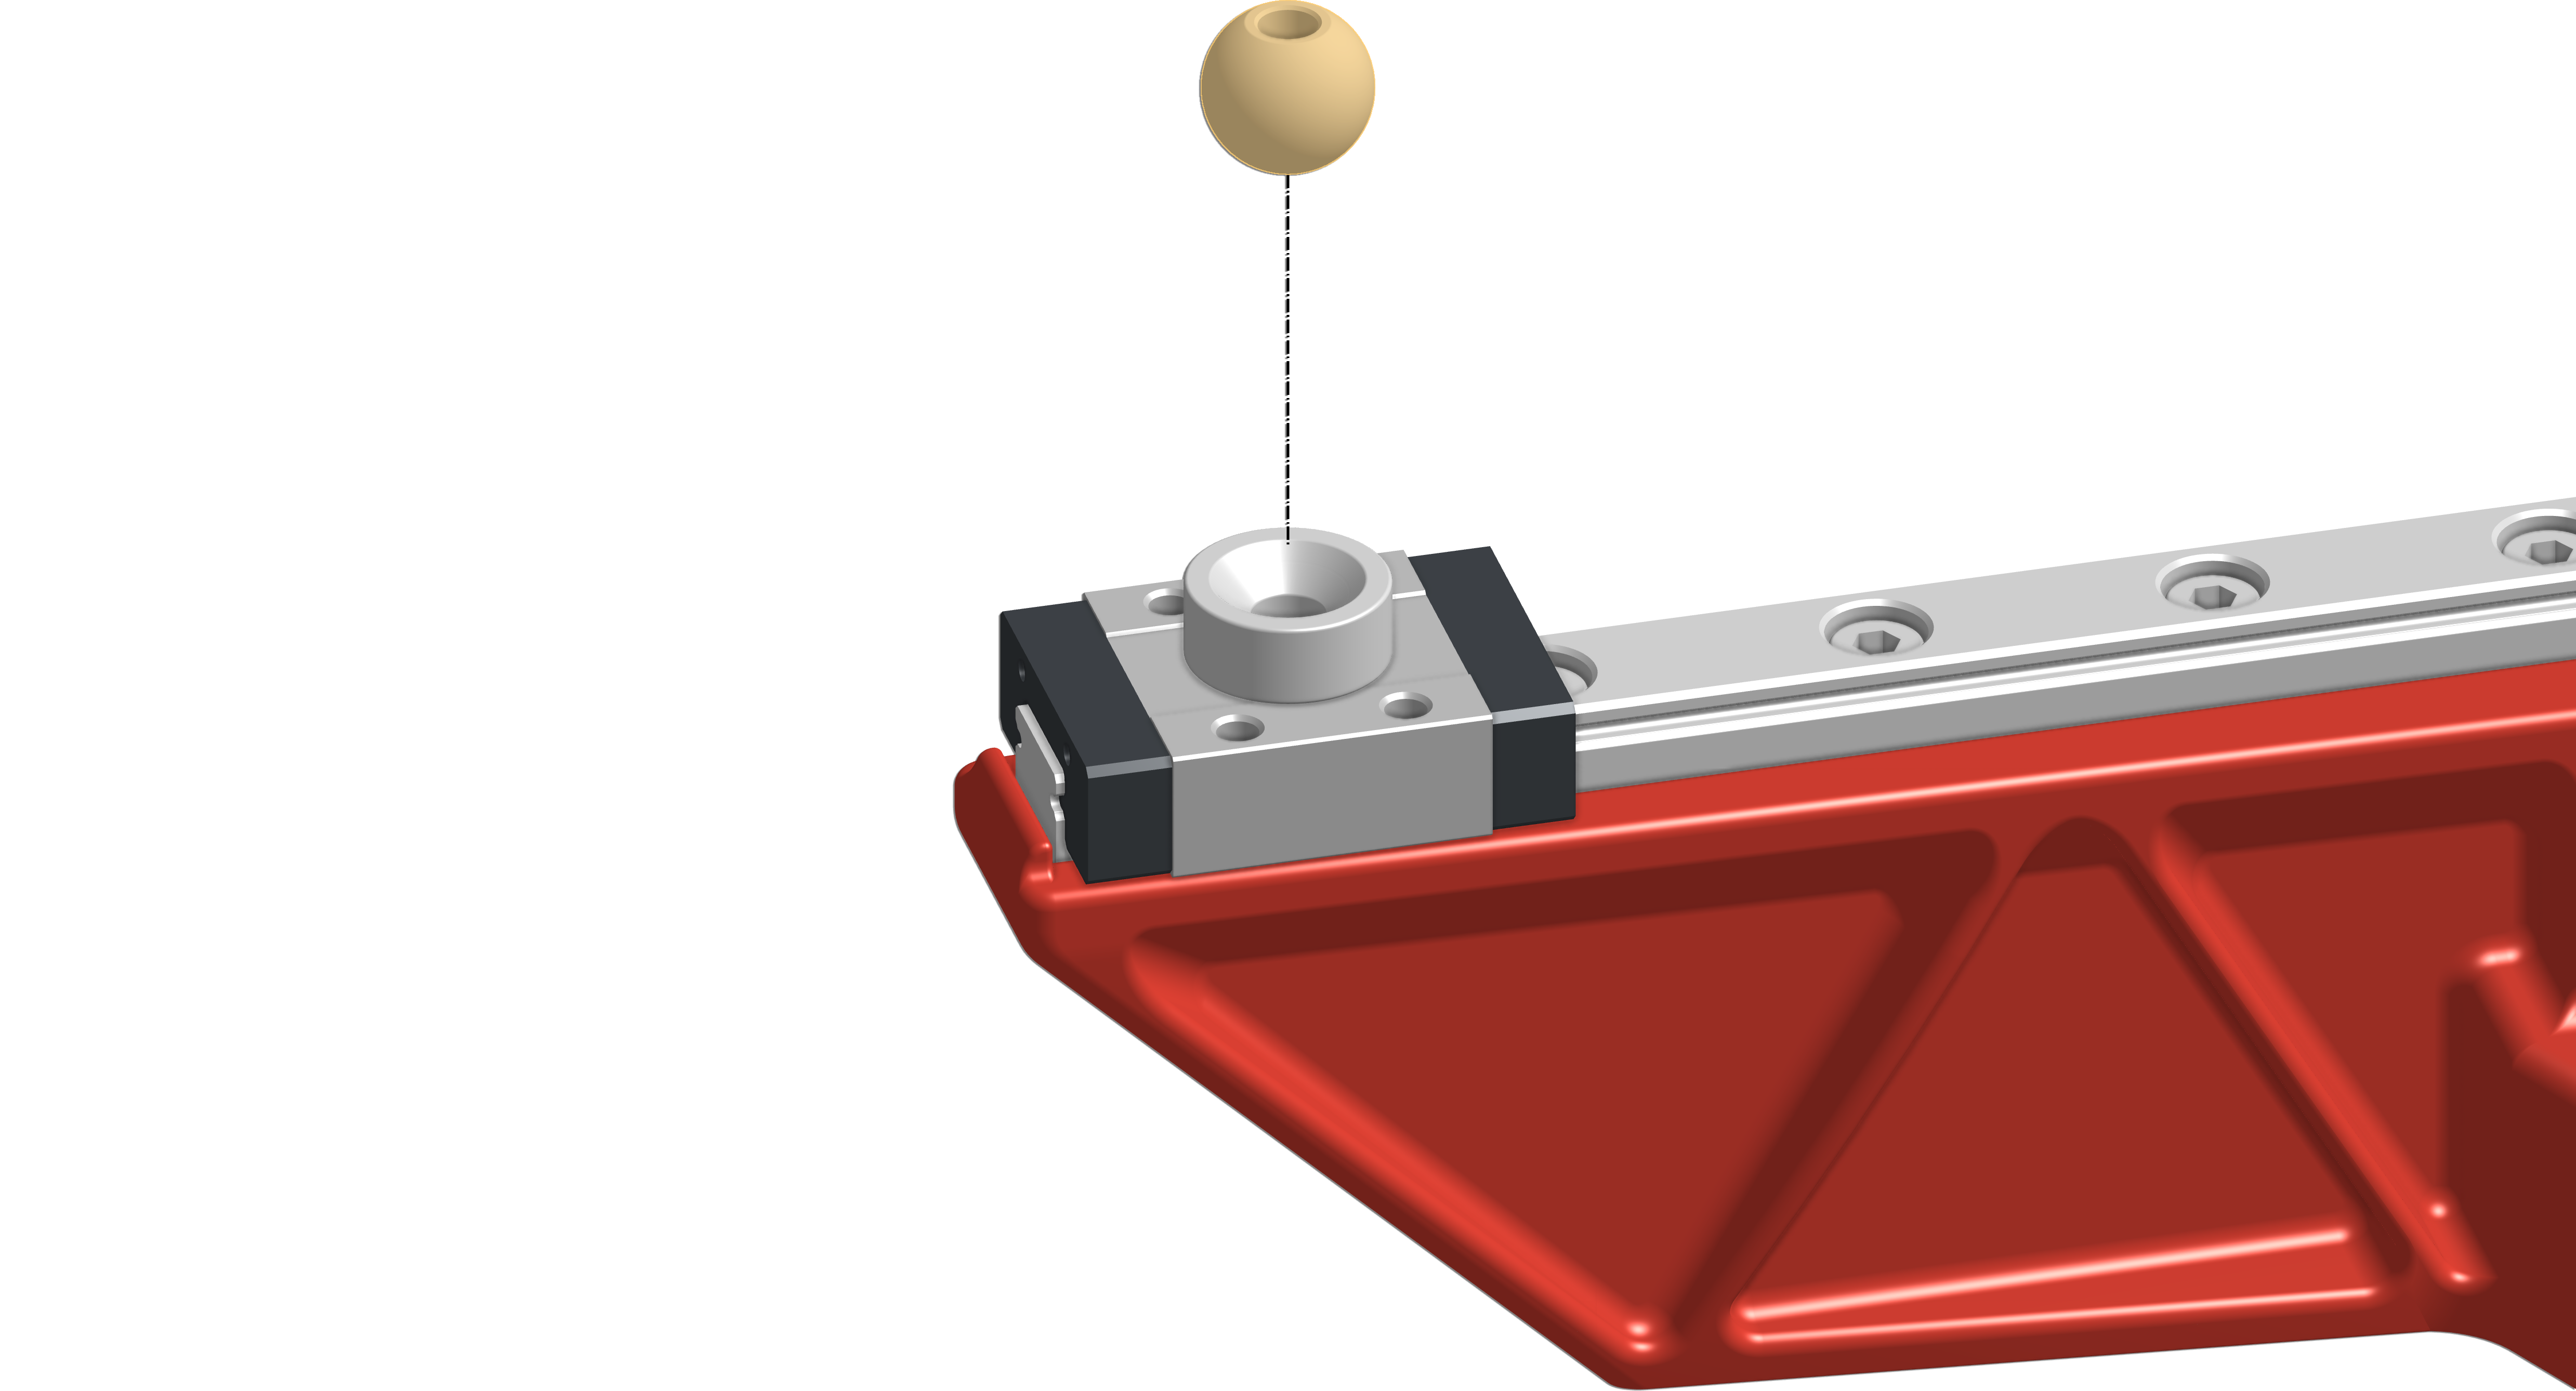

![Left arm full overview](https://docs.zerog.one/assets/images/instructions/hydra/left_arm/step9_lower_kossel_ball.png)

Take the Mini tank you’ve prepared, and lower it onto the magnet + Kossel ball.

[![Left arm](https://docs.zerog.one/assets/images/instructions/hydra/left_arm/step10_lower_tank.png)](https://docs.zerog.one/manual/build/hydra/left_arm#lightbox__item_13)
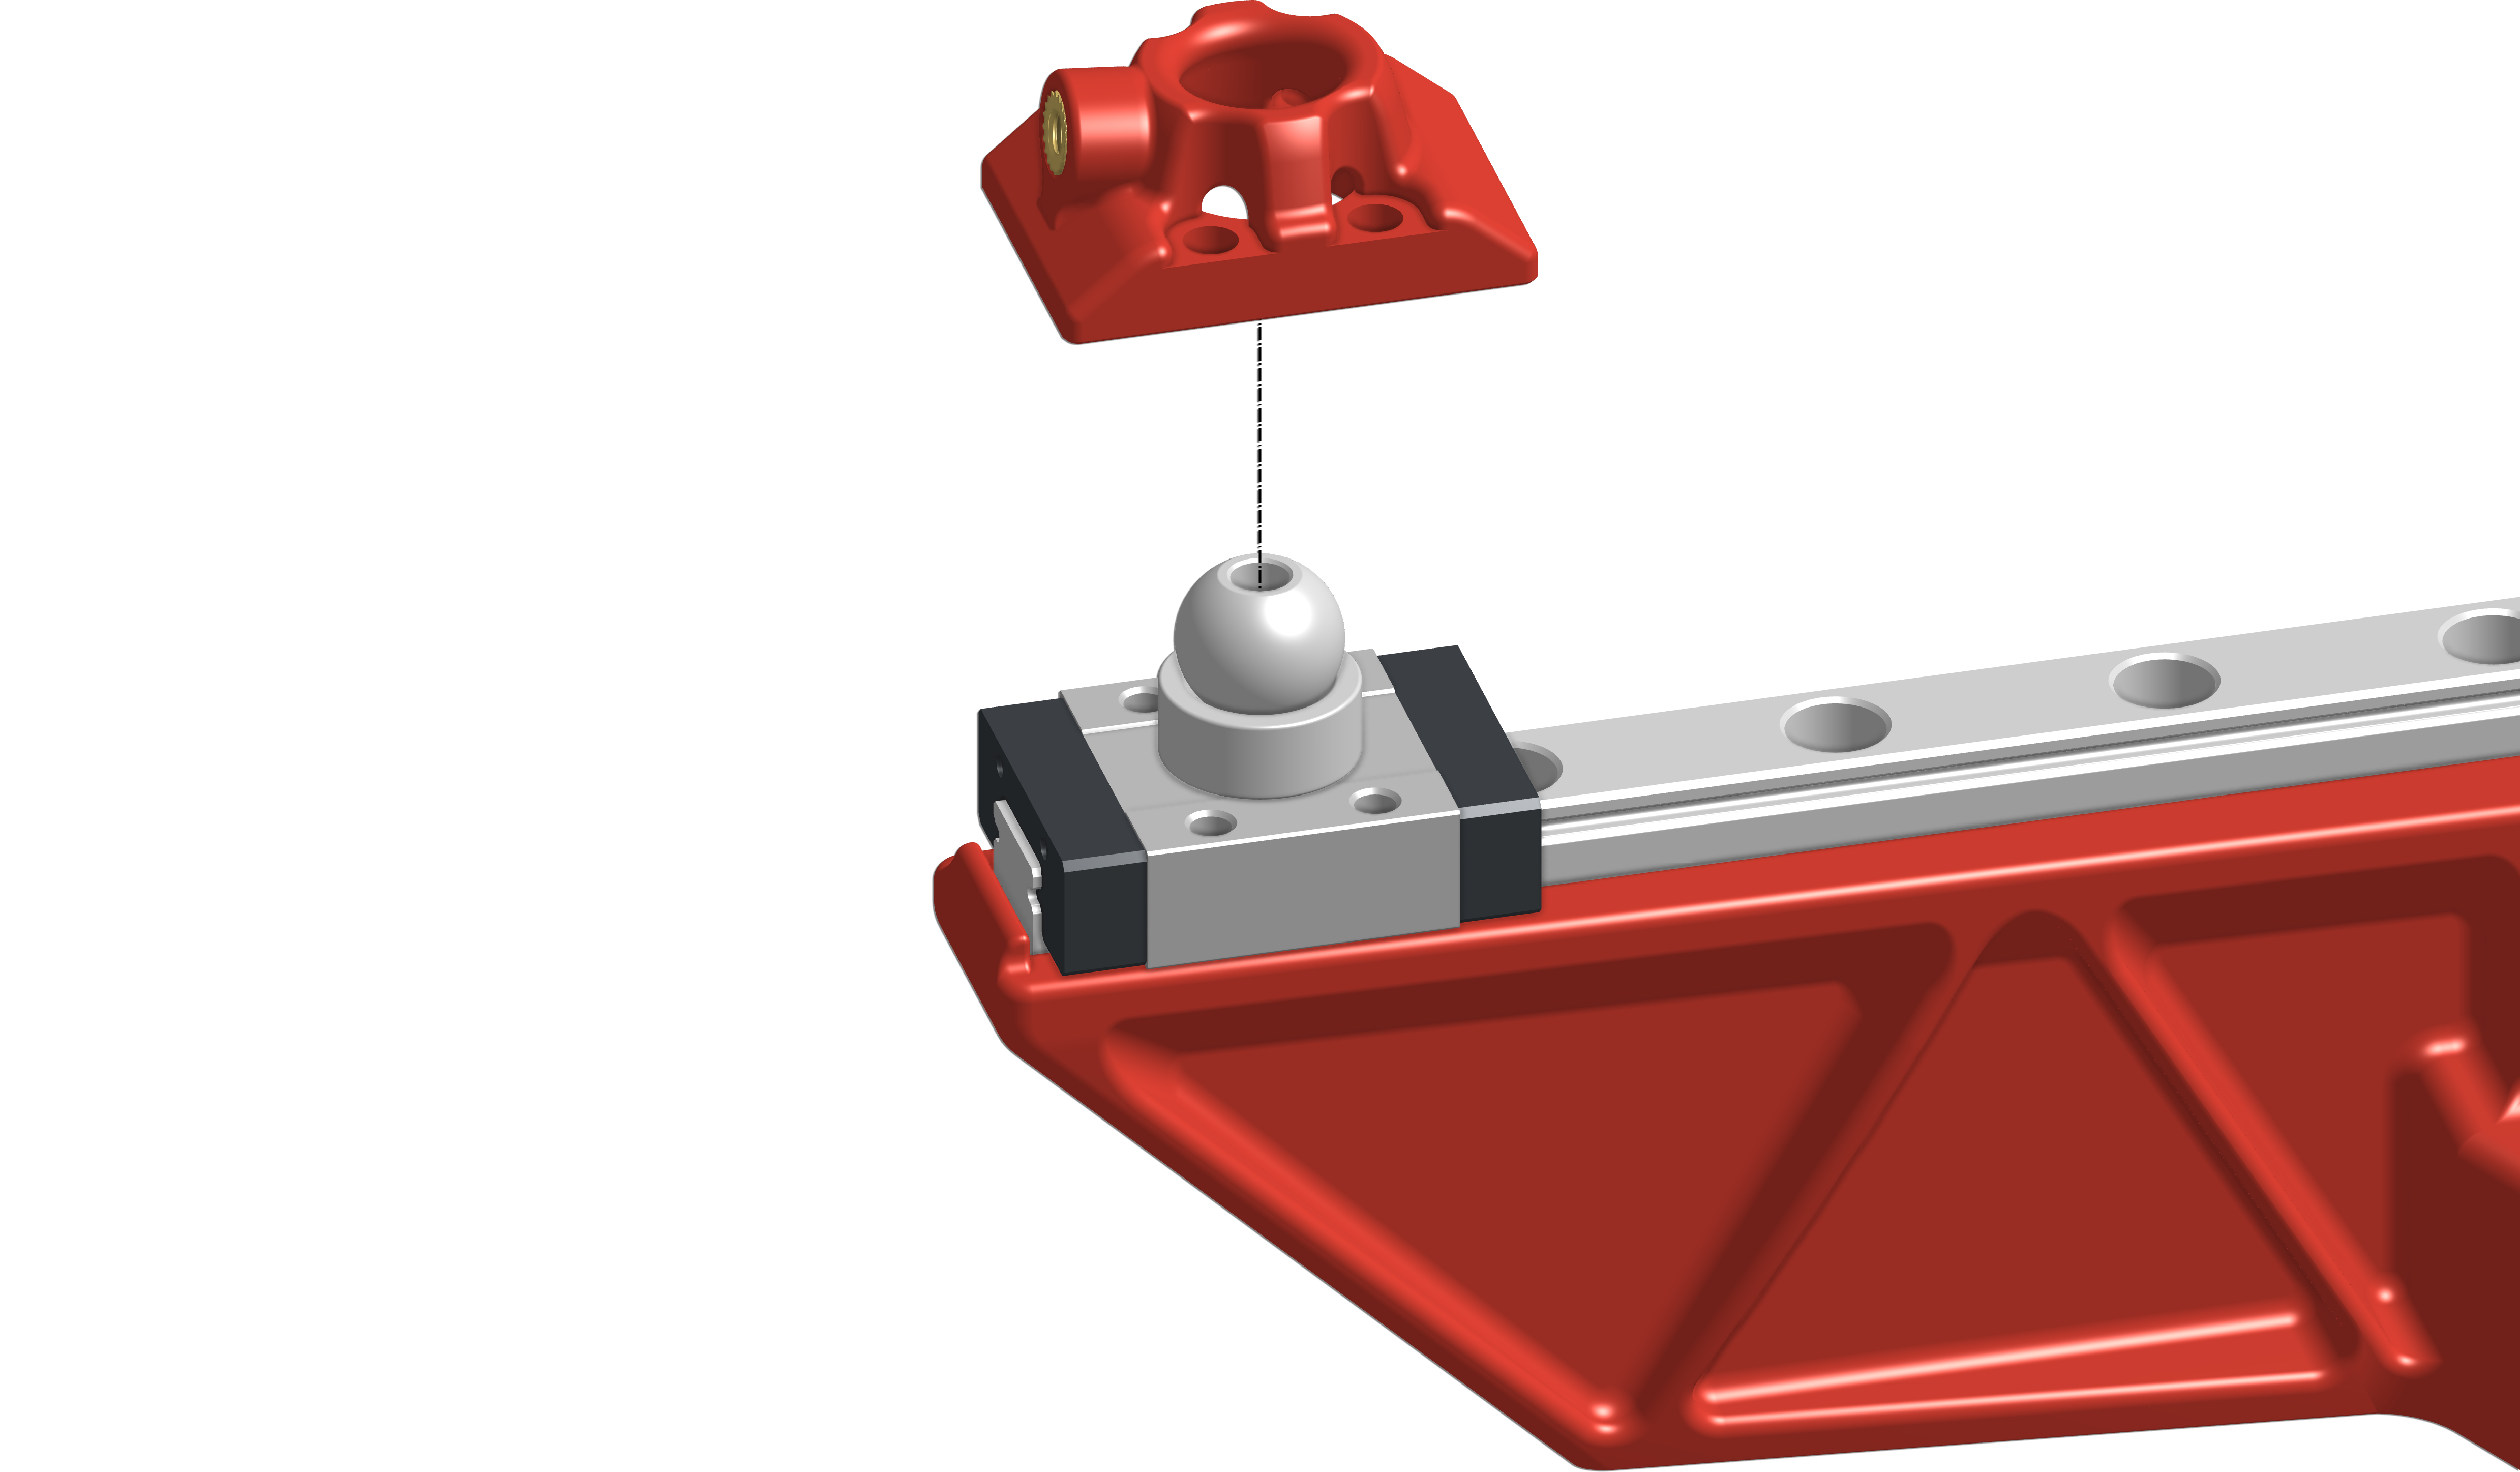

![Left arm full overview](https://docs.zerog.one/assets/images/instructions/hydra/left_arm/step10_lower_tank.png)

Your assembly should look something like this:

[![Left arm](https://docs.zerog.one/assets/images/instructions/hydra/left_arm/step11_lowered_tank.png)](https://docs.zerog.one/manual/build/hydra/left_arm#lightbox__item_14)
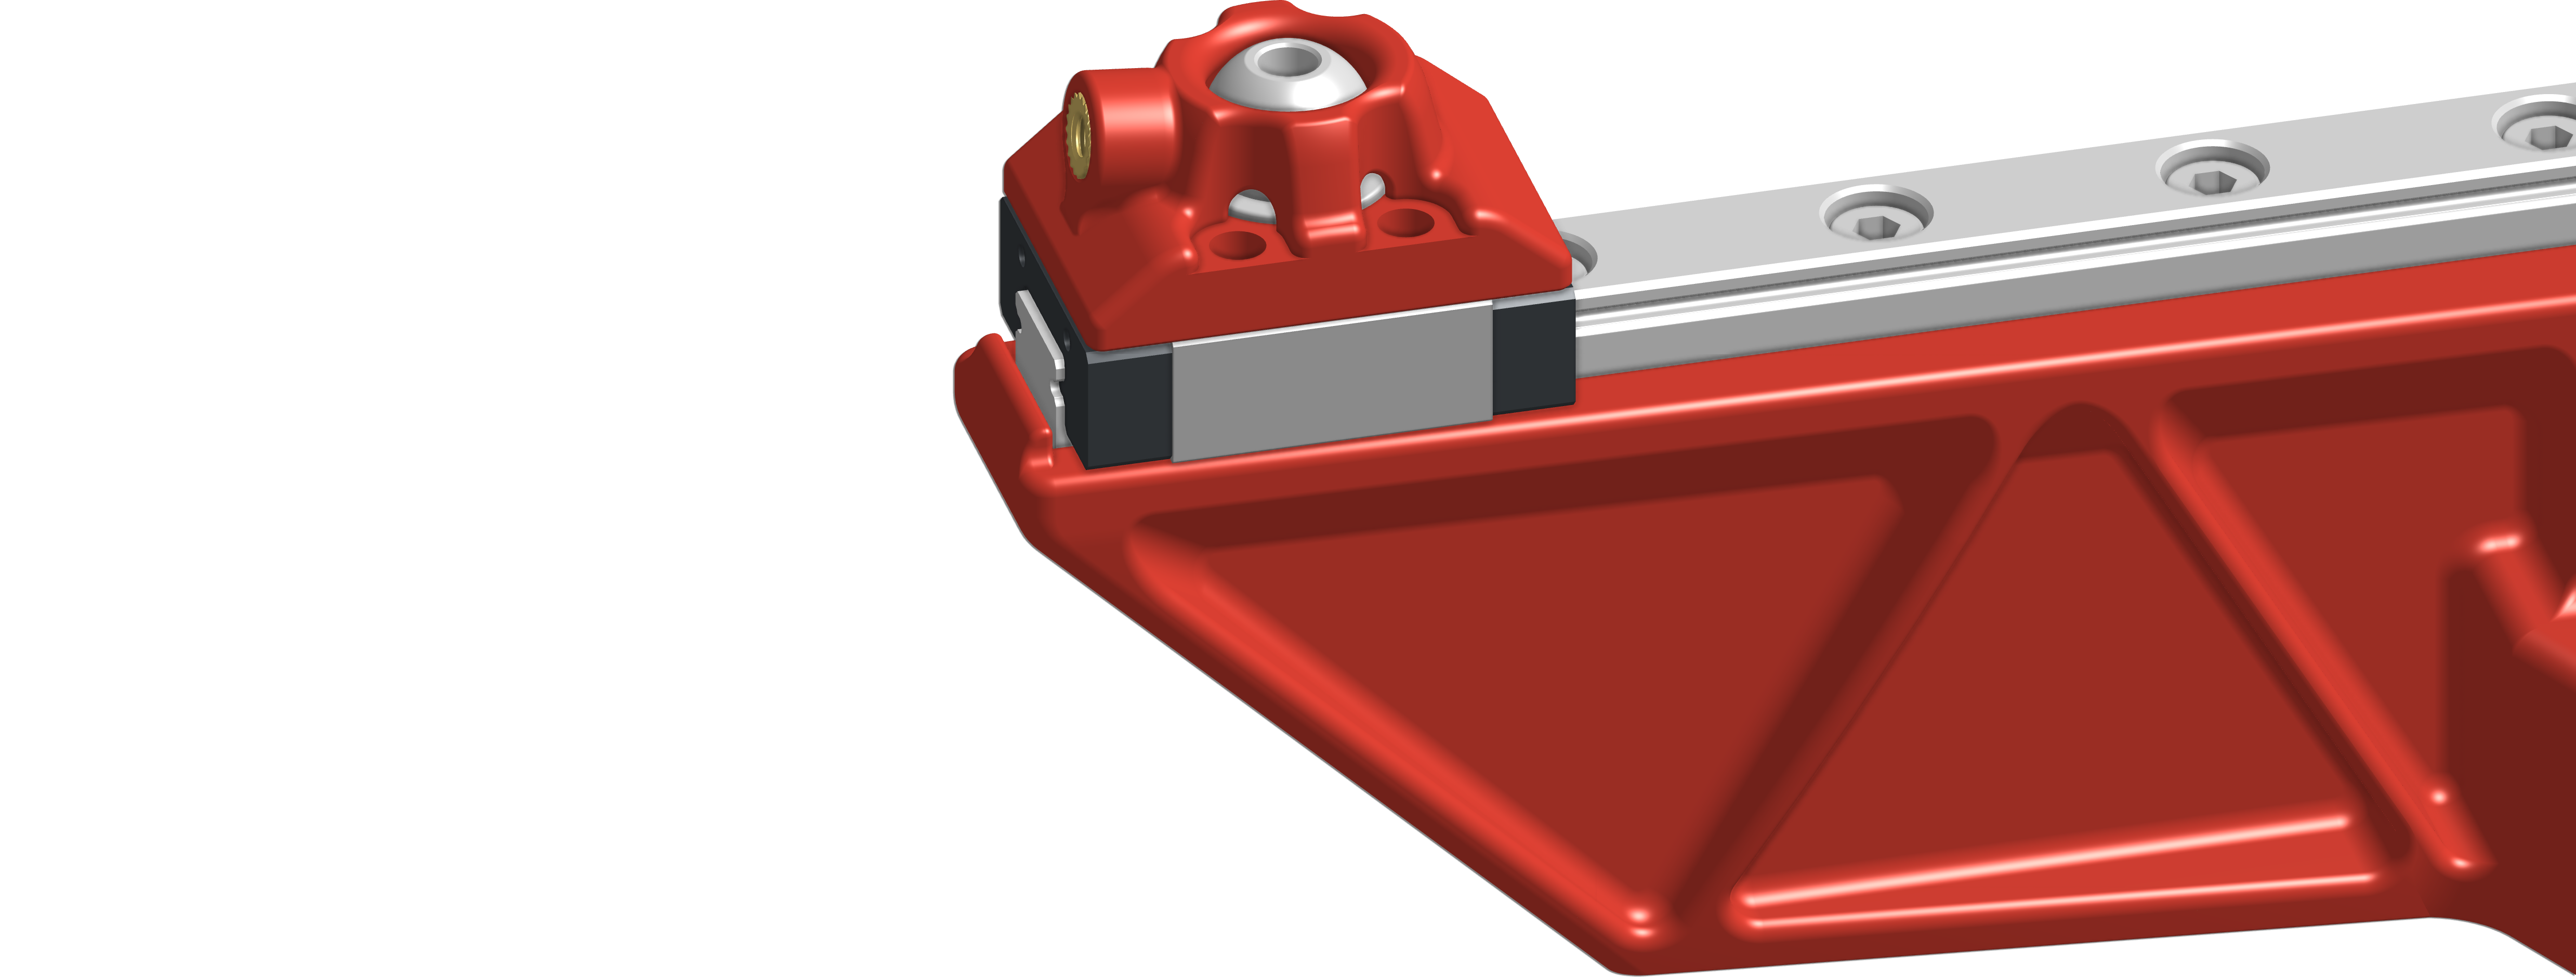

![Left arm full overview](https://docs.zerog.one/assets/images/instructions/hydra/left_arm/step11_lowered_tank.png)

#### <mark style="color:red;">**Inserting the screws**</mark>

Install all 4 M3x8mm screws into the top of the Mini tank and thread them into the MGN9C carriage as shown below.

[![Left arm](https://docs.zerog.one/assets/images/instructions/hydra/left_arm/step12_insert_4bolt.png)](https://docs.zerog.one/manual/build/hydra/left_arm#lightbox__item_15)
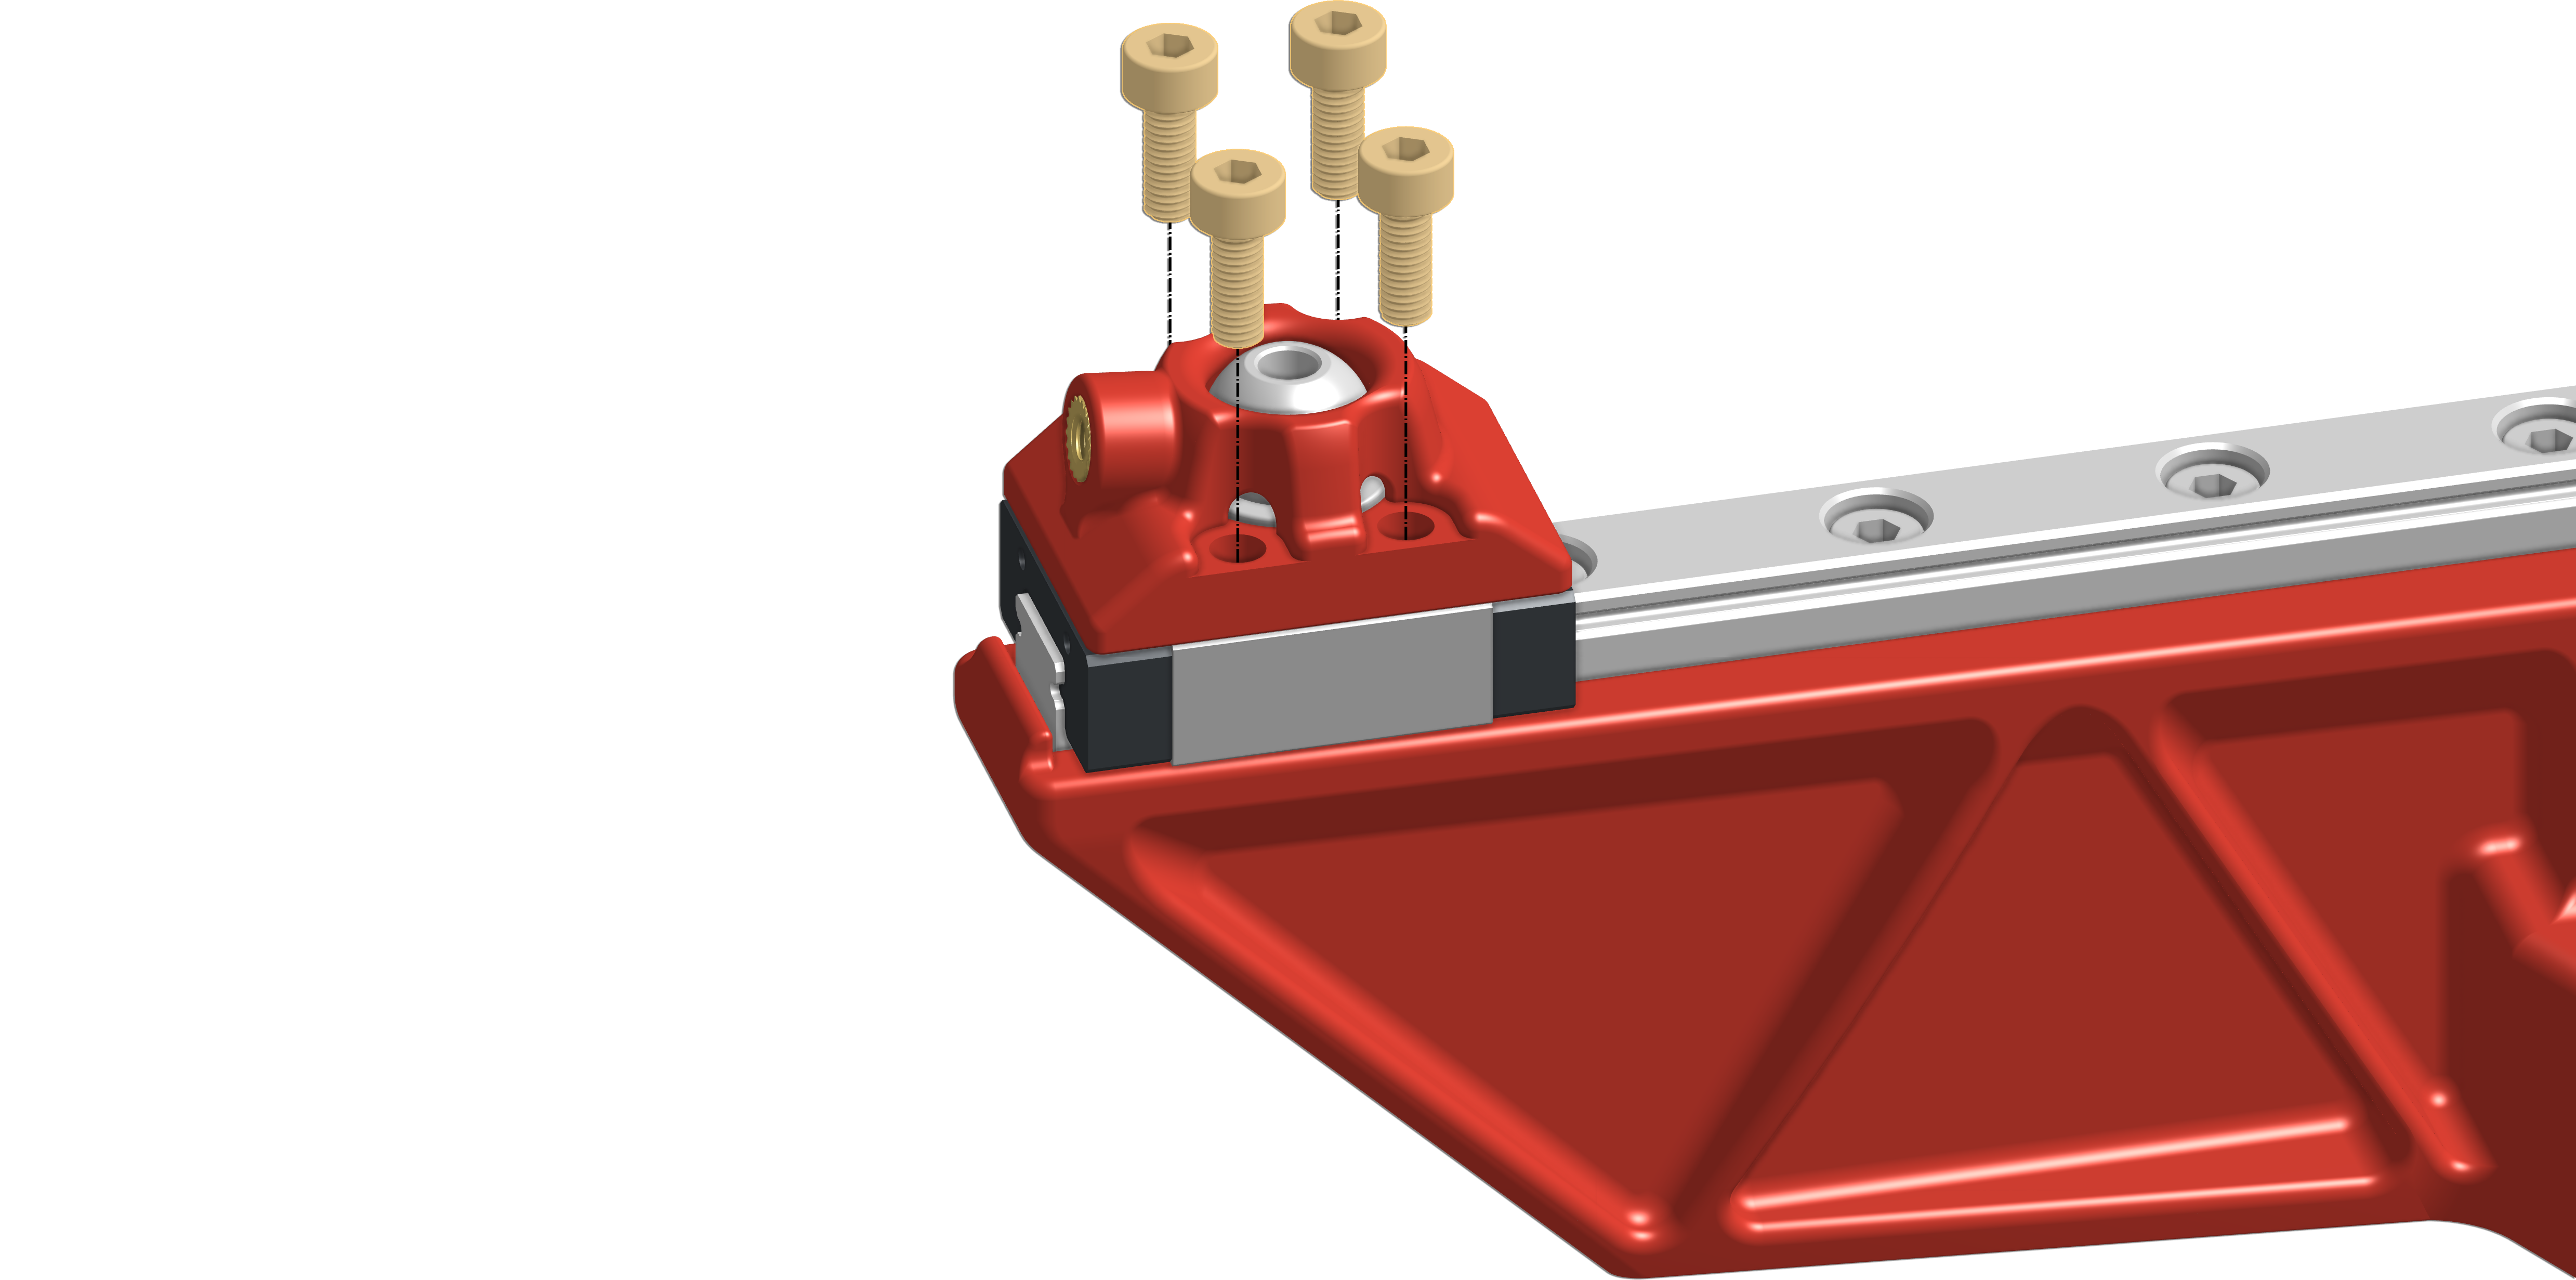

![Left arm full overview](https://docs.zerog.one/assets/images/instructions/hydra/left_arm/step12_insert_4bolt.png)

#### <mark style="color:red;">**Installing locking system**</mark>

This system is used to prevent the kossel ball from spinning when installing and uninstalling the bed. A **light snug fit** should be more than enough.

Hardware required:

| <p>Type:<br>Amount:</p> | <p>m3x10mm<br>1</p> | ![m3x10](https://docs.zerog.one/assets/images/instructions/m3x10.png) |
| ----------------------- | ------------------- | --------------------------------------------------------------------- |

When you’ve installed everything, you need to make sure the M3x10mm bolts are lose. Locking them into place will stop your Z-system from trimming correctly and might actually damage parts.

Grab the assembly and your M3x10mm screw and lightly thread it into the barrel as shown below. **Light fit is enough!**

[![Left arm](https://docs.zerog.one/assets/images/instructions/hydra/left_arm/step13_insert_tension_screw.png)](https://docs.zerog.one/manual/build/hydra/left_arm#lightbox__item_16)
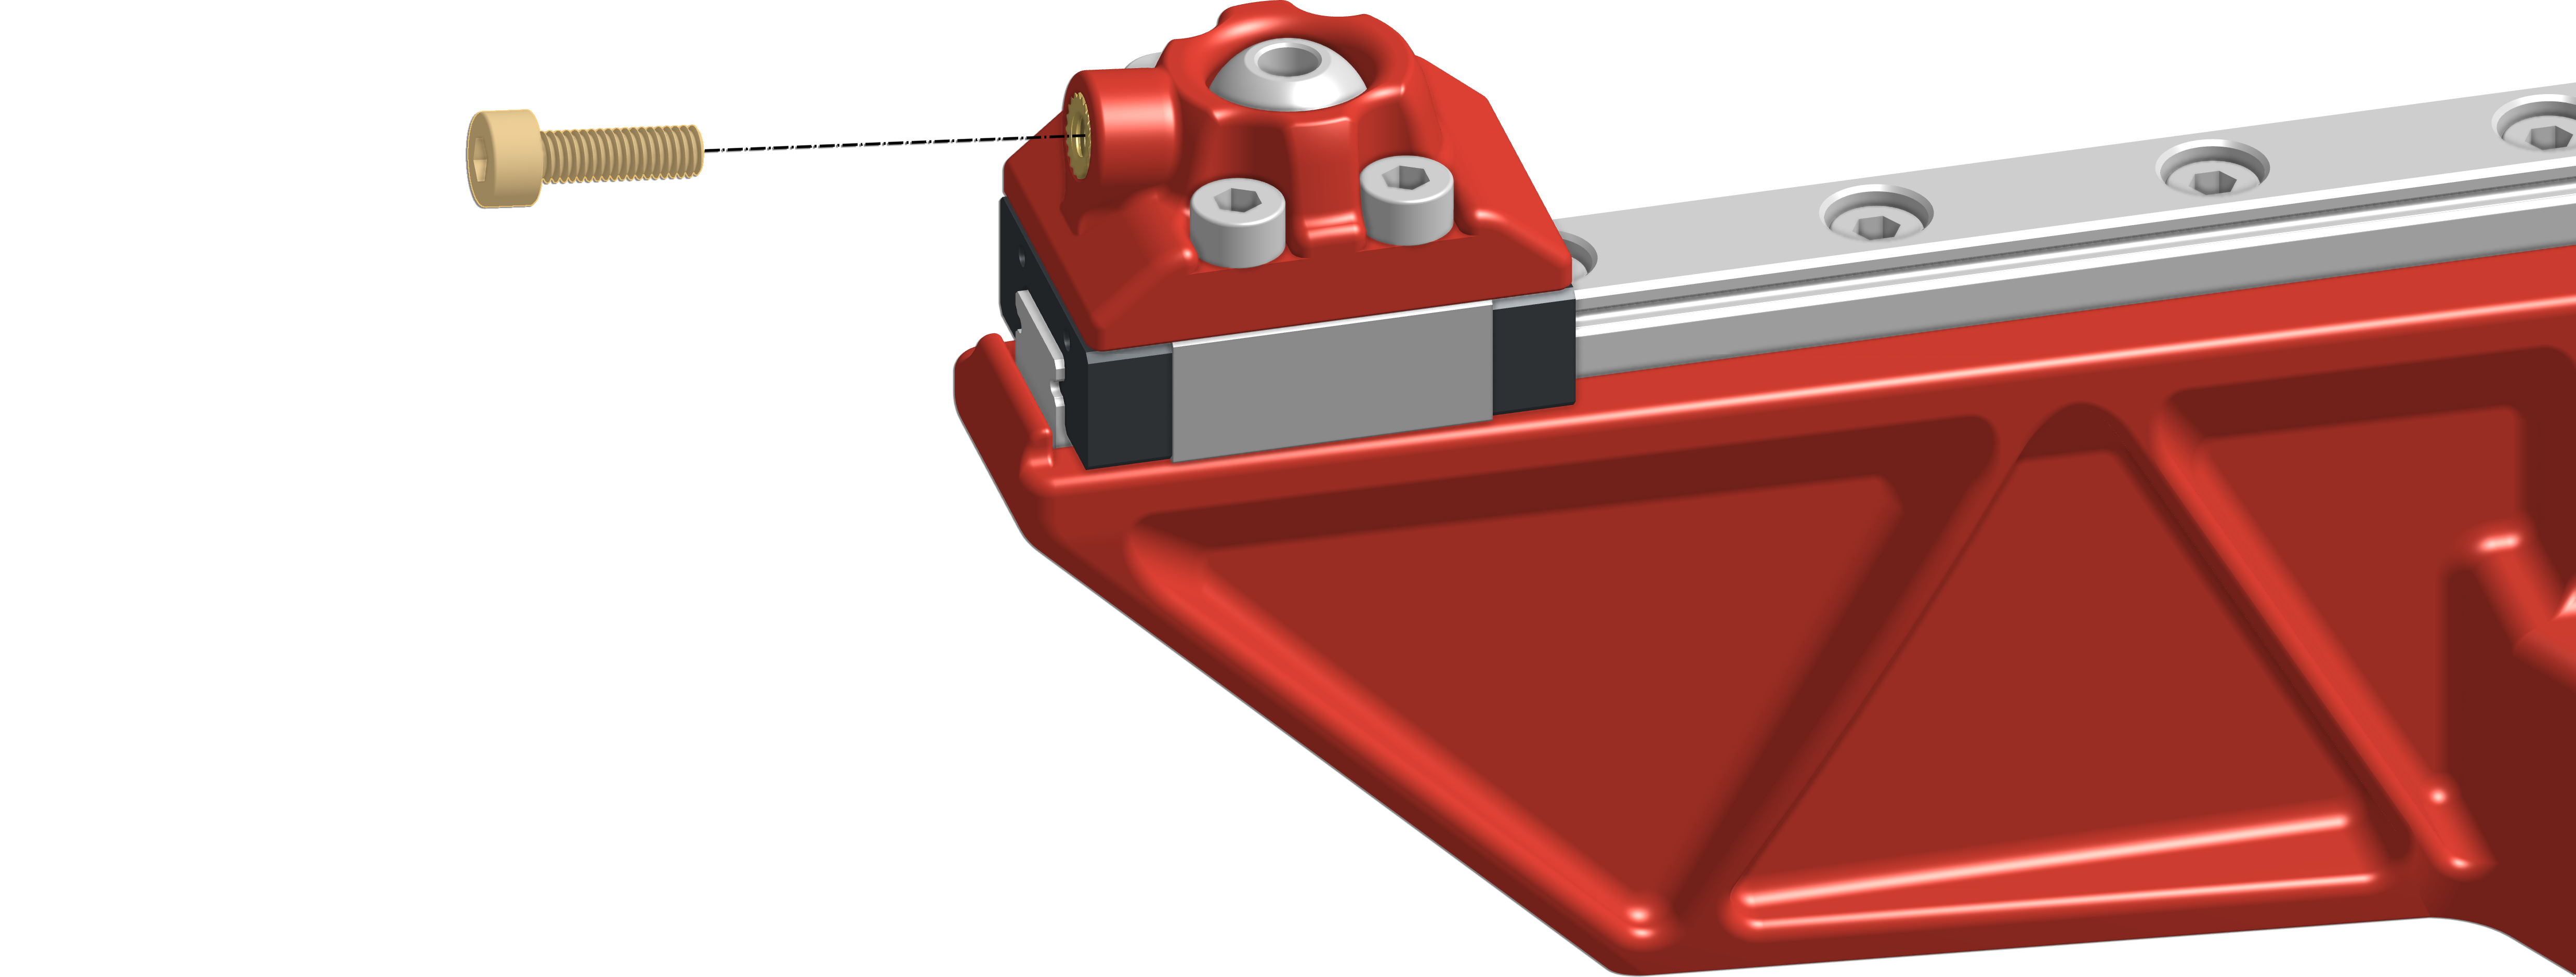

![Left arm full overview](https://docs.zerog.one/assets/images/instructions/hydra/left_arm/step13_insert_tension_screw.png)

The following image shows you how it will lock the kossel ball into place, hopefully, this will help you understand how it functions.

[![Left arm](https://docs.zerog.one/assets/images/instructions/hydra/left_arm/step14_explain_tension_screw.png)](https://docs.zerog.one/manual/build/hydra/left_arm#lightbox__item_17)
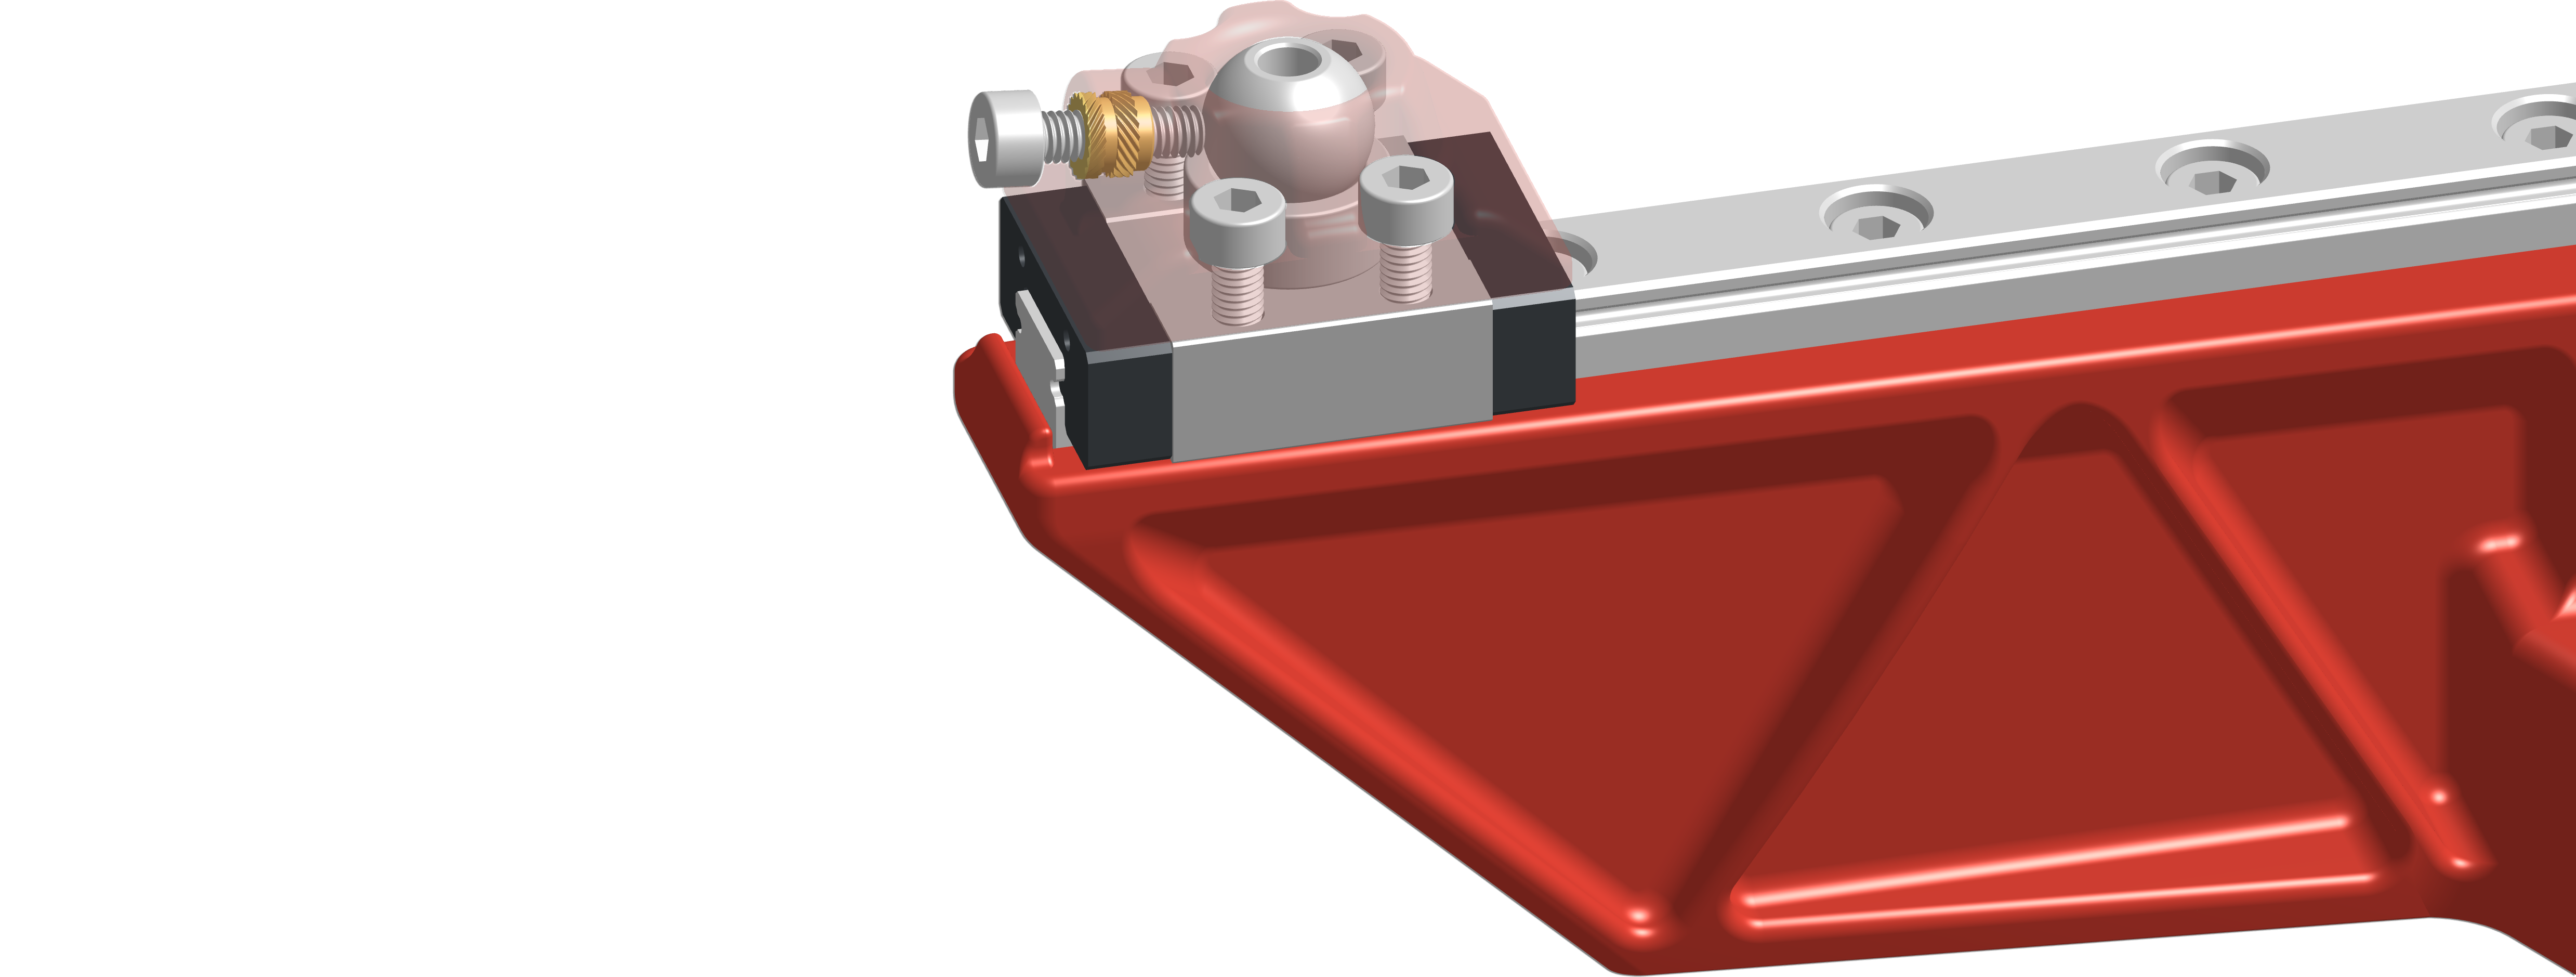

# Introduction

## <mark style="color:red;">NEBULA</mark> <a href="#mercury-one1" id="mercury-one1"></a>

<table data-card-size="large" data-view="cards" data-full-width="false"><thead><tr><th>Difficulty</th><th>Language</th></tr></thead><tbody><tr><td>Moderate to experienced</td><td>English</td></tr></tbody></table>

## <mark style="color:red;">What's this project about?</mark>

Nebula is the name of our custom frame/enclosure, some might know this is the 'beta enclosure'. It allows you to re-use many of your part on your current Mercury One.1/Hydra build and port them over a full custom frame giving you the ability to [print enclosed](#user-content-fn-1)[^1].

Nebula is also intended to be used as full from 'scratch' build. Giving you a nice, solid and square frame. We're working with LDO Motors to produce high-quality Nebula Kits.

{% hint style="info" %}
This is a unique frame, and your previous frame won't be used at all.
{% endhint %}

## <mark style="color:red;">Who's this project for?</mark> <a href="#whos-this-project-for" id="whos-this-project-for"></a>

This project is ideal for 3D printing enthusiasts who are currently using a Mercury One.1 / Hydra build and want to enclosure their setups. It's also perfect for those looking to start on a new build from scratch. Whether you want to upgrade your existing system or start fresh, the Nebula project allows both.&#x20;

## <mark style="color:red;">Expected Information in Instructions</mark>

In the instructions, you can expect detailed guidance on how to build the Nebula Project, with additional resources directing you to the Mercury One.1 and Hydra instructions, as these are essential for assembling the complete printer

## <mark style="color:red;">Additional Info</mark>

Building Nebula we expect you to source your materials for the Mercury One.1 and Hydra. We do include the electronics-bay Bill of Material under [these build instruction](#user-content-fn-2)[^2]s, by that we mean normal hardware, no electronics as of right now.

## <mark style="color:red;">Difficulty</mark> <a href="#difficulty" id="difficulty"></a>

We consider this build to be <mark style="color:purple;">moderate</mark> in difficulty. However, the more challenging aspects might be the firmware and wiring. As of now, we haven’t written any configuration for Klipper, and some wires may need to be remade or extended.

[^1]: Intended for materials like ABS and ASA.

[^2]: By this we mean Nebula Build Instructions.


# Bill of Material

A listing of the materials needed to build the Nebula Enclosure.

## <mark style="color:red;">Kits</mark> <a href="#kits" id="kits"></a>

We **do not** own the kits. We’re **not responsible** for these kits. **Make sure to check the included hardware**.

#### <mark style="color:red;">All kits</mark> <a href="#all-kits" id="all-kits"></a>

| Type                     | Stores     |
| ------------------------ | ---------- |
| Nebula kit by LDO Motors | Click here |

## <mark style="color:red;">Self sourcing</mark> <a href="#self-sourcing" id="self-sourcing"></a>

{% hint style="info" %}
The Bill of Materials DOES include all hardware to build the electronics-bay as well.
{% endhint %}

{% hint style="warning" %}
Keep in mind these numbers do not include spares, it might be wise to buy some spares.
{% endhint %}

### <mark style="color:red;">Bolts</mark> <a href="#bolts" id="bolts"></a>

<table><thead><tr><th width="146">Size</th><th>Type</th><th width="100">Amount</th><th width="144">Image</th><th>Stores</th></tr></thead><tbody><tr><td>M3x8</td><td>FHCS</td><td>2</td><td><img src="https://834763357-files.gitbook.io/~/files/v0/b/gitbook-x-prod.appspot.com/o/spaces%2FXgzDoYdwl0Vuu3qB4KOp%2Fuploads%2FZVVpOKVlsb3Fnaiznkd0%2FM3x8_FHCS.png?alt=media&amp;token=9a70bc15-a455-40c0-8983-7b88a15628f7" alt="" data-size="line"></td><td>Click here   </td></tr><tr><td>M3x8</td><td>BHCS</td><td>36</td><td><img src="https://834763357-files.gitbook.io/~/files/v0/b/gitbook-x-prod.appspot.com/o/spaces%2FXgzDoYdwl0Vuu3qB4KOp%2Fuploads%2FPEoKILZvEDKBN91FYC2c%2FM3x8_BHCS.png?alt=media&amp;token=aef20916-cb15-42ae-bbb4-3379f59af757" alt="" data-size="line"></td><td>Click here   </td></tr><tr><td>M3x8</td><td>SHCS</td><td>38</td><td><img src="https://834763357-files.gitbook.io/~/files/v0/b/gitbook-x-prod.appspot.com/o/spaces%2FXgzDoYdwl0Vuu3qB4KOp%2Fuploads%2FKKD5d4hrw3TBEL4rKaGD%2FM3x8_SHCS.png?alt=media&amp;token=d78cd4eb-a592-49f4-9423-89738a4f6180" alt="" data-size="line"></td><td><a href="/resources/sourcing-guide#m3-x-8mm-shcs">Click here</a>   </td></tr><tr><td>M3x12</td><td>SHCS</td><td>46</td><td><img src="https://834763357-files.gitbook.io/~/files/v0/b/gitbook-x-prod.appspot.com/o/spaces%2FXgzDoYdwl0Vuu3qB4KOp%2Fuploads%2FeVI91AVeNRSYp02YMP4Y%2FM3x12_SHCS.png?alt=media&amp;token=2bbe71a2-d560-402a-8e36-7cb7c3893382" alt="" data-size="line"></td><td><a href="/resources/sourcing-guide#m3-x-12mm-shcs">Click here</a>   </td></tr><tr><td>M3x14</td><td>SHCS</td><td>8</td><td><img src="https://834763357-files.gitbook.io/~/files/v0/b/gitbook-x-prod.appspot.com/o/spaces%2FXgzDoYdwl0Vuu3qB4KOp%2Fuploads%2Fny79iDvRC91wc9Xhj9hn%2FM3x14_SHCS.png?alt=media&amp;token=0b99d157-5d9a-48b4-b50a-0553db19da29" alt="" data-size="line"></td><td>Click here   </td></tr><tr><td>M5x6</td><td>BHCS</td><td>8</td><td><img src="https://834763357-files.gitbook.io/~/files/v0/b/gitbook-x-prod.appspot.com/o/spaces%2FXgzDoYdwl0Vuu3qB4KOp%2Fuploads%2FA4ddbimKmhMAXGqwLnLg%2FM5x6_BHCS.png?alt=media&amp;token=8a83a89f-fa1b-4b9e-932c-2fc4598c87b9" alt="" data-size="line"></td><td><a href="https://docs.zerog.one/manual/build/hydra/bill_of_material#m5x10_912">Click here</a>   </td></tr><tr><td>M5x10</td><td>BHCS</td><td>66</td><td><img src="https://834763357-files.gitbook.io/~/files/v0/b/gitbook-x-prod.appspot.com/o/spaces%2FXgzDoYdwl0Vuu3qB4KOp%2Fuploads%2FHXIJDm8UO7lTldlczv2R%2FM5x10_BHCS.png?alt=media&amp;token=16ae28c2-a262-46f2-97ff-895bd65b954d" alt="" data-size="line"></td><td>Click here </td></tr><tr><td>M5x10</td><td>FHCS</td><td>6</td><td><img src="https://834763357-files.gitbook.io/~/files/v0/b/gitbook-x-prod.appspot.com/o/spaces%2FXgzDoYdwl0Vuu3qB4KOp%2Fuploads%2FJWn77Ely8oip20BE7l5E%2FM5x10_FHCS.png?alt=media&amp;token=0741bb7f-47a8-41d5-8706-c0e02cb86a42" alt="" data-size="line"></td><td>Click here </td></tr><tr><td>M5x12</td><td>SHCS</td><td>4</td><td><img src="https://834763357-files.gitbook.io/~/files/v0/b/gitbook-x-prod.appspot.com/o/spaces%2FXgzDoYdwl0Vuu3qB4KOp%2Fuploads%2FQBQkb8ni5mCFtRkald9q%2FM5x12_SHCS.png?alt=media&amp;token=ff4120b0-d885-489e-be28-6f39ea0b80f8" alt="" data-size="line"></td><td><a href="/resources/sourcing-guide#m5-x-12mm-shcs">Click here </a></td></tr><tr><td>M5x18</td><td>SHCS</td><td>14</td><td><img src="https://834763357-files.gitbook.io/~/files/v0/b/gitbook-x-prod.appspot.com/o/spaces%2FXgzDoYdwl0Vuu3qB4KOp%2Fuploads%2FMsQgkSvSSXRPMARLBm23%2FM5x18_SHCS.png?alt=media&amp;token=c682251f-0ff1-405d-bca9-29f0747e4c80" alt="" data-size="line"></td><td>Click here </td></tr></tbody></table>

### <mark style="color:red;">Nuts</mark> <a href="#t-nuts" id="t-nuts"></a>

<table><thead><tr><th>Size</th><th>Type</th><th width="108">Amount</th><th>Image</th><th>Stores</th></tr></thead><tbody><tr><td>M3</td><td>Roll in spring loaded</td><td>106</td><td><img src="https://834763357-files.gitbook.io/~/files/v0/b/gitbook-x-prod.appspot.com/o/spaces%2FXgzDoYdwl0Vuu3qB4KOp%2Fuploads%2FQ4xDmxsyo7GKDk1mAQHd%2FM3_Roll_In_T-nut.png?alt=media&amp;token=9b1e3c41-c2d7-495e-bdfc-468babbfabed" alt="" data-size="line"></td><td><a href="https://docs.zerog.one/manual/build/hydra/bill_of_material#m3_rollin_tnut">Click here</a>   </td></tr><tr><td>M5</td><td>Roll in spring loaded</td><td>52</td><td><img src="https://834763357-files.gitbook.io/~/files/v0/b/gitbook-x-prod.appspot.com/o/spaces%2FXgzDoYdwl0Vuu3qB4KOp%2Fuploads%2FS4bZAFCByV93t75Kh3kf%2FM5_Roll_In_T-nut.png?alt=media&amp;token=41c0dc43-c0ef-48c3-a915-c87c30d5064e" alt="" data-size="line"></td><td><a href="https://docs.zerog.one/manual/build/hydra/bill_of_material#m5_rollin_tnut">Click here</a>   </td></tr><tr><td>M5</td><td>Hex Nut</td><td>4</td><td></td><td>Click here</td></tr></tbody></table>

### <mark style="color:red;">Dowel Pins</mark> <a href="#t-nuts" id="t-nuts"></a>

{% tabs %}
{% tab title="Nebula - 255" %}

<table><thead><tr><th>Size</th><th width="108">Amount</th><th>Image</th><th>Stores</th></tr></thead><tbody><tr><td>5x50 pin</td><td>3</td><td><img src="https://834763357-files.gitbook.io/~/files/v0/b/gitbook-x-prod.appspot.com/o/spaces%2FXgzDoYdwl0Vuu3qB4KOp%2Fuploads%2FCShgMNs3cPuIMkwdfA3K%2F5x50mm_Pin.png?alt=media&amp;token=681e09f7-d4dd-4314-9aa1-4d65e9a079aa" alt="" data-size="line"></td><td>Click here   </td></tr></tbody></table>
{% endtab %}

{% tab title="Nebula - 370" %}

<table><thead><tr><th>Size</th><th width="108">Amount</th><th>Image</th><th>Stores</th></tr></thead><tbody><tr><td>5x50 pin</td><td>6</td><td><img src="https://834763357-files.gitbook.io/~/files/v0/b/gitbook-x-prod.appspot.com/o/spaces%2FXgzDoYdwl0Vuu3qB4KOp%2Fuploads%2FCShgMNs3cPuIMkwdfA3K%2F5x50mm_Pin.png?alt=media&amp;token=681e09f7-d4dd-4314-9aa1-4d65e9a079aa" alt="" data-size="line"></td><td>Click here   </td></tr></tbody></table>
{% endtab %}
{% endtabs %}

### <mark style="color:red;">Bushings</mark>

{% tabs %}
{% tab title="Nebula - 255" %}

<table><thead><tr><th>Size</th><th width="108">Amount</th><th>Image</th><th>Stores</th></tr></thead><tbody><tr><td>5x7x8mm Bushing</td><td>6</td><td><img src="https://834763357-files.gitbook.io/~/files/v0/b/gitbook-x-prod.appspot.com/o/spaces%2FXgzDoYdwl0Vuu3qB4KOp%2Fuploads%2FPK0wCCM46qCQvaJ58y3y%2F5x7x8_brass_bushing.png?alt=media&amp;token=68424fcc-803b-4b3f-88e0-165202ec7255" alt="" data-size="line"></td><td>Click here   </td></tr></tbody></table>
{% endtab %}

{% tab title="Nebula - 370" %}

<table><thead><tr><th>Size</th><th width="108">Amount</th><th>Image</th><th>Stores</th></tr></thead><tbody><tr><td>5x7x8mm Bushing</td><td>12</td><td><img src="https://834763357-files.gitbook.io/~/files/v0/b/gitbook-x-prod.appspot.com/o/spaces%2FXgzDoYdwl0Vuu3qB4KOp%2Fuploads%2FPK0wCCM46qCQvaJ58y3y%2F5x7x8_brass_bushing.png?alt=media&amp;token=68424fcc-803b-4b3f-88e0-165202ec7255" alt="" data-size="line"></td><td>Click here   </td></tr></tbody></table>
{% endtab %}
{% endtabs %}

### <mark style="color:red;">Magnets</mark>

{% tabs %}
{% tab title="Nebula - 255" %}

<table><thead><tr><th>Size</th><th width="108">Amount</th><th>Image</th><th>Stores</th></tr></thead><tbody><tr><td>6x3</td><td>36 x</td><td><img src="https://834763357-files.gitbook.io/~/files/v0/b/gitbook-x-prod.appspot.com/o/spaces%2FXgzDoYdwl0Vuu3qB4KOp%2Fuploads%2FS9QVNSgjOSywYG24o0qq%2F6x3_Magnet.png?alt=media&amp;token=0822775d-4305-43bc-a37d-624852de7ef9" alt="" data-size="line"></td><td>Click here   </td></tr><tr><td>10x3</td><td>16 </td><td><img src="https://834763357-files.gitbook.io/~/files/v0/b/gitbook-x-prod.appspot.com/o/spaces%2FXgzDoYdwl0Vuu3qB4KOp%2Fuploads%2FeLDYT0vEZ2jWAwth4JMV%2F10x3_Magnet.png?alt=media&amp;token=58fb6b2c-0d58-4a54-b154-53315f3fa927" alt="" data-size="line"></td><td>Click here  </td></tr></tbody></table>
{% endtab %}

{% tab title="Nebula - 370" %}

<table><thead><tr><th>Size</th><th width="108">Amount</th><th>Image</th><th>Stores</th></tr></thead><tbody><tr><td>6x3</td><td>36</td><td><img src="https://834763357-files.gitbook.io/~/files/v0/b/gitbook-x-prod.appspot.com/o/spaces%2FXgzDoYdwl0Vuu3qB4KOp%2Fuploads%2FS9QVNSgjOSywYG24o0qq%2F6x3_Magnet.png?alt=media&amp;token=0822775d-4305-43bc-a37d-624852de7ef9" alt="" data-size="line"></td><td>Click here   </td></tr><tr><td>10x3</td><td>48</td><td><img src="https://834763357-files.gitbook.io/~/files/v0/b/gitbook-x-prod.appspot.com/o/spaces%2FXgzDoYdwl0Vuu3qB4KOp%2Fuploads%2FeLDYT0vEZ2jWAwth4JMV%2F10x3_Magnet.png?alt=media&amp;token=58fb6b2c-0d58-4a54-b154-53315f3fa927" alt="" data-size="line"></td><td>Click here  </td></tr></tbody></table>
{% endtab %}
{% endtabs %}


# Files

### <mark style="color:red;">Print settings</mark> <a href="#print-settings" id="print-settings"></a>

For the recommended settings when printing our parts, please click [here](https://docs.zerog.one/standard/print/settings). Deviating from these settings may result in lower quality prints, loss of features, and improper alignment.

{% hint style="info" %}
File names starting with 'a' can be printed in an accent color.
{% endhint %}

{% hint style="warning" %}
This page splits parts up in tabs, one for Nebula255, another for the Nebula370, since parts may differ. Please make sure to select the correct page.
{% endhint %}

{% tabs %}
{% tab title="Nebula - 255" %}

### <mark style="color:red;">Door</mark>

```
Estimated filament used: ~65g
```

<table><thead><tr><th width="99.5">Image</th><th width="299.5">File Name</th><th width="99.5">Qty.</th><th width="100">Plastic</th><th>Notes</th></tr></thead><tbody><tr><td></td><td><a href="https://github.com/ZeroGDesign/Nebula/blob/Nebula1/STLs/Doors/Nebula_255/Base_Hinge_X3.stl">Base_Hinge_X3.stl</a></td><td>3x</td><td>ABS/ASA</td><td>Plain Hinges*</td></tr><tr><td></td><td><a href="https://github.com/ZeroGDesign/Nebula/blob/Nebula1/STLs/Doors/Nebula_255/Left_Logo_Hinge_Multicolor_X2.stl">Left_Logo_Hinge_Multicolor_X2.stl</a></td><td>2x</td><td>ABS/ASA</td><td>Logo Hinges*</td></tr><tr><td></td><td><a href="https://github.com/ZeroGDesign/Nebula/blob/Nebula1/STLs/Doors/Nebula_255/Door_Handle.stl">Door_Handle.stl</a></td><td>1x</td><td>ABS/ASA</td><td>Door handle</td></tr><tr><td></td><td><a href="https://github.com/ZeroGDesign/Nebula/blob/Nebula1/STLs/Doors/Nebula_255/Zerog_Handle_text.stl">Zerog_Handle_text.stl</a></td><td>1x</td><td>ABS/ASA/PETG/PLA</td><td>Text inlay </td></tr><tr><td></td><td><a href="https://github.com/ZeroGDesign/Nebula/blob/Nebula1/STLs/Doors/Nebula_255/Door_Handle_Spacer_3mm.stl">Door_Handle_Spacer_3mm.stl</a></td><td>1x</td><td>ABS/ASA</td><td>Spacer</td></tr><tr><td></td><td><a href="https://github.com/ZeroGDesign/Nebula/blob/Nebula1/STLs/Doors/Nebula_255/Door_Magnet_Latch.stl">Door_Magnet_Latch.stl</a></td><td>1x</td><td>ABS/ASA</td><td>Magnet latch</td></tr><tr><td></td><td><a href="https://github.com/ZeroGDesign/Nebula/blob/Nebula1/STLs/Doors/Nebula_255/Magnet_Corner_Cap_3mm_x4.stl">Magnet_Corner_Cap_3mm_x4.stl</a></td><td>4x</td><td>ABS/ASA</td><td>Corner caps </td></tr></tbody></table>

{% hint style="info" %}
If you want the ZeroG Logo on your hinges, the Left\_Logo\_Hinge\_Multicolor file lets you split them into two parts, for easy multi-colored inlays. Print two of those, and one standard hinge.
{% endhint %}

### <mark style="color:red;">Electronics Cover</mark>

```
Estimated filament used: ~172g
```

<table><thead><tr><th width="99.5">Image</th><th width="299.5">File Name</th><th width="99.5">Qty.</th><th width="100">Plastic</th><th>Notes</th></tr></thead><tbody><tr><td></td><td><a href="https://github.com/ZeroGDesign/Nebula/blob/Nebula1/STLs/Electronics_Cover/Nebula_255/Back_Filler_Left.stl">Back_Filler_Left.stl</a></td><td>1x</td><td>ABS/ASA/PETG/PLA</td><td>Back left filler</td></tr><tr><td></td><td><a href="https://github.com/ZeroGDesign/Nebula/blob/Nebula1/STLs/Electronics_Cover/Nebula_255/Back_Filler_Right.stl">Back_Filler_Right.stl</a></td><td>1x</td><td>ABS/ASA/PETG/PLA</td><td>Back right filler</td></tr><tr><td></td><td><a href="https://github.com/ZeroGDesign/Nebula/blob/Nebula1/STLs/Electronics_Cover/Nebula_255/Filler_Panel_Front.stl">Filler_Panel_Front.stl</a></td><td>1x</td><td>ABS/ASA/PETG/PLA</td><td>Front filler</td></tr><tr><td></td><td><a href="https://github.com/ZeroGDesign/Nebula/blob/Nebula1/STLs/Electronics_Cover/Nebula_255/Filler_Panel_Left_Front.stl">Filler_Panel_Left_Front.stl</a></td><td>1x</td><td>ABS/ASA/PETG/PLA</td><td>Left front filler</td></tr><tr><td></td><td><a href="https://github.com/ZeroGDesign/Nebula/blob/Nebula1/STLs/Electronics_Cover/Nebula_255/Filler_Panel_Left_Back.stl">Filler_Panel_Left_Back.stl</a></td><td>1x</td><td>ABS/ASA/PETG/PLA</td><td>Left back filler</td></tr><tr><td></td><td><a href="https://github.com/ZeroGDesign/Nebula/blob/Nebula1/STLs/Electronics_Cover/Nebula_255/Filler_Panel_Right_Front.stl">Filler_Panel_Right_Front.stl</a></td><td>1x</td><td>ABS/ASA/PETG/PLA</td><td>Right front filler</td></tr><tr><td></td><td><a href="https://github.com/ZeroGDesign/Nebula/blob/Nebula1/STLs/Electronics_Cover/Nebula_255/Filler_Panel_Right_Back.stl">Filler_Panel_Right_Back.stl</a></td><td>1x</td><td>ABS/ASA/PETG/PLA</td><td>Right back filler</td></tr><tr><td></td><td><a href="https://github.com/ZeroGDesign/Nebula/blob/Nebula1/STLs/Electronics_Cover/Nebula_255/Clip_Top_x8.stl">Clip_Top_x8.stl</a></td><td>8x</td><td>ABS/ASA/PETG/PLA</td><td>Deck panel clips</td></tr></tbody></table>

### <mark style="color:red;">Skirts</mark>

```
Estimated filament used: ~524g
```

<table><thead><tr><th width="99.5">Image</th><th width="299.5">File Name</th><th width="99.5">Qty.</th><th width="100">Plastic</th><th>Notes</th></tr></thead><tbody><tr><td></td><td><a href="https://github.com/ZeroGDesign/Nebula/blob/Nebula1/STLs/Skirts/Nebula_255/SK_60mmFT_PowerSW_V1-02.stl">SK_60mmFT_PowerSW_V1-02.stl</a></td><td>1x</td><td>ABS/ASA</td><td>Switch foot</td></tr><tr><td></td><td><a href="https://github.com/ZeroGDesign/Nebula/blob/Nebula1/STLs/Skirts/Nebula_255/SK_60mmFT_V1-02_x3.stl">SK_60mmFT_V1-02_x3.stl</a></td><td>3x</td><td>ABS/ASA</td><td>Feet</td></tr><tr><td></td><td><a href="https://github.com/ZeroGDesign/Nebula/blob/Nebula1/STLs/Skirts/Nebula_255/SK_Center_Logo-v0-0-5.stl">SK_Center_Logo-v0-0-5.stl</a></td><td>4x</td><td>ABS/ASA/PETG/PLA</td><td>Center piece</td></tr><tr><td></td><td><a href="https://github.com/ZeroGDesign/Nebula/blob/Nebula1/STLs/Skirts/Nebula_255/SK_330_R_V0-0-4.stl">SK_330_R_V0-0-4.stl</a></td><td>4x</td><td>ABS/ASA/PETG/PLA</td><td>Right Skirt</td></tr><tr><td></td><td><a href="https://github.com/ZeroGDesign/Nebula/blob/Nebula1/STLs/Skirts/Nebula_255/SK_330_L_V0-0-4.stl">SK_330_L_V0-0-4.stl</a></td><td>3x</td><td>ABS/ASA/PETG/PLA</td><td>Left Skirt</td></tr><tr><td></td><td><a href="https://github.com/ZeroGDesign/Nebula/blob/Nebula1/STLs/Skirts/Nebula_255/SK_330_L_V0-0-4_SW-IEC.stl">SK_330_L_V0-0-4_SW-IEC.stl</a></td><td>1x</td><td>ABS/ASA/PETG/PLA</td><td>Switched IEC Skirt</td></tr><tr><td></td><td><a href="https://github.com/ZeroGDesign/Nebula/blob/Nebula1/STLs/Skirts/Nebula_255/SK_330_L_V0-0-4_IEC.stl">SK_330_L_V0-0-4_IEC.stl</a></td><td>1x</td><td>ABS/ASA/PETG/PLA</td><td>Regular IEC Skirt</td></tr></tbody></table>

{% hint style="info" %}
Print the SW-IEC version if you have an IEC with a On/Off switch included, otherwise print the regular IEC version.
{% endhint %}
{% endtab %}

{% tab title="Nebula - 370" %}

### <mark style="color:red;">Door</mark>

```
Estimated filament used: ~135g
```

<table><thead><tr><th width="99.5">Image</th><th width="299.5">File Name</th><th width="99.5">Qty.</th><th width="100">Plastic</th><th>Notes</th></tr></thead><tbody><tr><td></td><td><a href="https://github.com/ZeroGDesign/Nebula/blob/Nebula1/STLs/Doors/Nebula_370/Frame_Hinge_x6.stl">Frame_Hinge_x6.stl</a></td><td>6x</td><td>ABS/ASA</td><td>Plain hinges*</td></tr><tr><td></td><td><a href="https://github.com/ZeroGDesign/Nebula/blob/Nebula1/STLs/Doors/Nebula_370/Left_Logo_Hinge_X2.stl">Left_Logo_Hinge_X2.stl</a></td><td>2x</td><td>ABS/ASA</td><td>Left logo hinges*</td></tr><tr><td></td><td><a href="https://github.com/ZeroGDesign/Nebula/blob/Nebula1/STLs/Doors/Nebula_370/Right_Logo_Hinge_X2.stl">Right_Logo_Hinge_X2.stl</a></td><td>2x</td><td>ABS/ASA</td><td>Right logo hinges*</td></tr><tr><td></td><td><a href="https://github.com/ZeroGDesign/Nebula/blob/Nebula1/STLs/Doors/Nebula_370/Middle_Hinge_X2.stl">Middle_Hinge_X2.stl</a></td><td>2x</td><td>ABS/ASA</td><td>Middle hinges*</td></tr><tr><td></td><td><a href="https://github.com/ZeroGDesign/Nebula/blob/Nebula1/STLs/Doors/Nebula_370/a_Left_Handle.stl">a_Left_Handle.stl</a></td><td>1x</td><td>ABS/ASA</td><td>Left handle</td></tr><tr><td></td><td><a href="https://github.com/ZeroGDesign/Nebula/blob/Nebula1/STLs/Doors/Nebula_370/a_Right_Handle.stl">a_Right_Handle.stl</a></td><td>1x</td><td>ABS/ASA</td><td>Right Handle</td></tr><tr><td></td><td><a href="https://github.com/ZeroGDesign/Nebula/blob/Nebula1/STLs/Doors/Nebula_370/Center_Magnet_Latch.stl">Center_Magnet_Latch.stl</a></td><td>2x?</td><td>ABS/ASA/PETG/PLA</td><td>Magnet latch</td></tr><tr><td></td><td><a href="https://github.com/ZeroGDesign/Nebula/blob/Nebula1/STLs/Doors/Nebula_370/Magnet_Corner_Cap_3mm_x8.stl">Magnet_Corner_Cap_3mm_x8.stl</a></td><td>8x</td><td>ABS/ASA/PETG/PLA</td><td>Corner caps</td></tr></tbody></table>

{% hint style="info" %}
If you want the ZeroG Logo on your hinges, the Left\_Logo\_Hinge and Right\_Logo\_Hinge files let you split them into two parts, for easy multi-colored inlays. Print two of each, and two standard hinges.
{% endhint %}

### <mark style="color:red;">Electronics Cover</mark>

```
Estimated filament used: ~240g
```

<table><thead><tr><th width="99.5">Image</th><th width="299.5">File Name</th><th width="99.5">Qty.</th><th width="100">Plastic</th><th>Notes</th></tr></thead><tbody><tr><td></td><td><a href="https://github.com/ZeroGDesign/Nebula/blob/Nebula1/STLs/Electronics_Cover/Nebula_370/Back_Filler_Left.stl">Back_Filler_Left.stl</a></td><td>1x</td><td>ABS/ASA/PETG/PLA</td><td>Back left filler</td></tr><tr><td></td><td><a href="https://github.com/ZeroGDesign/Nebula/blob/Nebula1/STLs/Electronics_Cover/Nebula_370/Back_Filler_Right.stl">Back_Filler_Right.stl</a></td><td>1x</td><td>ABS/ASA/PETG/PLA</td><td>Back right filler</td></tr><tr><td></td><td><a href="https://github.com/ZeroGDesign/Nebula/blob/Nebula1/STLs/Electronics_Cover/Nebula_370/Filler_Panel_Front.stl">Filler_Panel_Front.stl</a></td><td>1x</td><td>ABS/ASA/PETG/PLA</td><td>Front filler</td></tr><tr><td></td><td><a href="https://github.com/ZeroGDesign/Nebula/blob/Nebula1/STLs/Electronics_Cover/Nebula_370/Filler_Panel_Left_Front.stl">Filler_Panel_Left_Front.stl</a></td><td>1x</td><td>ABS/ASA/PETG/PLA</td><td>Left front filler</td></tr><tr><td></td><td><a href="https://github.com/ZeroGDesign/Nebula/blob/Nebula1/STLs/Electronics_Cover/Nebula_370/Filler_Panel_Left_Back.stl">Filler_Panel_Left_Back.stl</a></td><td>1x</td><td>ABS/ASA/PETG/PLA</td><td>Left back filler</td></tr><tr><td></td><td><a href="https://github.com/ZeroGDesign/Nebula/blob/Nebula1/STLs/Electronics_Cover/Nebula_370/Filler_Panel_Right_Front.stl">Filler_Panel_Right_Front.stl</a></td><td>1x</td><td>ABS/ASA/PETG/PLA</td><td>Right front filler</td></tr><tr><td></td><td><a href="https://github.com/ZeroGDesign/Nebula/blob/Nebula1/STLs/Electronics_Cover/Nebula_370/Filler_Panel_Right_Back.stl">Filler_Panel_Right_Back.stl</a></td><td>1x</td><td>ABS/ASA/PETG/PLA</td><td>Right back filler</td></tr><tr><td></td><td><a href="https://github.com/ZeroGDesign/Nebula/blob/Nebula1/STLs/Electronics_Cover/Nebula_370/Clip_Top_x8.stl">Clip_Top_x8.stl</a></td><td>8x</td><td>ABS/ASA/PETG/PLA</td><td>Deck panel clips</td></tr></tbody></table>

### <mark style="color:red;">Skirts</mark>

```
Estimated filament used: ~626g
```

{% hint style="info" %}
Full Skirts Extend to the full depth of the frame, requiring **atleast** 610mm/24" in depth
{% endhint %}

<table><thead><tr><th width="99.5">Image</th><th width="299.5">File Name</th><th width="99.5">Qty.</th><th width="100">Plastic</th><th>Notes</th></tr></thead><tbody><tr><td></td><td><a href="https://github.com/ZeroGDesign/Nebula/blob/Nebula1/STLs/Skirts/Nebula_370/Full%20Skirt/SK_60mmFT_PowerSW_V1-02.stl">SK_60mmFT_PowerSW_V1-02.stl</a></td><td>1x</td><td>ABS/ASA</td><td>Switch Foot</td></tr><tr><td></td><td><a href="https://github.com/ZeroGDesign/Nebula/blob/Nebula1/STLs/Skirts/Nebula_370/Full%20Skirt/SK_60mmFT_V1-02_x3.stl">SK_60mmFT_V1-02_x3.stl</a></td><td>3x</td><td>ABS/ASA</td><td>Feet</td></tr><tr><td></td><td><a href="https://github.com/ZeroGDesign/Nebula/blob/Nebula1/STLs/Skirts/Nebula_370/Full%20Skirt/SK_Center_Logo-v0-0-5.stl">SK_Center_Logo-v0-0-5.stl</a></td><td>4x</td><td>ABS/ASA/PETG/PLA</td><td>Center Piece</td></tr><tr><td></td><td><a href="https://github.com/ZeroGDesign/Nebula/blob/Nebula1/STLs/Skirts/Nebula_370/Full%20Skirt/SK-458-L_x1.stl">SK-458-L_x1.stl</a></td><td>1x</td><td>ABS/ASA/PETG/PLA</td><td>Front Left Skirt</td></tr><tr><td></td><td><a href="https://github.com/ZeroGDesign/Nebula/blob/Nebula1/STLs/Skirts/Nebula_370/Full%20Skirt/SK-458-R_x2.stl">SK-458-R_x2.stl</a></td><td>2x</td><td>ABS/ASA/PETG/PLA</td><td>Front/Rear Right Skirt</td></tr><tr><td></td><td><a href="https://github.com/ZeroGDesign/Nebula/blob/Nebula1/STLs/Skirts/Nebula_370/Full%20Skirt/SK-480-L_x2.stl">SK-480-L_x2.stl</a></td><td>2x</td><td>ABS/ASA/PETG/PLA</td><td>Side Skirts</td></tr><tr><td></td><td><a href="https://github.com/ZeroGDesign/Nebula/blob/Nebula1/STLs/Skirts/Nebula_370/Full%20Skirt/SK-480-R_x2.stl">SK-480-R_x2.stl</a></td><td>2x</td><td>ABS/ASA/PETG/PLA</td><td>Side Skirts</td></tr><tr><td></td><td><a href="https://github.com/ZeroGDesign/Nebula/blob/Nebula1/STLs/Skirts/Nebula_370/Full%20Skirt/SK-458-L_SW-IEC_x1.stl">SK-458-L_SW-IEC_x1.stl</a></td><td>1x</td><td>ABS/ASA/PETG/PLA</td><td>Switched IEC Inlet</td></tr><tr><td></td><td><a href="https://github.com/ZeroGDesign/Nebula/blob/Nebula1/STLs/Skirts/Nebula_370/Full%20Skirt/SK-458-L_IEC_x1.stl">SK-458-L_IEC_x1.stl</a></td><td>1x</td><td>ABS/ASA/PETG/PLA</td><td>Regular IEC Inlet</td></tr><tr><td></td><td><a href="https://github.com/ZeroGDesign/Nebula/blob/Nebula1/STLs/Skirts/Nebula_370/Full%20Skirt/Nebula_370_Extension_Brace_x2.stl">Nebula_370_Extension_Brace_x2.stl</a></td><td>2x</td><td>ABS/ASA/PETG/PLA</td><td>Extension Braces</td></tr></tbody></table>

### <mark style="color:red;">Short Skirts</mark>

```
Estimated filament used: ~623g
```

{% hint style="info" %}
Short Skirts are the same depth as the stock Ender 5 Plus frame and are made to fit 600mm/23" workbenches. This is a common size for many workbenches.
{% endhint %}

<table><thead><tr><th width="99.5">Image</th><th width="299.5">File Name</th><th width="99.5">Qty.</th><th width="100">Plastic</th><th>Notes</th></tr></thead><tbody><tr><td></td><td><a href="https://github.com/ZeroGDesign/Nebula/blob/Nebula1/STLs/Skirts/Nebula_370/Short%20Skirt/SK_60mmFT_PowerSW_V1-02.stl">SK_60mmFT_PowerSW_V1-02.stl</a></td><td>1x</td><td>ABS/ASA</td><td>Switch Foot</td></tr><tr><td></td><td><a href="https://github.com/ZeroGDesign/Nebula/blob/Nebula1/STLs/Skirts/Nebula_370/Short%20Skirt/SK_60mmFT_V1-02_x3.stl">SK_60mmFT_V1-02_x3.stl</a></td><td>3x</td><td>ABS/ASA</td><td>Feet</td></tr><tr><td></td><td><a href="https://github.com/ZeroGDesign/Nebula/blob/Nebula1/STLs/Skirts/Nebula_370/Short%20Skirt/SK_Center_Logo-v0-0-5.stl">SK_Center_Logo-v0-0-5.stl</a></td><td>4x</td><td>ABS/ASA/PETG/PLA</td><td>Center piece</td></tr><tr><td></td><td><a href="https://github.com/ZeroGDesign/Nebula/blob/Nebula1/STLs/Skirts/Nebula_370/Short%20Skirt/SK-435-L_V0-0-4.stl">SK-435-L_V0-0-4.stl</a></td><td>2x</td><td>ABS/ASA/PETG/PLA</td><td>Left Skirt</td></tr><tr><td></td><td><a href="https://github.com/ZeroGDesign/Nebula/blob/Nebula1/STLs/Skirts/Nebula_370/Short%20Skirt/SK-435-R_V0-0-4.stl">SK-435-R_V0-0-4.stl</a></td><td>2x</td><td>ABS/ASA/PETG/PLA</td><td>Right Skirt</td></tr><tr><td></td><td><a href="https://github.com/ZeroGDesign/Nebula/blob/Nebula1/STLs/Skirts/Nebula_370/Short%20Skirt/SK-458-L_V0-0-4.stl">SK-458-L_V0-0-4.stl</a></td><td>1x</td><td>ABS/ASA/PETG/PLA</td><td>Front Left Skirt</td></tr><tr><td></td><td><a href="https://github.com/ZeroGDesign/Nebula/blob/Nebula1/STLs/Skirts/Nebula_370/Short%20Skirt/SK-458-R_V0-0-4.stl">SK-458-R_V0-0-4.stl</a></td><td>2x</td><td>ABS/ASA/PETG/PLA</td><td>Front/Rear Right Skirt</td></tr><tr><td></td><td><a href="https://github.com/ZeroGDesign/Nebula/blob/Nebula1/STLs/Skirts/Nebula_370/Short%20Skirt/SK-458-L_V0-0-4_SW-IEC.stl">SK-458-L_V0-0-4_SW-IEC.stl</a></td><td>1x</td><td>ABS/ASA/PETG/PLA</td><td>Switched IEC Skirt</td></tr><tr><td></td><td><a href="https://github.com/ZeroGDesign/Nebula/blob/Nebula1/STLs/Skirts/Nebula_370/Short%20Skirt/SK-458-L_V0-0-4_IEC.stl">SK-458-L_V0-0-4_IEC.stl</a></td><td>1x</td><td>ABS/ASA/PETG/PLA</td><td>Regular IEC Skirt</td></tr><tr><td></td><td><a href="https://github.com/ZeroGDesign/Nebula/blob/Nebula1/STLs/Skirts/Nebula_370/Short%20Skirt/5_Plus_E_Rear_Skirt_Wing_L.stl">5_Plus_E_Rear_Skirt_Wing_L.stl</a></td><td>1x</td><td>ABS/ASA/PETG/PLA</td><td>Left Rear Wing</td></tr><tr><td></td><td><a href="https://github.com/ZeroGDesign/Nebula/blob/Nebula1/STLs/Skirts/Nebula_370/Short%20Skirt/5_Plus_E_Rear_Skirt_Wing_R.stl">5_Plus_E_Rear_Skirt_Wing_R.stl</a></td><td>1x</td><td>ABS/ASA/PETG/PLA</td><td>Right Rear Wing</td></tr></tbody></table>
{% endtab %}
{% endtabs %}

### <mark style="color:red;">Panel Clips</mark>

```
Estimated filament used: ~61g
```

<table><thead><tr><th width="99.5">Image</th><th width="299.5">File Name</th><th width="99.5">Qty.</th><th width="100">Plastic</th><th width="179.7501220703125">Notes</th></tr></thead><tbody><tr><td></td><td><a href="https://github.com/ZeroGDesign/Nebula/blob/Nebula1/STLs/Panels/Panel_Clip_Hollow.stl">Panel_Clip_Hollow.stl</a></td><td>10x</td><td>ABS/ASA/PETG/PLA</td><td>Hollow panel clips (370)</td></tr><tr><td></td><td><a href="https://github.com/ZeroGDesign/Nebula/blob/Nebula1/STLs/Panels/Top_Panel_Corner_Clip_FIlament_Entry.stl">Top_Panel_Corner_Clip_FIlament_Entry.stl</a></td><td>1x</td><td>ABS/ASA/PETG/PLA</td><td>Filament entry</td></tr><tr><td></td><td><a href="https://github.com/ZeroGDesign/Nebula/blob/Nebula1/STLs/Panels/Top_Panel_Corner_Clip_X3.stl">Top_Panel_Corner_Clip_X3.stl</a></td><td>3x</td><td>ABS/ASA/PETG/PLA</td><td>Top panel clips</td></tr></tbody></table>

{% hint style="info" %}
You can find 5mm Extrusion Slot versions of the Hollow Panel Clips further down the page.
{% endhint %}

### <mark style="color:red;">Misc</mark>

```
Estimated filament used: ~130g
```

<table><thead><tr><th width="99.5">Image</th><th width="299.5">File Name</th><th width="99.5">Qty.</th><th width="100">Plastic</th><th>Notes</th></tr></thead><tbody><tr><td></td><td><a href="https://github.com/ZeroGDesign/Nebula/blob/Nebula1/STLs/Misc/Beta_Spool_Holder_M1_Enclosed.stl">Beta_Spool_Holder_M1_Enclosed.stl</a></td><td>1</td><td>ABS/ASA/PETG/PLA</td><td>Spool holder</td></tr><tr><td></td><td><a href="https://github.com/ZeroGDesign/Nebula/blob/Nebula1/STLs/Misc/Enclosure_Tension_Plate.stl">Enclosure_Tension_Plate.stl</a></td><td>2x</td><td>ABS/ASA</td><td><a href="/projects/mercury-one.1/files#nebula-specific-parts">Also Mentioned Here</a></td></tr><tr><td></td><td><a href="https://github.com/ZeroGDesign/Nebula/blob/Nebula1/STLs/Misc/Nebula_Left_Stepper_Bottom.stl">Nebula_Left_Stepper_Bottom.stl</a></td><td>1x</td><td>ABS/ASA</td><td><a href="/projects/mercury-one.1/files#nebula-specific-parts">Also Mentioned Here</a></td></tr><tr><td></td><td><a href="https://github.com/ZeroGDesign/Nebula/blob/Nebula1/STLs/Misc/Nebula_Right_Stepper_Bottom.stl">Nebula_Right_Stepper_Bottom.stl</a></td><td>1x</td><td>ABS/ASA</td><td><a href="/projects/mercury-one.1/files#nebula-specific-parts">Also Mentioned Here</a></td></tr></tbody></table>

### <mark style="color:red;">Optional: 5mm slot files</mark>

```
Estimated filament used: ~64g
```

{% hint style="info" %}
These files are for extrusions that use a 5mm slot rather than the more common 6mm.
{% endhint %}

<table><thead><tr><th width="99.5">Image</th><th width="299.5">File Name</th><th width="99.5">Qty.</th><th width="100">Plastic</th><th>Notes</th></tr></thead><tbody><tr><td></td><td><a href="https://github.com/ZeroGDesign/Nebula/blob/Nebula1/STLs/Optional_5mm_slot_with_files/Enclosure_Tension_Plate_5mm.stl">Enclosure_Tension_Plate_5mm.stl</a></td><td>2x</td><td>ABS/ASA</td><td>5mm Tension plate</td></tr><tr><td></td><td><a href="https://github.com/ZeroGDesign/Nebula/blob/Nebula1/STLs/Optional_5mm_slot_with_files/Front_Tower_Left_-_5mm.stl">Front_Tower_Left_-_5mm.stl</a></td><td>1x</td><td>ABS/ASA</td><td>5mm Left tower</td></tr><tr><td></td><td><a href="https://github.com/ZeroGDesign/Nebula/blob/Nebula1/STLs/Optional_5mm_slot_with_files/Front_Tower_Right_-_5mm.stl">Front_Tower_Right_-_5mm.stl</a></td><td>1x</td><td>ABS/ASA</td><td>5mm Right tower</td></tr><tr><td></td><td><a href="https://github.com/ZeroGDesign/Nebula/blob/Nebula1/STLs/Optional_5mm_slot_with_files/Panel_Clip_Hollow_-_5mm.stl">Panel_Clip_Hollow_-_5mm.stl</a></td><td>10x</td><td>ABS/ASA/PETG/PLA</td><td>Hollow panel clips (370)</td></tr></tbody></table>


# Build Instructions

<table data-card-size="large" data-view="cards"><thead><tr><th>Phase</th><th>Link</th><th>About</th></tr></thead><tbody><tr><td>1</td><td><a href="broken://pages/EXjxDexWZnIoKZqPCafH">Get Started -></a></td><td>Mostly information, introduction, BoM and other important information</td></tr><tr><td>2</td><td><a href="broken://pages/TqDUnIrj0ZwDjypqXRTl">Get Started -></a></td><td>Assembly of Hydra Arms</td></tr><tr><td>3</td><td>Get Started -></td><td>Assembly of Rails on Frame</td></tr><tr><td>4</td><td>Get Started -></td><td>Installation of motor mounts</td></tr></tbody></table>


# Phase 1


# Gather and Identify Components

### <mark style="color:red;">Lets start with a crucial step: gathering and identifying components and hardware.</mark>

The Frame - Nebula - is one of the most critical components of your printer. It's important to take your time when assembling to ensure your build goes smooth. If you jump ahead you may miss some very important notes, or worse, end up with an out-of-square frame.&#x20;

Below is the series of extrusions for the kit. Some are long, some are short, and some look similar but have different features - it is important to note these differences.

<figure><img src="https://834763357-files.gitbook.io/~/files/v0/b/gitbook-x-prod.appspot.com/o/spaces%2FXgzDoYdwl0Vuu3qB4KOp%2Fuploads%2FvT54QTfbhaoyjMJeEwuP%2F255%20extrusions.png?alt=media&amp;token=c3c213ce-cb71-48a7-bac9-137ae3d3740b" alt=""><figcaption></figcaption></figure>

## <mark style="color:red;">Hardware</mark>

The hardware displayed below is common to both the 255 and 370 sizes. Only the Quantities will change.

{% hint style="info" %}
The quantities on this table were purposefully left out. Please reference the correct page for your build size for quantities. This table is to familiarize yourself with the necessary hardware.&#x20;
{% endhint %}

**Hardware**

<table><thead><tr><th width="544">Type</th><th width="200">Image</th></tr></thead><tbody><tr><td>5X7X8 Bushing</td><td><img src="https://834763357-files.gitbook.io/~/files/v0/b/gitbook-x-prod.appspot.com/o/spaces%2FXgzDoYdwl0Vuu3qB4KOp%2Fuploads%2FPK0wCCM46qCQvaJ58y3y%2F5x7x8_brass_bushing.png?alt=media&amp;token=68424fcc-803b-4b3f-88e0-165202ec7255" alt="" data-size="line"></td></tr><tr><td>5x50 Pin</td><td><img src="https://834763357-files.gitbook.io/~/files/v0/b/gitbook-x-prod.appspot.com/o/spaces%2FXgzDoYdwl0Vuu3qB4KOp%2Fuploads%2FCShgMNs3cPuIMkwdfA3K%2F5x50mm_Pin.png?alt=media&amp;token=681e09f7-d4dd-4314-9aa1-4d65e9a079aa" alt="" data-size="line"></td></tr><tr><td>6x3 Magnet</td><td><img src="https://834763357-files.gitbook.io/~/files/v0/b/gitbook-x-prod.appspot.com/o/spaces%2FXgzDoYdwl0Vuu3qB4KOp%2Fuploads%2FS9QVNSgjOSywYG24o0qq%2F6x3_Magnet.png?alt=media&amp;token=0822775d-4305-43bc-a37d-624852de7ef9" alt="" data-size="line"></td></tr><tr><td>10x3 Magnet</td><td><img src="https://834763357-files.gitbook.io/~/files/v0/b/gitbook-x-prod.appspot.com/o/spaces%2FXgzDoYdwl0Vuu3qB4KOp%2Fuploads%2FeLDYT0vEZ2jWAwth4JMV%2F10x3_Magnet.png?alt=media&amp;token=58fb6b2c-0d58-4a54-b154-53315f3fa927" alt="" data-size="line"></td></tr><tr><td>M3 Roll In T-nut</td><td><img src="https://834763357-files.gitbook.io/~/files/v0/b/gitbook-x-prod.appspot.com/o/spaces%2FXgzDoYdwl0Vuu3qB4KOp%2Fuploads%2FQ4xDmxsyo7GKDk1mAQHd%2FM3_Roll_In_T-nut.png?alt=media&amp;token=9b1e3c41-c2d7-495e-bdfc-468babbfabed" alt="" data-size="line"></td></tr><tr><td>M5 Roll In T-Nut</td><td><img src="https://834763357-files.gitbook.io/~/files/v0/b/gitbook-x-prod.appspot.com/o/spaces%2FXgzDoYdwl0Vuu3qB4KOp%2Fuploads%2FS4bZAFCByV93t75Kh3kf%2FM5_Roll_In_T-nut.png?alt=media&amp;token=41c0dc43-c0ef-48c3-a915-c87c30d5064e" alt="" data-size="line"></td></tr><tr><td>M3 X D5.0 X L4.0 - Heat-set</td><td><img src="https://834763357-files.gitbook.io/~/files/v0/b/gitbook-x-prod.appspot.com/o/spaces%2FXgzDoYdwl0Vuu3qB4KOp%2Fuploads%2FfFNNt7ggGtI2nj79EYvB%2FM3%20X%20D5.0%20X%20L4.0%20-%20Heatset%20v4.png?alt=media&amp;token=3043d777-06a0-4849-b9ac-05c8479ee387" alt="" data-size="line"></td></tr><tr><td>M3x8 FHCS</td><td><img src="https://834763357-files.gitbook.io/~/files/v0/b/gitbook-x-prod.appspot.com/o/spaces%2FXgzDoYdwl0Vuu3qB4KOp%2Fuploads%2FZVVpOKVlsb3Fnaiznkd0%2FM3x8_FHCS.png?alt=media&amp;token=9a70bc15-a455-40c0-8983-7b88a15628f7" alt="" data-size="line"></td></tr><tr><td>M3x8 BHCS</td><td><img src="https://834763357-files.gitbook.io/~/files/v0/b/gitbook-x-prod.appspot.com/o/spaces%2FXgzDoYdwl0Vuu3qB4KOp%2Fuploads%2FPEoKILZvEDKBN91FYC2c%2FM3x8_BHCS.png?alt=media&amp;token=aef20916-cb15-42ae-bbb4-3379f59af757" alt="" data-size="line"></td></tr><tr><td>M3x8 SHCS</td><td><img src="https://834763357-files.gitbook.io/~/files/v0/b/gitbook-x-prod.appspot.com/o/spaces%2FXgzDoYdwl0Vuu3qB4KOp%2Fuploads%2FKKD5d4hrw3TBEL4rKaGD%2FM3x8_SHCS.png?alt=media&amp;token=d78cd4eb-a592-49f4-9423-89738a4f6180" alt="" data-size="line"></td></tr><tr><td>M3x12 SHCS</td><td><img src="https://834763357-files.gitbook.io/~/files/v0/b/gitbook-x-prod.appspot.com/o/spaces%2FXgzDoYdwl0Vuu3qB4KOp%2Fuploads%2FeVI91AVeNRSYp02YMP4Y%2FM3x12_SHCS.png?alt=media&amp;token=2bbe71a2-d560-402a-8e36-7cb7c3893382" alt="" data-size="line"></td></tr><tr><td>M3x14 SHSC</td><td><img src="https://834763357-files.gitbook.io/~/files/v0/b/gitbook-x-prod.appspot.com/o/spaces%2FXgzDoYdwl0Vuu3qB4KOp%2Fuploads%2FPvYi6005W1Fyrc0drg75%2FM3x14_BHCS.png?alt=media&amp;token=0debea2f-8ba3-4393-834e-598f6ba92b93" alt="" data-size="line"></td></tr><tr><td>M5x6 BHSC</td><td><img src="https://834763357-files.gitbook.io/~/files/v0/b/gitbook-x-prod.appspot.com/o/spaces%2FXgzDoYdwl0Vuu3qB4KOp%2Fuploads%2FA4ddbimKmhMAXGqwLnLg%2FM5x6_BHCS.png?alt=media&amp;token=8a83a89f-fa1b-4b9e-932c-2fc4598c87b9" alt="" data-size="line"></td></tr><tr><td>M5x10 BHSC</td><td><img src="https://834763357-files.gitbook.io/~/files/v0/b/gitbook-x-prod.appspot.com/o/spaces%2FXgzDoYdwl0Vuu3qB4KOp%2Fuploads%2FHXIJDm8UO7lTldlczv2R%2FM5x10_BHCS.png?alt=media&amp;token=16ae28c2-a262-46f2-97ff-895bd65b954d" alt="" data-size="line"></td></tr><tr><td>M5x10 FHCS</td><td><img src="https://834763357-files.gitbook.io/~/files/v0/b/gitbook-x-prod.appspot.com/o/spaces%2FXgzDoYdwl0Vuu3qB4KOp%2Fuploads%2FJWn77Ely8oip20BE7l5E%2FM5x10_FHCS.png?alt=media&amp;token=0741bb7f-47a8-41d5-8706-c0e02cb86a42" alt="" data-size="line"></td></tr><tr><td>M5x12 SHCS</td><td><img src="https://834763357-files.gitbook.io/~/files/v0/b/gitbook-x-prod.appspot.com/o/spaces%2FXgzDoYdwl0Vuu3qB4KOp%2Fuploads%2FQBQkb8ni5mCFtRkald9q%2FM5x12_SHCS.png?alt=media&amp;token=ff4120b0-d885-489e-be28-6f39ea0b80f8" alt="" data-size="line"></td></tr><tr><td>M5x18 SHCS</td><td><img src="https://834763357-files.gitbook.io/~/files/v0/b/gitbook-x-prod.appspot.com/o/spaces%2FXgzDoYdwl0Vuu3qB4KOp%2Fuploads%2FMsQgkSvSSXRPMARLBm23%2FM5x18_SHCS.png?alt=media&amp;token=c682251f-0ff1-405d-bca9-29f0747e4c80" alt="" data-size="line"></td></tr><tr><td>M5 Hex Nut</td><td>/</td></tr><tr><td>3x5mm Foam Tape</td><td>/</td></tr><tr><td>38x19mm Rubber Foot</td><td><img src="https://834763357-files.gitbook.io/~/files/v0/b/gitbook-x-prod.appspot.com/o/spaces%2FXgzDoYdwl0Vuu3qB4KOp%2Fuploads%2F3xgah8Dn6v5q4ACp2OcA%2F38mm_Rubber_Foot.png?alt=media&amp;token=aba6bf34-db5c-4b2d-bb5d-96e1161adadf" alt="" data-size="line"></td></tr></tbody></table>

## <mark style="color:red;">**Printed parts**</mark>

We have very specific [settings](/guides/printing/print-settings) you should print the parts with, they’ve been designed around these settings. The printed parts are also designed for ABS/ASA shrinkage.&#x20;

\*Note\* Other filaments may have been used in builds and may work, but the absolute recommendation is ABS/ASA.


# Phase 2


# Building the vertical frame

Place two M5 T-Nuts in the Extrusion marked G (2040).

<figure><img src="https://834763357-files.gitbook.io/~/files/v0/b/gitbook-x-prod.appspot.com/o/spaces%2FXgzDoYdwl0Vuu3qB4KOp%2Fuploads%2F0iYSm78Z6WJHFYZLgB1b%2FNebula_uprights_tnuts_G.png?alt=media&amp;token=f47399d2-434a-4128-ae97-586b6affc595" alt=""><figcaption></figcaption></figure>

Add two M5x6 Screws to the T-Nuts you've just added on the G extrusion

<figure><img src="https://834763357-files.gitbook.io/~/files/v0/b/gitbook-x-prod.appspot.com/o/spaces%2FXgzDoYdwl0Vuu3qB4KOp%2Fuploads%2FnQruRoHf6Ed5CR1q7Eiq%2Fnebula_uprights_tnuts_screws_g.png?alt=media&amp;token=c74b1b2d-5a39-4676-91e2-4093a1a6f197" alt=""><figcaption></figcaption></figure>

Take the G extrusion (2040) and align the screws with the hole spacing on the A extrusion. This step is crucial to ensure access to the screws from the blind joint on extrusion A.

<img src="https://834763357-files.gitbook.io/~/files/v0/b/gitbook-x-prod.appspot.com/o/spaces%2FXgzDoYdwl0Vuu3qB4KOp%2Fuploads%2FsFzSnoChFkvw1EnpYEC5%2Ffile.excalidraw.svg?alt=media&amp;token=95b10395-1662-4910-b919-8b895c6349d4" alt="" class="gitbook-drawing">

Align the A extrusion with the G extrusion and slide it into place, ensuring the bolt heads fit into the extrusion slot.

<img src="https://834763357-files.gitbook.io/~/files/v0/b/gitbook-x-prod.appspot.com/o/spaces%2FXgzDoYdwl0Vuu3qB4KOp%2Fuploads%2FhztdfVc6ew0TLaPYfj2P%2Ffile.excalidraw.svg?alt=media&amp;token=3c287330-488e-4686-9353-3aac52ca6c4c" alt="" class="gitbook-drawing">

Slide the extrusion completely into the final bolt.

<figure><img src="https://834763357-files.gitbook.io/~/files/v0/b/gitbook-x-prod.appspot.com/o/spaces%2FXgzDoYdwl0Vuu3qB4KOp%2Fuploads%2FOQWELGdbbNIU9h3tmmcU%2Fnebula_uprights_screws_slide_2_g.png?alt=media&amp;token=a18e28b2-eb3b-4898-8be4-d171ef94c839" alt=""><figcaption></figcaption></figure>

Make sure the bottom surfaces are flush.

<figure><img src="https://834763357-files.gitbook.io/~/files/v0/b/gitbook-x-prod.appspot.com/o/spaces%2FXgzDoYdwl0Vuu3qB4KOp%2Fuploads%2F2Qs2tp1TEfsUiXxf40UO%2Fnebula_uprights_screws_slide_flush_g.png?alt=media&amp;token=7f93b9b5-241b-4f1d-a47c-5fb659f54098" alt=""><figcaption></figcaption></figure>

Tighten the two M5x6 screws on the blind joints

{% hint style="info" %}
If you're experiencing difficulties with screws moving when sliding the extrusion, ensure they're not overly tightened and are of equal length. You can use a hex key through the drilled hole to help slide the extrusion into place, then remove the key to align the other hole.
{% endhint %}

<img src="https://834763357-files.gitbook.io/~/files/v0/b/gitbook-x-prod.appspot.com/o/spaces%2FXgzDoYdwl0Vuu3qB4KOp%2Fuploads%2F74ZOqnzS2stshCqAUoKC%2Ffile.excalidraw.svg?alt=media&amp;token=7321c51a-c8e7-40d9-997f-40a1cccc2e8c" alt="" class="gitbook-drawing">

Now add a M5 T-Nut and M5x3 screw to A extrusion, this should be inserted on the side that has the G extrusion attached.

{% hint style="info" %}
These Screw/T-Nut set will later secure the Y extrusion in the build.
{% endhint %}

Now repeat these steps another 3 times until you have 4 vertical frame assemblies.

<img src="https://834763357-files.gitbook.io/~/files/v0/b/gitbook-x-prod.appspot.com/o/spaces%2FXgzDoYdwl0Vuu3qB4KOp%2Fuploads%2FTjCXJjUYu1EHNDgnVL1b%2Ffile.excalidraw.svg?alt=media&amp;token=e793995c-dec0-4343-a2a3-97e2a06d04ee" alt="" class="gitbook-drawing">

Ensure you now have 4, and proceed to the next step.

<img src="https://834763357-files.gitbook.io/~/files/v0/b/gitbook-x-prod.appspot.com/o/spaces%2FXgzDoYdwl0Vuu3qB4KOp%2Fuploads%2FTfzqATxTinEAbsUkCXlR%2Ffile.excalidraw.svg?alt=media&amp;token=7464848a-ee36-4be7-bc63-b20da98119d4" alt="" class="gitbook-drawing">


# Building the side frame

Now we will build the right side of the frame.

<figure><img src="https://834763357-files.gitbook.io/~/files/v0/b/gitbook-x-prod.appspot.com/o/spaces%2FXgzDoYdwl0Vuu3qB4KOp%2Fuploads%2FqAnzwrR5KkzuyozUarMK%2FNebula_Side_Frame_01.gif?alt=media&amp;token=c285ad6f-5a8e-4183-8f3f-03cf0de4c000" alt=""><figcaption><p>Above is an overview of the entire assembly.</p></figcaption></figure>

|   | QTY. | Nebula 255 | Nebula 370 |
| - | ---- | ---------- | ---------- |
| A | 4x   | 2020 650mm | 2020 800mm |
| B | 2x   | 2020 450mm | 2020 600mm |
| C | 2x   | 2040 450mm | 2040 600mm |
| D | 2x   | 2020 410mm | 2020 560mm |
| E | 2x   | 2020 410mm | 2020 538mm |
| F | 4x   | 2040 400mm | 2040 510mm |
| G | 1x   | 2020 400mm | 2020 510mm |
| H | 2x   | 2020 370mm | 2020 498mm |
| I | 3x   | 2020 370mm | 2020 498mm |

<figure><img src="https://834763357-files.gitbook.io/~/files/v0/b/gitbook-x-prod.appspot.com/o/spaces%2FXgzDoYdwl0Vuu3qB4KOp%2Fuploads%2FRHPM9B3GOQ3d1H0HTLnC%2FNebula_side_assembly_01.png?alt=media&amp;token=05130fe8-021c-467c-8c7e-e4c1a68e5dcb" alt=""><figcaption><p>Insert two M5x10 BHCS into the bottom of each upright assembled previously. Then, slide each upright over Extrusion B.</p></figcaption></figure>


# Introduction


# Bill of Materials


# Files


# Build Instructions


# Phase 1


# Phase 2


# Phase 3


# Phase 4


# Discord Integration, new pages and more

TLDR; Added Discord integration on update of docs and some new pages.

## 💬Discord Integration

This will push changes to the documentation straight to our external update channel in Discord.

*Yes it's a small change, using this post we'll test it.*

## Documentation Streamlined

We've now separated all the building guides from the main documentation and changelogs. This allows for cleaner overall documentation, reducing chaos and improving readability. We've also made significant progress in adding our projects to the the "[project space](https://tempdocs.zerog.one/projects/)".

## New pages!

* Added different motherboards to the FAQ.
  * *Thanks, CharlotteBeLike.*
* Cleaned up broken links.
* Nebula BoM is almost done.
* Adding a basic structure to the project environment (menu) for build instructions.


# Announcement: New docs, working with GitBook and more

We are excited to announce the transition of our documentation platform to GitBook!

## 💡What’s changing?

We're moving to GitBook! GitBook is a platform that allows us to easily manage, modify and create documentation. This helps us future proof our project / documentation as it's easy to edit even for people that do not know how to code.

For us it's a major change, we can actually draw arrows, circles and add text straight into the docs without needing extra software to make this happen.

## Sync with GitHub

Our documentation is now synced with [GitHub](https://github.com/ZeroGDesign/documentation), allowing contributors to make changes without a GitBook account or team membership.

## Open Source Collaboration

A heartfelt thanks to GitBook for supporting us with an Open Source license. This marks a new chapter for ZeroG Docs. This opens a whole new world for ZeroG Docs!


# A Page with a Secret

Well well well...

## A Page with a Secret

Once upon a time, there was a page with nothing to reveal. It lay still, devoid of text or illustration, with only one purpose: testing the changelog. Many would pass by, expecting insight or excitement, but its simplicity charmed those who took a moment to linger. Turtle, a man of curious nature, often paused to ponder its silent mystery. For though it seemed empty, it was a silent guardian of updates and a keeper of history. In this blank expanse, the story was not what was present, but what was yet to come.